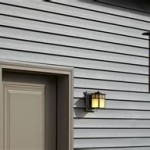
How to Replace Outdoor Can Lights
Outdoor can lights, also known as recessed lighting, are a common fixture in many homes and provide a stylish and functional way to illuminate patios, decks, and walkways. Over time, however, these lights may need replacing due to bulb failure, fixture damage, or simply a desire for an updated look. Replacing outdoor can lights can seem daunting, but with the right tools and a bit of know-how, it's a manageable DIY project for most homeowners.
Step 1: Gather Your Supplies
Before beginning the replacement process, ensure you have all the necessary tools and materials on hand. This will save you time and frustration during the project. Here's a list of what you'll need:
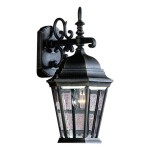
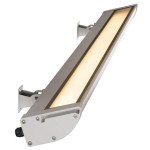
- New outdoor can light fixture
- Screwdriver (Phillips head and flat head)
- Wire strippers
- Wire connectors (also known as wire nuts)
- Voltage tester
- Safety glasses
- Gloves
- Ladder (if necessary to reach the fixture)
It's important to choose a new fixture that is compatible with the existing electrical wiring and meets local building codes. Consult with a qualified electrician if you're unsure about the proper type of fixture for your specific needs.
Step 2: Disconnect Power to the Light
Safety is paramount when working with electricity. Before attempting to remove or replace any electrical components, always disconnect power to the light fixture. You can usually find the circuit breaker controlling the outdoor lighting in your home's electrical panel. Turn off the breaker and verify that the power is off using your voltage tester.
Once the power is disconnected, you can proceed with removing the old fixture. This will usually involve removing screws or other fasteners holding the fixture to the ceiling or wall. Be careful not to damage the surrounding area while removing the fixture.
Step 3: Remove the Old Fixture
With the power off, carefully remove the old can light fixture. Start by disconnecting the electrical wires leading to the fixture. Note the color codes of the wires (usually black for hot, white for neutral, and green or bare copper for ground). This will help you connect the new fixture correctly.
Once the wires are disconnected, detach the fixture from the ceiling or wall. This may involve removing screws, clips, or other mounting mechanisms depending on the fixture's design. Be mindful of any insulation or other materials surrounding the fixture to avoid damaging them.
Step 4: Install the New Fixture
Now that the old fixture is removed, you can install the new one. Begin by attaching the new fixture to the ceiling or wall using the provided mounting hardware. Ensure the fixture is securely fastened and level.
Next, connect the electrical wires to the new fixture. Match the wire colors to the corresponding terminals on the fixture. Use wire connectors to secure the connections. It's essential to make sure all connections are tight and secure to prevent electrical hazards.
Step 5: Test and Finalize
Once the new fixture is installed and wired, it's time to test it. Turn the power back on at the breaker and check if the light operates correctly. Ensure the bulb is working properly and that all connections are secure.
Finally, inspect the installation to ensure that all components are properly secured and there are no loose wires or other hazards. Check that the fixture is aesthetically pleasing and aligns with your desired lighting style.

How To Replace Exterior Recessed Light Fixture

How To Replace An Outside Light

Replace Recessed Light With A Pendant Fixture

How To Install Replace Outdoor Light Easy Simple

How To Replace An Outdoor Light Fixture

Replacing An Outdoor Light Fixture Concord Carpenter

How To Change A Recessed Light Bulb

Replacing An Outdoor Light Fixture Concord Carpenter

How To Replace Recessed Lighting With Led The Home Depot

5 Minute Light Upgrade Converting A Recessed To Pendant Can Lights Covers Diy