Wiring Outdoor Lighting: A Comprehensive Guide
Outdoor lighting adds ambiance, security, and functionality to any property. From illuminating pathways to accentuating landscaping, the possibilities are endless. But before you can enjoy the benefits of outdoor lighting, you need to wire it properly. This comprehensive guide will explore the essential considerations for wiring outdoor lighting, covering safety precautions, installation methods, and troubleshooting tips.
Safety First: Understanding Electrical Codes and Regulations
Safety is paramount when working with electricity. Before embarking on any wiring project, it's crucial to understand and comply with local electrical codes and regulations. These codes vary by region and are designed to ensure safe installation practices. Consult your local building department or a qualified electrician for guidance on specific requirements. Some common safety precautions include:
- Always disconnect power to the circuit before working on any wiring.
- Use proper tools designed for electrical work, such as wire strippers, crimping tools, and insulated screwdrivers.
- Wear appropriate safety gear, including insulated gloves, eye protection, and work boots with non-conductive soles.
- Be aware of potential hazards, such as exposed wires, wet surfaces, and overhead power lines.
Choosing the Right Wiring and Components
The type of wiring and components you choose will depend on the specific needs of your outdoor lighting project. Here's a breakdown of essential considerations:
1. Wire Gauge:
The wire gauge, represented by a number, indicates the thickness of the wire. A lower gauge number corresponds to a thicker wire with greater capacity for carrying electricity. For outdoor lighting, a common gauge is 14 AWG (American Wire Gauge), which is suitable for most residential applications. However, for higher wattage fixtures or longer runs, 12 AWG or even thicker wire may be necessary. Consult the fixture's specifications and the local electrical code for guidance on appropriate wire gauge.
2. Wire Type:
Outdoor wiring requires a type specifically designed to withstand harsh weather conditions. Common options include:
- THHN (Thermoplastic High Heat-Resistant Nylon): A durable and weather-resistant wire commonly used for outdoor applications.
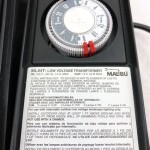
- UF (Underground Feeder): A wire specifically designed for direct burial underground. It is typically used for running power to outdoor lighting fixtures or other devices located away from the house.
- Direct Burial Cable: A cable with a jacket that makes it suitable for direct burial in the ground. It often includes multiple conductors for multiple circuits.
3. Junction Boxes:
Junction boxes serve as connection points for wiring. They protect and organize electrical connections, ensuring safe and reliable operation. Outdoor junction boxes are typically made of weatherproof materials like plastic or metal. Choose a junction box large enough to accommodate the number of wires and connections you need to make.
Installation Methods and Techniques:
The installation process for outdoor lighting varies depending on the type of fixtures and the location of the wiring. Here's a general overview:
1. Direct Burial:
For burying wires underground, use UF or direct burial cable. Dig a trench deep enough to protect the wires from damage and frost heave. Run the cable through the trench and bury it with backfill. It's important to ensure the cable is properly secured and protected from sharp objects.
2. Overhead Wiring:
Overhead wiring often uses THHN wire attached to electrical conduit or cable stapled to a suitable surface, like a house wall or fence. Use wire clamps and connectors to secure the wire to the conduit or staples. Ensure the wiring follows a safe and clear path, avoiding potential hazards.
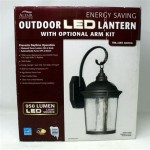
3. Installing Fixtures:
Once the wiring is in place, you can install the outdoor lighting fixtures. The process involves securing the fixture to a mounting surface, connecting wires to the fixture's terminals, and testing the installation. Follow the manufacturer's instructions for proper installation and wiring connections. Ensure that all connections are secure and that the grounding wire (usually green or bare copper) is connected correctly.
4. Testing and Troubleshooting:
After completing the installation, it's crucial to test the lighting system to ensure it's functioning properly. Turn on the circuit breaker controlling the outdoor lighting and check if all fixtures are illuminated. If any issues arise, troubleshoot them by carefully inspecting the wiring, connections, and fixtures. Look for loose wires, damaged connections, or faulty bulbs. If you're unable to resolve the problem, contact a qualified electrician for assistance.

Wiring Installation Coastal Source

Outdoor Low Voltage Lighting Diy Family Handyman

Installation Help For Outdoor Lighting

How To Install Low Voltage Outdoor Landscape Lighting The Garden Glove

How To Install Low Voltage Outdoor Landscape Lighting The Garden Glove

How To Install A Yard Light Post Electrical Projects Home Wiring Lights

How To Install Outdoor Lighting And Solar Lights Garden

The Easiest Way To Install Low Voltage Landscape Lighting Abby Organizes

How To Wire Outdoor Low Voltage Lighting Part 2

How To Install Low Voltage Outdoor Deck Lighting