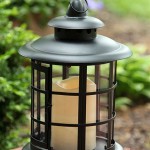
Spray Painting Outdoor Light Fixtures: Refreshing Your Curb Appeal
Outdoor light fixtures can significantly enhance a home's curb appeal and security. Over time, however, these fixtures can fade, become discolored, or simply lose their luster. Spray painting offers an effective and affordable way to refresh those aging fixtures, giving them a new lease on life and bringing a touch of personality to your home's exterior.
Before embarking on this DIY project, it is essential to understand the proper techniques and safety precautions. This article will guide you through the process of spray painting outdoor light fixtures, ensuring a professional finish that enhances your home's aesthetics.
Preparing for a Successful Spray Painting Project
Proper preparation is paramount for a successful spray painting project. It ensures a smooth, even coat and a long-lasting finish. The first step is to disconnect the power supply to the light fixtures. This precaution is crucial for safety and prevents any potential electrical hazards. After disconnecting the power, thoroughly clean the fixtures with a degreaser to remove any dirt, grease, or grime that could interfere with the paint adhesion. Use a scraper or wire brush to remove any loose paint or rust, ensuring a smooth surface for the new paint.
Next, cover the surrounding areas, including plants, walkways, and any surfaces that you don't want to be painted. Plastic sheeting, drop cloths, or painter's tape can effectively protect these areas. Masking off the areas that you don't want to be painted is also crucial. Use painter's tape to cover the areas around the glass, lenses, and other delicate components. Pay attention to details and ensure a clean and precise masking job for a professional finish.
Selecting the Right Paint and Tools
Choosing the right paint is essential for a durable and aesthetically pleasing finish. Outdoor light fixtures are exposed to the elements, so it is crucial to use a paint formulated for exterior use. Look for paints with a high-gloss finish for maximum durability and resistance to UV rays, moisture, and fading. Some popular options include enamel paints, alkyd paints, and acrylic paints. Ensure that the paint is compatible with the material of your light fixtures, as some paints may not adhere well to certain materials.
To apply the paint, you will need a spray gun or spray can. A spray gun provides a more even and professional finish, especially for larger fixtures. However, spray cans are more convenient and affordable for smaller projects. Regardless of your choice, ensure that the spray equipment is clean and in good working order.
Applying the Paint with Precision
Once the preparations are complete, it's time to start applying the paint. Start by holding the spray can or gun approximately 12 inches away from the fixture. Apply thin, even coats, allowing each coat to dry completely before applying the next. Overspraying can result in drips and an uneven finish, so work in light, consistent passes. Use a light back-and-forth motion, overlapping each stroke slightly.
For areas that are difficult to reach with a spray gun or can, use a small brush to touch up the edges and corners. This ensures a complete and professional coverage of the fixtures. Allow the paint to dry completely before applying the final coat, allowing adequate time for the paint to cure.
Finishing Touches and Maintenance
Once the paint is fully dry, remove the masking tape and protective coverings. To protect the new paint finish, consider applying a clear sealant. This sealant will help to prevent fading, chipping, and scratches, ensuring a long-lasting finish for your outdoor light fixtures. The sealant should be applied in thin, even coats, allowing each coat to dry completely before applying the next.
Regular maintenance is crucial to keep the painted fixtures looking their best. To clean the fixtures, use a mild soap and water solution. Avoid abrasive cleaners or harsh chemicals, as they can damage the paint finish. Apply a fresh coat of paint or sealant as needed to maintain the fixture's appearance and protect it from the elements. By taking the time to properly prepare, select the right paint and tools, and apply the paint with precision, you can successfully spray paint your outdoor light fixtures and enhance your home's aesthetics for years to come.

How To Update Outdoor Light Fixtures The Easy Way Confessions Of A Serial Do It Yourselfer

Spray Painting Outdoor Lights It Works Thrifty Decor Diy And Organizing

How To Spray Paint Outdoor Light Fixtures True Value

Outdoor Light Fixture Makeover Using Metallic Paint Inmyownstyle Com

How To Update Outdoor Light Fixtures The Easy Way Confessions Of A Serial Do It Yourselfer

How To Paint Light Fixtures Front Porch Refresh Budget Friendly

Lighting Makeover Exterior Copper Spray Paint

Outdoor Light Fixture Makeover Using Metallic Paint Inmyownstyle Com

How To Update Outdoor Light Fixtures The Easy Way Confessions Of A Serial Do It Yourselfer

Spray Painting Outdoor Lights It Works Thrifty Decor Diy And Organizing