Setting Outdoor Light Timers
Outdoor light timers provide a convenient and energy-efficient way to manage exterior lighting. They offer security by illuminating the property during evening hours, deterring potential intruders. Additionally, they enhance aesthetics by highlighting landscaping features and creating a welcoming ambiance. This article explores the process of setting outdoor light timers, covering various types and their specific configurations.
Types of Outdoor Light Timers
Understanding the different types of timers available is crucial for selecting the right one for specific needs. Common types include mechanical timers, digital timers, and smart timers.
Mechanical timers are the simplest type, relying on a dial with segments representing hours of the day. Users rotate the dial to set the on and off times. While straightforward to use, they offer limited programming options.
Digital timers offer more precision and flexibility. They utilize a digital display and buttons for setting on and off times. Many digital timers allow for multiple on/off cycles per day and some include features like weekday/weekend scheduling.
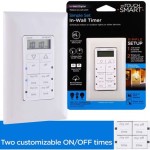
Smart timers represent the latest advancement in lighting control. They connect to Wi-Fi, enabling control through smartphone apps. Smart timers offer the greatest flexibility, allowing for remote control, customizable schedules, and integration with other smart home devices.
Installing the Timer
Before beginning the installation, ensure the power supply to the outdoor light fixture is turned off at the breaker box. This is a crucial safety precaution to prevent electrical shock. Once the power is off, connect the timer to the light fixture's wiring according to the manufacturer's instructions. Typically, this involves connecting the hot wire from the power source to the timer's input and the hot wire from the light fixture to the timer's output. The neutral and ground wires are typically connected directly to the corresponding wires from the power source and the light fixture.
Setting a Mechanical Timer
Setting a mechanical timer involves rotating the dial to align the current time with the indicator mark. Then, push down the segments corresponding to the desired on times. For example, to have the light on from 7 PM to 7 AM, push down the segments between 7 PM and 7 AM. The segments that remain up represent the off times.
Setting a Digital Timer
Digital timers are programmed using buttons on the device. The specific steps may vary depending on the model, so consulting the manufacturer's instructions is recommended. Generally, the process involves using buttons to navigate to the programming mode, setting the current time, and then setting the desired on and off times. Many digital timers allow for multiple on/off cycles per day and some offer features like weekday/weekend scheduling.
Setting a Smart Timer
Setting up a smart timer typically involves downloading the manufacturer's app and creating an account. Then, the timer needs to be connected to the home's Wi-Fi network. This process usually involves putting the timer in pairing mode and connecting to it through the app. Once connected, the app allows users to create customized schedules, control the lights remotely, and often integrate the timer with other smart home devices or systems.
Troubleshooting Common Issues
If the light does not turn on or off as scheduled, check the following: First, ensure the timer is receiving power. Verify the breaker is on and the connections to the timer are secure. Second, check the timer's settings to ensure they are correctly programmed. Third, ensure the light bulb is functioning correctly. If these steps do not resolve the issue, consult the manufacturer’s troubleshooting guide or contact customer support.
Safety Considerations
Always turn off the power at the breaker box before working with electrical wiring. Use appropriate safety precautions when working with electricity, such as wearing insulated gloves. Ensure the timer is rated for outdoor use and is compatible with the light fixture's wattage. If unsure about any aspect of the installation or programming, consult a qualified electrician.
Choosing the Right Timer
Selecting the appropriate timer depends on individual needs and preferences. Mechanical timers offer simplicity for basic on/off scheduling. Digital timers provide more programming options and precision. Smart timers offer the greatest flexibility and remote control capabilities, but typically come at a higher price point. Consider the desired level of control, budget, and technical proficiency when making a selection.

3 Easy Ways To Use A Light Timer Wikihow

How To Set A Plug Timer Mechanical Digital Switches

How To Adjust Your Timer For Daylight Savings Spring Lexington Outdoor Lighting

3 Easy Ways To Use A Light Timer Wikihow

Programming Your Mechanical Timer

How To Program An Outdoor Light Timer Quora

It 04 Exterior Digital Astronomic Programmable Timer P M Lighting Llc

Noma Outdoor Holiday Light Timer 4 Settings 3 Grounded S Black Canadian Tire

How To Program An Outdoor Light Timer Quora

Bn Link 24 Hour Mechanical Outdoor Light Timer With Silicone And Protective Covers Waterproof Dustproof Plug 3 Prong 6 Inch Flexible Cord Heavy Duty Com