Light Timer Outdoor Instructions
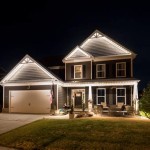
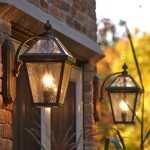
Outdoor light timers provide a convenient and energy-efficient way to control exterior lighting. They offer security by simulating occupancy when a property is vacant and enhance curb appeal by illuminating landscaping or architectural features. This document provides comprehensive instructions for installing and operating various types of outdoor light timers.
Outdoor light timers generally fall into two categories: mechanical and digital. Mechanical timers utilize a dial with segments representing hours of the day. Users set the on and off times by pushing pins or levers into the corresponding segments. Digital timers offer more precise control and often include features such as multiple on/off programs, astronomical clocks, and daylight sensors.
Before installation, it is crucial to ensure the timer is rated for outdoor use. Look for terms like "weatherproof," "waterproof," or a specific IP (Ingress Protection) rating on the packaging. This rating indicates the level of protection against dust and moisture. A higher IP rating signifies greater protection.
Installation typically involves replacing an existing wall switch with the timer. Before beginning, always disconnect the power to the circuit at the main breaker box. Double-check the power is off using a non-contact voltage tester. Carefully remove the existing switch, noting the wiring configuration. Most timers are clearly labeled with terminals for the “line” (incoming power), “load” (outgoing power to the light fixture), and “ground.” Connect the wires to the corresponding terminals on the timer, ensuring a secure connection.
For mechanical timers, setting the on/off times involves rotating the dial to the current time and pushing the pins or levers inward for the desired on periods. The timer will then automatically turn the lights on and off according to the set schedule. Digital timers typically have buttons or touchscreens for programming. Consult the specific instructions provided with the timer for detailed programming steps. These instructions will outline how to set the current time, day of the week, and desired on/off times.
Some digital timers offer advanced features such as astronomical clocks. Astronomical timers automatically adjust the on/off times based on the sunrise and sunset times for the user's location. This feature eliminates the need to manually adjust the timer throughout the year. Other models include daylight sensors, which activate the lights only when the ambient light level falls below a certain threshold.
Troubleshooting common issues often involves checking the power supply, verifying the wiring connections, and reviewing the timer’s programming. If the lights fail to turn on, ensure the circuit breaker is not tripped and that the bulb is functioning correctly. If the timer is not functioning as programmed, consult the user manual for troubleshooting tips or contact the manufacturer's customer support.
Safety precautions are paramount when working with electrical components. Always disconnect the power before making any connections. If uncertain about any aspect of the installation, consult a qualified electrician. Never install a timer in a damp or wet location unless it is specifically rated for such environments. Ensure all connections are secure to prevent overheating or electrical hazards.
Maintaining an outdoor light timer involves periodic cleaning and inspection. Use a soft, damp cloth to wipe away any dirt or debris that may accumulate on the timer's surface. Inspect the wiring connections for any signs of looseness or corrosion. If the timer is exposed to harsh weather conditions, consider applying a protective sealant around the edges to further enhance its weather resistance.
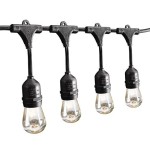
Different types of light fixtures may have specific compatibility requirements with certain timers. Incandescent, fluorescent, LED, and halogen bulbs each have different electrical characteristics. Check the timer's specifications to ensure compatibility with the intended light fixture. Some timers may have wattage limitations, meaning they cannot handle the electrical load of high-wattage bulbs.
Choosing the right outdoor light timer depends on individual needs and preferences. Consider factors such as the type of light fixture, desired programming features, and budget. Mechanical timers offer a simple and cost-effective solution for basic on/off scheduling. Digital timers provide more advanced features and greater control over lighting schedules. Astronomical timers and daylight sensors offer further convenience and energy efficiency.
Proper installation and operation of an outdoor light timer can enhance security, convenience, and energy efficiency. By following the manufacturer’s instructions and adhering to safety precautions, users can enjoy the benefits of automated outdoor lighting control for years to come.

How To Use A Timer Switch For Lights

3 Easy Ways To Use A Light Timer Wikihow

Noma Light Timer Instructions Model Et525c Lights

How To Set A Plug Timer Mechanical Digital Switches

How To Set A Plug Timer Mechanical Digital Switches

How To Program Light Timer Mechanical Dial Face Diy

Dewenwils Outdoor Digital Timer 7 Day Programmable Plug In With 3 Grounded S For Landscape String Light

How To Setup A Mechanical Timer

3 Easy Ways To Use A Light Timer Wikihow

Ge Extreme Weather Outdoor Mechanical Timer 24 Hour Heavy Duty Plug In 1 Grounded 31277 Com