Installing Outdoor Lights on Stucco: A Comprehensive Guide
Adding outdoor lighting to a property enhances its aesthetic appeal, improves security, and increases usability of outdoor spaces. Stucco, a popular exterior siding material, presents unique challenges when installing light fixtures. A careful approach is crucial to prevent damage to the stucco and ensure a secure, weather-resistant installation. This article provides a detailed guide on how to install outdoor lights on stucco, covering necessary tools, preparation, and step-by-step instructions.
Understanding Stucco and Its Vulnerabilities
Stucco is a cement-based plaster applied to exterior walls, typically in multiple layers, over a lath base. Its rigid nature makes it susceptible to cracking if not handled properly during drilling or fastening. Water intrusion behind the stucco can lead to significant damage, including mold growth and structural issues. Therefore, maintaining the integrity of the stucco barrier is paramount when installing outdoor lighting.
Different types of stucco exist, including traditional three-coat stucco and synthetic stucco (Exterior Insulation and Finish System, or EIFS). EIFS is more flexible and can be more easily damaged than traditional stucco. Identifying the type of stucco on a building is essential to selecting the appropriate installation techniques and fasteners.
Before commencing any work, it is prudent to inspect the stucco surface for existing cracks or damage. Addressing these issues prior to installing lights will prevent further deterioration and ensure a more robust installation.
Essential Tools and Materials
The successful installation of outdoor lights on stucco requires a specific set of tools and materials. Utilizing the appropriate equipment will streamline the process and minimize the risk of damage.
The following tools are necessary:
*Drill:
A powerful drill with variable speed settings is essential for creating pilot holes and driving screws. *Masonry Drill Bits:
Carbide-tipped masonry drill bits are specifically designed for drilling through stucco and concrete. Select the appropriate size based on the chosen fasteners. *Screwdriver:
A screwdriver, either manual or powered, is required to tighten screws. Ensure the screwdriver head matches the screw type. *Level:
A level is crucial for ensuring the light fixture is mounted straight. *Wire Strippers/Crimpers:
These tools are needed to safely strip the insulation from electrical wires and crimp connectors. *Voltage Tester:
A non-contact voltage tester is essential for confirming that the power is off before working on electrical circuits. *Caulk Gun:
A caulk gun is used to apply sealant around the light fixture to prevent water intrusion. *Pencil:
A pencil is needed for marking drilling locations and wiring connections. *Measuring Tape:
A measuring tape ensures accurate placement of the light fixture. *Safety Glasses:
Safety glasses protect the eyes from dust and debris during drilling. *Gloves:
Gloves provide a better grip and protect hands from rough surfaces.The following materials are needed:
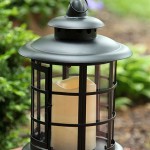
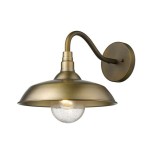
*Outdoor Light Fixture:
Choose a light fixture specifically designed for outdoor use, with a weatherproof rating. *Mounting Screws:
Select screws long enough to penetrate the stucco and securely anchor into the wall structure. Consider using concrete screws or sleeve anchors. *Wire Connectors:
Use weatherproof wire connectors rated for outdoor use to ensure safe and reliable electrical connections. *Electrical Tape:
Electrical tape is used to insulate and protect wire connections. *Weatherproof Caulk:
Choose a high-quality, paintable, and weatherproof caulk specifically designed for exterior use. *Electrical Box Extender (Optional):
If the existing electrical box is recessed too deeply into the stucco, an extender can bring it flush with the surface. *Gasket or Foam Backer:
Apply a gasket or foam backer between the light fixture and the stucco to create a watertight seal.Step-by-Step Installation Process
Following a methodical approach is essential for a safe and effective installation. The steps below outline the process of installing an outdoor light fixture on a stucco surface.
Step 1: Safety First – Disconnect the Power
Before commencing any electrical work, the first and most crucial step is to disconnect the power to the circuit that will supply the light fixture. Locate the circuit breaker that controls the outdoor lighting circuit and switch it to the "OFF" position. Verify that the power is off using a non-contact voltage tester before touching any wires. This step is paramount for preventing electrical shock.
Step 2: Prepare the Mounting Location
Determine the desired location for the light fixture. Use a level to ensure the fixture will be mounted straight. If replacing an existing light fixture, ensure the new fixture will cover the existing electrical box.
Inspect the stucco surface for any cracks or damage. If necessary, repair any minor cracks with stucco patch before proceeding. For larger repairs, it is advisable to consult a professional.
Step 3: Drill Pilot Holes
Position the light fixture mounting plate against the stucco surface and mark the location of the mounting holes with a pencil. Use a masonry drill bit that is slightly smaller than the diameter of the mounting screws. Drill pilot holes through the stucco and into the underlying wall structure. Drill slowly and apply gentle pressure to avoid cracking the stucco. If encountering resistance, stop and check for obstructions before proceeding.
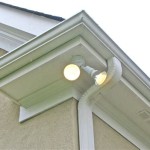
Step 4: Install the Electrical Box (If Needed)
If installing a new light fixture where no electrical box exists, a weatherproof electrical box must be installed. This typically involves cutting an opening in the stucco to accommodate the box. This task can be complex and may require the expertise of a professional electrician.
If replacing an existing fixture and the electrical box is recessed too deeply, install an electrical box extender to bring the box flush with the stucco surface. This will ensure a proper seal between the light fixture and the stucco.
Step 5: Make Electrical Connections
Carefully pull the electrical wires through the opening in the electrical box. Using wire strippers, strip approximately ½ inch of insulation from the ends of the wires. Connect the wires from the light fixture to the wires in the electrical box using weatherproof wire connectors. Typically, black wires connect to black wires (hot), white wires connect to white wires (neutral), and green or bare copper wires connect to green or bare copper wires (ground). Secure the wire connectors by twisting them tightly and wrapping them with electrical tape for added insulation and protection.
Ensure that all wire connections are secure and that no bare wires are exposed. Carefully tuck the wires into the electrical box, making sure they are not pinched or crimped.
Step 6: Mount the Light Fixture
Position the light fixture mounting plate over the pilot holes and secure it to the wall using the appropriate mounting screws. Tighten the screws firmly, but avoid over-tightening, which could crack the stucco. Ensure the mounting plate is level before fully tightening the screws.
Attach the light fixture to the mounting plate according to the manufacturer's instructions. Make sure all screws and fasteners are securely tightened.
Step 7: Seal the Fixture
Apply a bead of weatherproof caulk around the perimeter of the light fixture where it meets the stucco surface. This will create a watertight seal and prevent water from seeping behind the fixture and damaging the stucco. Smooth the caulk with a wet finger or a caulk smoothing tool for a clean and professional finish.
Consider using a gasket or foam backer between the light fixture and the stucco for added protection. These materials provide an extra layer of sealing and help prevent water intrusion.
Step 8: Restore Power and Test the Fixture
After the caulk has dried completely, switch the circuit breaker back to the "ON" position. Test the light fixture to ensure it is working properly. If the light does not turn on, double-check all wiring connections and ensure the bulb is properly installed.
If any problems persist, consult a qualified electrician.
Step 9: Clean Up
Clean up any debris or materials left over from the installation process. Dispose of any used materials properly.
Key Considerations for a Successful Installation
Beyond the step-by-step process, several key considerations can significantly impact the success and longevity of an outdoor lighting installation on stucco.
Choosing the Right Fasteners:
Selecting appropriate fasteners is crucial for a secure and lasting installation. Concrete screws or sleeve anchors are generally recommended for stucco applications. These fasteners provide a strong grip and resist pulling out of the stucco. The length of the screws should be sufficient to penetrate the stucco and securely anchor into the underlying wall structure. It is also important to use corrosion-resistant fasteners to prevent rust and deterioration.Preventing Water Intrusion:
Water intrusion is a major concern when installing anything on stucco. The integrity of the stucco barrier must be maintained to prevent water from seeping behind the siding and causing damage. Using weatherproof caulk to seal around the light fixture is essential. Additionally, consider using a gasket or foam backer between the fixture and the stucco to create an extra layer of protection. Proper drainage around the base of the fixture can also help prevent water from accumulating and potentially seeping behind the stucco.Handling Electrical Wiring Safely:
Electrical work can be dangerous if not performed correctly. Always disconnect the power before working on any electrical circuits. Use appropriate wire connectors rated for outdoor use and ensure all connections are secure and insulated. If unsure about any aspect of the electrical wiring, consult a qualified electrician. Ignoring safety precautions can lead to electrical shock or fire hazards.
How To Mount External Light Fixtures On Existing Stucco Ehow

How To Mount An Exterior Light Fixture On Stucco

How To Hang Lights On Stucco A Professional S Guide For Diyers

Electrical Boxes For Porch Lights Prior To Stucco Doityourself Com Community Forums

How To Hang Lights On Stucco

How To Replace An Outdoor Light On Stucco

How To Hang Lights On Stucco A Professional S Guide For Diyers

How To Install An Exterior Light Fixture Part 1

3 Simple Ways To Hang Lights On Stucco Wikihow

How To Hang Lights On Stucco
Related Posts