How To Wire A Light Sensor To Outdoor Lights
Wiring a light sensor to outdoor lights offers a practical and energy-efficient way to automate outdoor illumination. By automatically turning lights on at dusk and off at dawn, light sensors eliminate the need for manual operation, enhancing convenience and security. This article provides a comprehensive guide on how to wire a light sensor to outdoor lights, covering essential tools, safety precautions, wiring diagrams, and troubleshooting tips.
Before commencing any electrical work, safety should be the paramount concern. Electricity presents inherent hazards, and improper wiring can lead to electric shock, fire, or damage to property. Therefore, strict adherence to safety guidelines is essential. Ensure that the power to the circuit is completely shut off at the circuit breaker or fuse box before starting any wiring. Double-check with a non-contact voltage tester to confirm that the circuit is de-energized. Never work on electrical circuits while standing in water or on a damp surface. Wearing appropriate safety gear, such as insulated gloves and safety glasses, is also highly recommended.
Familiarizing oneself with local electrical codes and regulations is crucial before undertaking any electrical installation. These codes are designed to ensure the safety and integrity of electrical systems within a specific jurisdiction. Failure to comply with these codes can result in fines, legal repercussions, and, more importantly, compromised safety. Consult with a qualified electrician if there are any doubts or uncertainties regarding the applicable electrical codes in your area.
Understanding the Components
Successfully wiring a light sensor to outdoor lights requires an understanding of the components involved. These typically include the light sensor itself, the outdoor light fixture, junction boxes, wiring connectors, and the electrical wiring. Each component plays a crucial role in the overall functionality of the system.
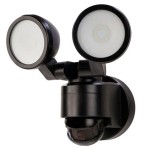
The light sensor is the core component that detects the ambient light level and triggers the switching action. Light sensors are commonly available in two main types: photocell sensors and motion-activated sensors with daylight cut-off. Photocell sensors react solely to the amount of light, turning on the lights when darkness falls and turning them off when daylight returns. Motion-activated sensors, on the other hand, activate the lights only when motion is detected within their range, but incorporate a photocell to prevent activation during daylight hours, offering a combination of security and energy efficiency. The type of sensor selected determines the specific wiring configuration required.
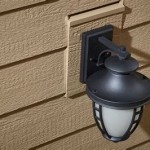
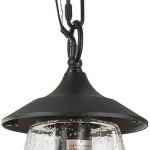
The outdoor light fixture is the device that provides the illumination. These fixtures come in a wide variety of styles, sizes, and wattages. It's crucial to select a fixture that is suitable for outdoor use and rated for the expected environmental conditions, such as rain, snow, and temperature extremes. Ensure the fixture is properly grounded for safety.
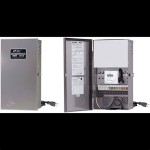
Junction boxes are enclosures used to protect wiring connections from the elements and provide a safe and secure environment for making splices. Outdoor junction boxes are typically weatherproof and constructed from durable materials like metal or plastic.
Wiring connectors, such as wire nuts or push-in connectors, are essential for creating secure and reliable electrical connections between wires. Use connectors that are rated for the wire gauge and voltage being used. Apply the connectors properly following the manufacturer's instructions to ensure a tight and safe connection.
The electrical wiring used must be appropriate for the voltage and current requirements of the lighting circuit. Commonly used wiring types include NM-B (non-metallic sheathed cable) for indoor use and UF (underground feeder) cable for outdoor or buried applications. The wire gauge (thickness) must be sufficient to handle the electrical load of the lights without overheating. Consult with an electrician or refer to electrical code guidelines to determine the appropriate wire gauge for your specific application.
Preparing for the Installation
Before commencing the wiring process, gather all the necessary tools and materials. Having everything readily available will streamline the installation and minimize delays. Essential tools include a non-contact voltage tester, wire strippers, wire cutters, screwdrivers (both flathead and Phillips head), pliers, a drill with appropriate drill bits, and a level. A conduit bender may be necessary if running wiring through conduit outdoors. Safety glasses and insulated gloves are imperative for personal protection.
Carefully review the wiring diagrams provided with the light sensor and the outdoor light fixture. These diagrams illustrate the proper connections between the various components. Pay close attention to the color-coding of the wires and the terminal markings on the devices. In most standard wiring schemes, black wires are typically used for the hot (live) conductor, white wires are used for the neutral conductor, and green or bare copper wires are used for the ground conductor. However, it's crucial to verify the wiring scheme in the specific diagrams for the components being used, as color-coding conventions can vary.
Choose a suitable location for the light sensor. The sensor should be mounted in a location where it can accurately detect ambient light levels without being obstructed by trees, buildings, or other objects. Avoid placing the sensor directly under the light fixture it is controlling, as this can create a feedback loop and cause the lights to flicker or turn themselves on and off repeatedly. Ideally, the sensor should be mounted facing north or east, away from direct sunlight. The sensor should also be easily accessible for maintenance and adjustments.
If the light sensor is being mounted on a wall or other surface, ensure that the mounting surface is structurally sound and capable of supporting the weight of the sensor. Use appropriate mounting hardware, such as screws or anchors, to securely fasten the sensor in place.
Step-by-Step Wiring Instructions
Once all the preparations are complete, the actual wiring process can begin. This section provides detailed step-by-step instructions for wiring a light sensor to outdoor lights. Remember to always disconnect the power at the circuit breaker before proceeding with any wiring.
Begin by mounting the light sensor in the chosen location. Follow the manufacturer's instructions for proper mounting procedures. Ensure the sensor is securely fastened and level.
Next, run the appropriate wiring from the power source to the junction box closest to the light sensor. This wiring will typically consist of NM-B cable for indoor runs and UF cable for outdoor runs. Securely fasten the wiring to the building structure using appropriate cable staples or clamps.
In the junction box, connect the incoming power wires to the corresponding wires of the light sensor, following the wiring diagram provided with the sensor. Typically, the black (hot) wire from the power source will be connected to the black wire of the sensor, the white (neutral) wire from the power source will be connected to the white wire of the sensor, and the green or bare copper (ground) wire from the power source will be connected to the green or bare copper wire of the sensor. Use wire nuts or push-in connectors to create secure and insulated connections.
Now, run wiring from the light sensor to the outdoor light fixture. The wiring diagram will indicate which wires from the sensor need to be connected to the light fixture. Typically, the sensor will switch the hot (black) wire to the light fixture, while the neutral (white) and ground (green or bare copper) wires will be connected directly from the power source to the light fixture.
Connect the wires from the light sensor to the corresponding wires of the outdoor light fixture, again following the wiring diagram. Use wire nuts or push-in connectors to create secure and insulated connections. Ensure that all connections are tight and properly insulated.
Carefully tuck all the wires and connectors into the junction boxes and securely close the covers. This will protect the connections from the elements and prevent accidental contact.
Finally, restore power to the circuit at the circuit breaker and test the operation of the light sensor and the outdoor lights. The lights should turn on automatically when darkness falls and turn off automatically when daylight returns. If a motion-activated sensor is being used, ensure that the lights activate when motion is detected within the sensor's range.
Troubleshooting Common Issues
After the installation is complete, it's crucial to test the system thoroughly and address any issues that may arise. Common problems include the lights not turning on, the lights staying on all the time, the lights flickering, or the sensor not detecting motion.
If the lights are not turning on, first, double-check that the circuit breaker is turned on and that the light bulb is functioning correctly. Next, verify that all the wiring connections are secure and that there are no loose wires or short circuits. Use a non-contact voltage tester to check for voltage at the light fixture and the sensor. If there is no voltage, there may be a problem with the wiring or the circuit breaker. If there is voltage but the lights are still not turning on, the sensor may be defective and need to be replaced.
If the lights are staying on all the time, the light sensor may be malfunctioning or improperly adjusted. Check the sensitivity settings on the sensor and adjust them as needed. Ensure that the sensor is not being exposed to artificial light sources, such as streetlights or porch lights, as this can prevent it from turning off the lights. If the problem persists, the sensor may be defective and require replacement.
If the lights are flickering, the wiring connections may be loose or corroded. Inspect all the wiring connections and tighten them as needed. Replace any corroded connectors. Flickering can also be caused by a faulty light bulb or a defective sensor. Try replacing the light bulb first, and if the problem persists, consider replacing the sensor.
If a motion-activated sensor is not detecting motion, check the sensor's range and sensitivity settings. Ensure that there are no obstructions blocking the sensor's view. The sensor may also need to be recalibrated. Refer to the manufacturer's instructions for specific calibration procedures. If the problem persists, the sensor may be defective and require replacement.
By following these steps and taking appropriate safety precautions, one can successfully wire a light sensor to outdoor lights, providing automated and energy-efficient illumination for the property.

Zenith Motion Sensor Wiring Diagram Outside Lights To Handyman Wire Home Electrical

Elegant Wiring Diagram Ceiling Light Diagrams Digramssample Diagramimages Wiringdiagramsam Outdoor Flood Lights Sensor Lighting Wire

How To Add Motion Sensor Outdoor Lights With Or Function Doityourself Com Community Forums

Diagrams Digramssample Diagramimages Wiringdiagramsample Wiringdiagram Check More At H Led Outdoor Lighting Security Lights Light Fixtures

How To Wire Motion Sensor Occupancy Sensors

How To Wire Motion Sensor Occupancy Sensors

Motion Sensor Wiring Diagram Lights Outdoor

Unique Wiring Diagram For Outdoor Motion Detector Light Diagrams Digramssample Diagramimage Flood Lights Sensor Lighting Wire

Photocell Sensor Wiring Practical

How To Add Motion Sensor Outdoor Lights With Or Function Doityourself Com Community Forums
Related Posts