How To Use An Outdoor Light Timer
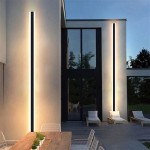
Outdoor light timers are valuable tools for automating exterior lighting, enhancing home security, and conserving energy. These devices regulate when outdoor lights turn on and off, offering convenience and potentially lowering electricity bills. Understanding how to correctly install and program an outdoor light timer is crucial for optimal performance and longevity of both the timer and the connected lighting fixtures.
This article provides a comprehensive guide on utilizing outdoor light timers, covering aspects from selecting the appropriate timer type to troubleshooting common issues. The information aims to help users effectively manage their outdoor lighting systems with minimal effort.
Choosing the Right Outdoor Light Timer
Selecting the appropriate outdoor light timer requires consideration of several factors. The primary considerations include the type of lighting being controlled, the desired control mechanism (digital or mechanical), the power requirements of the lights, and the environmental conditions where the timer will be installed.
Timer Type: Outdoor light timers generally fall into two main categories: mechanical and digital. Mechanical timers, also known as analog timers, utilize a rotating dial with pins or segments that are pushed in or out to set the on/off times. These timers are typically less expensive and simpler to operate. However, they offer less precise control and may not be suitable for complex scheduling needs. Digital timers, on the other hand, feature a digital display and buttons for programming. They allow for more accurate and flexible scheduling, often with options for multiple on/off cycles per day, weekend/weekday settings, and even astronomical clock features that automatically adjust lighting times based on sunrise and sunset.
Power Requirements: Before purchasing a timer, it is essential to determine the total wattage of the outdoor lights that the timer will control. The timer’s maximum wattage rating must exceed the total wattage of the connected lights to prevent overloading and potential damage to the timer or the lighting fixtures. Exceeding the timer's wattage rating can lead to overheating, malfunction, and even fire hazards. The wattage rating is typically printed on the timer's packaging or housing.
Environmental Considerations: Outdoor light timers are exposed to various weather conditions, including rain, snow, and extreme temperatures. It is crucial to select a timer specifically designed for outdoor use and rated for weather resistance. Look for timers with a NEMA (National Electrical Manufacturers Association) rating that indicates the level of protection against environmental elements. A NEMA 3R rating, for example, signifies protection against rain, sleet, and snow.
Outlet Type: Finally, consider the type of electrical outlet available for the timer. Outdoor light timers are available in plug-in and hardwired models. Plug-in timers are simply plugged into an existing outlet, while hardwired timers require direct wiring into the electrical system. Hardwired timers typically require professional installation and are suitable for controlling larger lighting systems. Plug-in timers are more convenient for smaller lighting setups and areas with readily accessible outlets.
Installing an Outdoor Light Timer
The installation process varies depending on the type of timer. Plug-in timers are generally straightforward to install, while hardwired timers demand more technical expertise and adhering to electrical safety standards.
Plug-in Timer Installation: For plug-in timers, identify a suitable outdoor outlet that is protected from direct exposure to rain and snow. The outlet should ideally be a Ground Fault Circuit Interrupter (GFCI) outlet for added safety. Ensure the power switch on the outlet is in the "off" position before plugging in the timer. Once the timer is plugged in, connect the outdoor lights to the timer's outlet. Secure the timer and cords to prevent them from being tripped over or damaged. Some plug-in timers come with built-in weather shields, while others may require a separate protective enclosure.
Hardwired Timer Installation: Hardwired timer installation is more complex and should ideally be performed by a qualified electrician. The process involves disconnecting the power supply to the circuit at the breaker box. The existing wiring to the outdoor lights is then connected to the terminals on the timer, following the manufacturer's wiring diagram. Proper grounding is essential for safety. Once the wiring is complete, the timer is mounted securely in a weatherproof enclosure. After all connections are verified, the power is restored to the circuit at the breaker box.
Safety Precautions: Regardless of the timer type, several safety precautions must be followed. Always disconnect power before working with electrical wiring. Use appropriate tools and safety equipment, such as insulated gloves and safety glasses. Consult local electrical codes and regulations to ensure compliance. If unsure about any aspect of the installation process, seek the assistance of a qualified electrician.
Programming an Outdoor Light Timer
Once the timer is installed, the next step is to program it to control the outdoor lights according to the desired schedule. The programming process differs based on whether the timer is mechanical or digital.
Mechanical Timer Programming: Mechanical timers usually involve setting the current time and configuring the on/off times using pins or segments around the dial. To set the current time, rotate the dial until the correct time aligns with the pointer or marker on the timer. To set the on/off times, push in the pins or segments corresponding to the periods when the lights should be on. Each pin or segment typically represents a specific time interval, such as 15 or 30 minutes. The closer the pins are together, the shorter the “on” period will be. For example, pushing in segments from 6:00 PM to 10:00 PM will cause the lights to turn on at 6:00 PM and turn off at 10:00 PM. The specific programming methodology will differ based on the model and manufacturer of the mechanical timer.
Digital Timer Programming: Digital timers utilize buttons and a display screen to set the time and program the on/off schedules. Most digital timers feature a "program" or "set" button that is used to access the programming menu. The user can then use the up and down arrow buttons to adjust the time, date, and on/off times. Digital timers often offer multiple programming options, such as setting different schedules for weekdays and weekends, or creating multiple on/off cycles per day. Some advanced digital timers include astronomical clock features that automatically adjust the on/off times based on the sunrise and sunset times for a specific location. This eliminates the need to manually adjust the timer throughout the year as the days get longer or shorter. To save the programmed settings, press the "enter" or "OK" button. Review the timer's manual for specific instructions and advanced programming options.
Testing and Adjustments: After programming the timer, test the settings to ensure the lights turn on and off at the correct times. If necessary, adjust the settings or consult the timer's manual for troubleshooting tips. Some timers may have a "manual override" feature that allows the user to temporarily turn the lights on or off, regardless of the programmed schedule. This can be useful for special occasions or when temporary adjustments are needed.
Troubleshooting Common Issues
Like any electrical device, outdoor light timers can sometimes experience issues. Addressing these problems efficiently can help to maintain optimal performance and extend the life of the timer.
Lights Not Turning On: If the outdoor lights are not turning on at the programmed time, the first step is to check the power supply. Ensure the outlet is working properly by plugging in another device. Verify the timer is receiving power and that the fuse or circuit breaker controlling the outlet has not tripped. Confirm that the timer is correctly programmed with the desired on/off times. Ensure the lights themselves are functional and their bulbs have not burned out. If the issue persists, consult the timer’s manual or consider replacing the timer.
Lights Not Turning Off: If the lights are not turning off at the programmed time, double-check the timer’s settings. Verify that the off time is correctly set and that the timer is not in manual override mode. If using a mechanical timer, ensure that the pins or segments corresponding to the off time are not engaged. If the timer continues to malfunction, it may require replacement. Digital timers may sometimes have a reset button that can be pressed to return the timer to its factory default settings. This can sometimes resolve minor programming glitches.
Timer Not Keeping Time: Mechanical timers may occasionally lose accuracy and drift over time. If this occurs, reset the timer and readjust the current time. Digital timers typically use a battery backup to maintain the time during power outages. If the battery is low or dead, the timer may lose its settings or display incorrect time. Replace the battery according to the manufacturer's instructions. Verify the timer is not located in an area that receives extreme temperature fluctuations that could interfere with the timer's internal clock mechanism.
Timer Damaged by Weather: If the timer is exposed to excessive moisture or extreme temperatures, it may malfunction or become damaged. Ensure the timer is properly rated for outdoor use and is installed in a protected location. Consider using a weatherproof enclosure to shield the timer from the elements. If the timer shows signs of water damage or corrosion, immediately disconnect the power supply and replace the timer.
By following these guidelines, users can effectively install, program, and maintain outdoor light timers, optimizing their home's exterior lighting system for security, convenience, and energy efficiency.

How To Use A Timer Switch For Lights

How To Put Outdoor Lights On A Timer Electronicshub

Programming Your Mechanical Timer

How To Use A Timer Switch For Lights

Install The Hb11k Outdoor Heavy Duty Plug In Timer From Intermatic This Season

A Complete Guide To Light Switch Timers

Can You Put Outdoor Lights On A Timer Sorta Techy

5 Places To Use Outdoor Timers 1000bulbs Blog

How To Program The Hb31k Outdoor Plug In Timer From Intermatic

Woods Outdoor Lighting Mechanical Timer With 3 Remote Control Countdown 50126wd The Home Depot