How To Replace an Outdoor Low Voltage Lighting Circuit
Outdoor low-voltage lighting enhances the aesthetic appeal and safety of residential and commercial properties. Over time, however, these systems can degrade due to weather exposure, physical damage, or component failure. Replacing a low-voltage lighting circuit involves a systematic approach to ensure safety, functionality, and longevity. This article outlines the steps involved in replacing an outdoor low-voltage lighting circuit, providing detailed instructions and precautionary measures.
Before initiating any electrical work, safety precautions are paramount. Disconnecting power to the lighting circuit is the first and most crucial step. This involves locating the main circuit breaker panel controlling the outdoor lighting and switching it to the "off" position. Verify the power is disconnected by using a non-contact voltage tester on the transformer and any accessible wiring. Wearing appropriate personal protective equipment (PPE), such as insulated gloves and safety glasses, further mitigates the risk of electrical shock or injury.
Planning and Assessment
The initial phase of replacing a low-voltage lighting circuit involves a thorough assessment of the existing system and careful planning. This includes documenting the layout of the current wiring, noting the location of each light fixture, and identifying any damaged or corroded components. Understanding the original design helps in replicating or improving the system during the replacement process. Photographing the existing setup can be invaluable for reference during reinstallation.
Next, evaluate the capacity of the existing transformer. Ensure that the new lighting system's total wattage does not exceed the transformer's rated output. Exceeding this limit can lead to transformer failure and potential fire hazards. If the new system requires more power, consider upgrading to a transformer with a higher wattage capacity.
Determining the appropriate gauge of wire is equally critical. The wire gauge should be sufficient to handle the current load without excessive voltage drop. Voltage drop occurs when the voltage decreases along the length of the wire due to resistance. This can result in dim lighting and reduced performance. Consult voltage drop charts to select the correct wire gauge based on the total wattage of the lighting system and the distance from the transformer to the farthest light fixture. Using direct burial rated low voltage cable for outdoor applications is recommended.
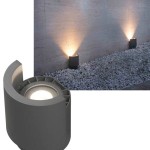
Finally, carefully select replacement components. Opt for high-quality, weather-resistant fixtures, connectors, and wiring. Consider LED lighting, which offers energy efficiency, long lifespan, and reduced heat output compared to traditional halogen bulbs. Ensure all components are compatible with the existing or new transformer and comply with local electrical codes.
Removal of the Existing Circuit
After completing the planning and assessment phase, the next step is to remove the existing low-voltage lighting circuit. Start by disconnecting the wiring from the transformer. Carefully label each wire before disconnecting it to ensure proper reconnection later. This can be done using masking tape and a permanent marker or pre-printed wire labels.
Next, disconnect the wiring from each light fixture. Inspect the connections for corrosion or damage. Cut the wires close to the fixtures, leaving enough length for reconnection with the new system. If the existing fixtures are being replaced, carefully remove them from their mounting locations. Note the orientation and mounting methods for easy reinstallation of the new fixtures.
Once the fixtures and wiring are disconnected, carefully remove the old wiring from the ground. If the wiring is buried, it may be necessary to carefully dig it up using a shovel or trenching tool. Exercise caution to avoid damaging underground utilities, such as gas lines or water pipes. If the wiring is attached to trees or structures, detach it carefully to avoid causing damage.
Proper disposal of the old wiring and fixtures is essential. Consult local regulations for recycling or disposal options. Copper wiring can often be recycled for scrap value. Damaged or non-functional fixtures may need to be disposed of at a designated recycling center or landfill.
Installation of the New Circuit
With the old circuit removed, the installation of the new low-voltage lighting circuit can begin. Start by running the new wiring according to the planned layout. If the wiring is being buried, dig trenches deep enough to accommodate the wiring and any necessary conduit. The depth of the trench should comply with local electrical codes, typically ranging from 6 to 12 inches.
When running the wiring, avoid sharp bends or kinks that can damage the insulation and reduce the wire's current-carrying capacity. Use appropriate conduit or protective sleeving in areas where the wiring is exposed to physical damage, such as along walkways or near lawnmowers. Secure the wiring to trees or structures using appropriate fasteners that will not damage the wiring or the supporting structure.
Next, install the new light fixtures according to the manufacturer's instructions. Ensure that the fixtures are securely mounted and properly oriented. Connect the wiring to the fixtures using waterproof connectors designed for low-voltage outdoor lighting applications. These connectors protect the connections from moisture and corrosion, ensuring reliable performance.
Once all the fixtures are installed and wired, connect the wiring to the transformer. Match the wire labels to ensure proper polarity and connection to the correct terminals. Securely tighten all connections to prevent loose wires, which can cause voltage drop or electrical arcing. Double-check all wiring connections before restoring power to the circuit.
Testing and Troubleshooting
After completing the installation, it's crucial to test the new low-voltage lighting circuit to ensure proper functionality. Restore power to the circuit by switching the circuit breaker back to the "on" position. Observe the light fixtures to verify that they are all functioning correctly.
If any of the fixtures fail to light up, check the wiring connections for looseness or corrosion. Use a multimeter to measure the voltage at each fixture. A significant voltage drop may indicate an undersized wire gauge or a faulty connection. Correct any wiring issues or replace damaged components as needed.
If the transformer is overloaded, it may shut down automatically. Check the transformer's output rating and ensure that the total wattage of the lighting system does not exceed its capacity. If necessary, reduce the number of fixtures or upgrade to a transformer with a higher wattage rating.
Inspect the entire system for any potential hazards, such as exposed wiring or damaged fixtures. Address any issues promptly to prevent electrical shocks or fire hazards. Consider using a professional electrician for complex troubleshooting or repairs.
Finally, adjust the light fixtures to achieve the desired lighting effect. Fine-tune the aiming and intensity of each fixture to highlight architectural features, illuminate pathways, or create a welcoming ambiance. Periodic maintenance, such as cleaning the fixtures and checking the wiring connections, will help ensure the long-term performance and reliability of the low-voltage lighting system.

How To Install Low Voltage Outdoor Landscape Lighting The Garden Glove

Wiring Installation Coastal Source

How To Wire Outdoor Low Voltage Lighting Part 2

How To Install Low Voltage Outdoor Landscape Lighting

How To Install Low Voltage Outdoor Deck Lighting

Low Voltage System Layout Landscape Lighting Supply Company

The Easiest Way To Install Low Voltage Landscape Lighting Abby Organizes

How To Install Low Voltage Outdoor Landscape Lighting The Garden Glove

How To Install Low Voltage Outdoor Deck Lighting Diy Plans

Landscape Lights Not Working Solutions To 7 Common Problems