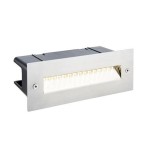
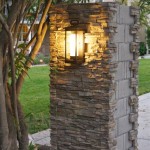
How To Remove Glass From Outdoor Light Fixture
Outdoor light fixtures enhance the aesthetic appeal and security of properties. Over time, these fixtures may require maintenance, including cleaning or replacing the glass components. The process of removing the glass from an outdoor light fixture necessitates caution and adherence to specific steps to prevent injury and damage to the fixture itself. This article provides a comprehensive guide on how to safely and effectively remove glass from outdoor light fixtures.
Before commencing any work on electrical fixtures, it is paramount to prioritize safety. Electrical hazards pose significant risks, and precautions are essential to mitigate potential harm. Consequently, the initial step involves disconnecting the power supply to the fixture. This measure ensures that there is no risk of electric shock during the removal process. Locate the corresponding circuit breaker or fuse in the electrical panel that controls the outdoor light fixture and switch it off. Additionally, it is advisable to test the fixture with a non-contact voltage tester to confirm that the power is indeed off before proceeding. A non-contact voltage tester detects the presence of electrical current without requiring direct contact with the wires, providing an extra layer of safety.
Gathering the necessary tools and materials contributes to a smoother and more efficient removal process. The specific tools required may vary depending on the design and construction of the light fixture. However, some common tools that are frequently needed include a screwdriver set (both flathead and Phillips head), a pair of gloves to protect hands, safety glasses to shield eyes from potential glass shards, a ladder or step stool, a soft cloth or towel, and a container to hold any screws or small parts that are removed. Having these tools readily available will minimize interruptions and facilitate a safe and systematic approach to removing the glass.
Different types of outdoor light fixtures incorporate varying methods for securing the glass components. Some fixtures utilize screws, while others employ clips, tabs, or retaining rings. Therefore, a thorough examination of the fixture is necessary to identify the specific type of mechanism used to hold the glass in place. Look for any visible screws around the perimeter of the glass or on the fixture body. If screws are present, determine the type of screwdriver required to remove them. Alternatively, if clips are used, carefully inspect how they are attached and how they can be disengaged. Retaining rings typically require a slight twist or pressure to release the glass panel. Understanding the specific attachment method will inform the subsequent steps and prevent unnecessary force, which could potentially damage the fixture or the glass.
Identifying and Removing Fasteners
The first step in physically removing the glass involves addressing any fasteners that secure it to the fixture. This step demands careful attention to detail to avoid damaging the fixture or the glass itself. If screws are present, use the appropriate screwdriver to loosen and remove them. It is crucial to use the correct size and type of screwdriver to prevent stripping the screw heads, which can make removal significantly more difficult. Once the screws are loosened, carefully remove them and place them in a container to prevent them from getting lost. If clips are used, gently pry them open or slide them to release the glass. Avoid applying excessive force, as this can break the clips or damage the surrounding fixture components. If the fixture utilizes a retaining ring, carefully twist or press the ring in the direction indicated by the manufacturer (if applicable) to release the glass. The goal is to systematically and gently release the glass without causing any undue stress on the assembly.
After removing the fasteners, the glass may still be held in place by its own weight or by a sealant. To safely remove the glass, provide support from below to prevent it from falling and potentially shattering. Use one hand to gently grasp the glass while using the other hand to carefully loosen it from the fixture. If the glass appears to be stuck, avoid forcing it. Instead, try gently wiggling it back and forth to break any seal that may be present. In some cases, a thin blade, such as a putty knife or utility knife, can be carefully inserted between the glass and the fixture to break the seal. Exercise extreme caution when using a blade to avoid cutting yourself or damaging the fixture. Once the glass is loosened, carefully lower it from the fixture and place it on a soft cloth or towel to prevent scratches or breakage.
Once the glass is removed, it's advisable to inspect the fixture for any signs of corrosion, deterioration, or damage. This inspection allows for the identification of potential issues that may require attention or repair. Check the wiring for any signs of fraying, cracking, or loose connections. If any wiring issues are detected, it is recommended to consult a qualified electrician to address them. Examine the fixture body for rust, cracks, or other forms of damage. Cleaning the fixture at this stage can also improve its appearance and functionality. Use a soft cloth and a mild cleaning solution to remove any dirt, debris, or residue that may have accumulated. This proactive maintenance can help prolong the lifespan of the outdoor light fixture.
Addressing Stubborn or Stuck Glass
Situations may arise where the glass is stubbornly stuck to the fixture, defying initial attempts at removal. This often occurs when there is corrosion, dirt buildup, or the presence of adhesive or sealant. In such cases, employing specific techniques can help loosen the glass without resorting to excessive force. A gentle heating method can be effective in softening any adhesive or sealant that may be holding the glass in place. Use a hairdryer on a low setting to warm the perimeter of the glass where it meets the fixture. Avoid using a heat gun, as it can generate excessive heat and potentially damage the fixture or the glass. Apply heat evenly and gradually, periodically testing to see if the glass has loosened. Another technique involves using a solvent, such as mineral spirits or WD-40, to dissolve any adhesive or corrosion. Apply the solvent sparingly to the area where the glass is stuck, allowing it to penetrate for a few minutes. Then, gently try to wiggle the glass free. Repeat the application if necessary. Always wear gloves and eye protection when using solvents and ensure adequate ventilation.
In situations where gentle methods fail, a more targeted approach may be required. A putty knife or utility knife can be carefully used to break the seal between the glass and the fixture. Insert the blade between the glass and the fixture at a shallow angle and gently work it around the perimeter. Avoid applying excessive force, as this can crack the glass or damage the fixture. It is crucial to proceed slowly and cautiously, taking breaks as needed to avoid fatigue and maintain control. If the glass is particularly fragile, consider using a plastic putty knife instead of a metal one to minimize the risk of scratching or chipping the glass. Once the seal is broken, carefully remove the glass as described previously.
After successfully removing the glass, it is crucial to properly prepare for the installation of a replacement or for cleaning and reinstallation of the original glass. Before handling the replacement glass, ensure that it is the correct size and shape for the fixture. Compare the new glass to the old glass to verify compatibility. Clean the fixture thoroughly to remove any remaining debris, corrosion, or adhesive residue. Use a soft cloth and a mild cleaning solution to clean the interior and exterior surfaces of the fixture. Pay particular attention to the area where the glass will be installed, ensuring that it is clean and smooth. If necessary, apply a thin layer of silicone sealant to the perimeter of the glass to create a watertight seal and prevent moisture from entering the fixture. This is particularly important for outdoor light fixtures that are exposed to the elements. Allow the sealant to dry completely before reinstalling the glass.
Reinstallation and Final Checks
Once the fixture is cleaned and prepared, carefully reinstall the glass. Align the glass with the fixture opening and gently lower it into place. Ensure that the glass sits flush against the fixture and that there are no gaps or misalignments. If the fixture uses screws, reinstall them one at a time, tightening them evenly to distribute the pressure. Avoid overtightening the screws, as this can crack the glass. If the fixture uses clips, carefully snap them into place, ensuring that they securely hold the glass. If the fixture uses a retaining ring, twist or press the ring into position to lock the glass in place. Once the glass is reinstalled, visually inspect the fixture to ensure that everything is properly aligned and that there are no loose parts. Gently wiggle the glass to confirm that it is securely attached to the fixture.
With the glass reinstalled, the final step involves restoring power to the fixture and verifying its functionality. Return to the electrical panel and switch the circuit breaker or fuse back on. Observe the fixture to ensure that the light turns on and operates correctly. If the light does not turn on, double-check the bulb to ensure that it is properly seated and that it is not burned out. If the bulb is fine, there may be an issue with the wiring or the power supply. In such cases, it is recommended to consult a qualified electrician to diagnose and repair the problem. If the light turns on and operates correctly, perform a final visual inspection to ensure that there are no leaks or other issues. Clean the surrounding area and remove any tools or materials that were used during the removal and reinstallation process.
Proper disposal of broken glass and any related materials is crucial for safety and environmental reasons. Exercise caution when handling broken glass to avoid cuts or injuries. Wear gloves and use a brush and dustpan to collect any shards or fragments. Do not attempt to pick up broken glass with bare hands. Place the broken glass in a sturdy container, such as a cardboard box or a plastic bin, to prevent it from cutting through the garbage bag. Label the container clearly to indicate that it contains broken glass. Check local regulations for specific guidelines on disposing of broken glass. Some jurisdictions may require it to be disposed of separately from regular trash. Dispose of any used solvents, cleaning solutions, or sealant according to the manufacturer's instructions and local regulations. By following these guidelines, one can ensure the safe and responsible disposal of waste materials generated during the glass removal process.

Replacing An Outdoor Light Fixture

Replacing An Outdoor Light Fixture

How To Change An Outdoor Porch Lantern Sconce Light Bulb Simple Diy Do It Yourself Procedure Hq

Preparing To Paint Removing The Porch Lights

How To Change An Outdoor Porch Lantern Sconce Light Bulb Simple Diy Do It Yourself Procedure Hq

Remove Frosted Glass From Light Fixture Tiktok Search

How To Clean Exterior Light Fixtures Full Process Explained

Replace Bulb Of Outdoor Light In 2 Minutes

Can Anyone Help Me Open This Outdoor Wall Fixture To Change The Bulbs

How To Replace Outdoor Wall Light Fixture