How to Install Outdoor Lighting on Lap Siding
Outdoor lighting enhances the ambiance of any home, providing safety and security while creating a welcoming atmosphere. When dealing with lap siding, the installation process requires specific considerations to ensure a seamless and aesthetically pleasing result. This article will guide you through the steps of installing outdoor lighting fixtures on lap siding, providing a clear and informative approach for a successful outcome.
1. Planning and Preparation
Before embarking on the installation, careful planning and preparation are essential. The first step involves determining the location and purpose of the outdoor lighting. Consider the desired light distribution, the type of fixtures, and the overall design aesthetic. Once the plan is finalized, gather the necessary tools and materials, including:
- Outdoor lighting fixtures
- Electrical wire (appropriate gauge for the fixtures)
- Junction box
- Siding trim (if needed)
- Wire connectors
- Electrical tape
- Level
- Measuring tape
- Screwdriver
- Drill
- Safety glasses
- Work gloves
It is crucial to turn off the power to the circuit where the new lighting will be connected. This safety measure is paramount to prevent any electrical hazards during the installation process.
2. Selecting and Mounting the Fixtures
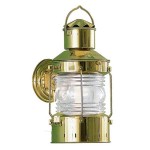
The choice of outdoor lighting fixtures depends on the desired effect and the style of the home. For example, wall sconces, post lights, and hanging lanterns are popular options for lap siding. Once the fixtures are chosen, determine the mounting location.
For wall-mounted fixtures, consider the placement of the light source. Avoid obstructing the view from windows or doors. For post lights, ensure they are firmly anchored to the ground or deck surface. When mounting the fixtures, use suitable screws and anchors that correspond to the siding material and weight of the fixture.
3. Running the Electrical Wiring
Running electrical wiring is a critical step in outdoor lighting installation. If existing wiring is available, it can be tapped into for the new fixtures. However, if new wiring needs to be installed, follow these steps:
- Plan the wire route, avoiding any obstacles or obstructions.
- Use an electrical fish tape to guide the wire through the walls or siding.
- Secure the wire to the wall using staples, cable ties, or other approved methods.
- When running the wire, ensure it is adequately insulated to prevent grounding issues.
Once the wiring is in place, connect it to the junction box and the fixtures. Connect the wires according to the fixtures' instructions, ensuring proper grounding and polarization.
4. Finishing Touches
After the fixtures are mounted and the wiring is connected, the final steps involve completing the installation. This includes:
- Testing the fixtures to ensure they are working correctly.
- Restoring the power to the circuit.
- Adding any necessary trim or decorative elements to enhance the aesthetic appeal.
It is recommended to clean the fixtures and the surrounding area to maintain the overall appearance and functionality of the lighting.

New House Siding How Do I Install Outdoor Lights On This Bracket Doityourself Com Community Forums

Proper Installation Of Outdoor Lantern Lamp On Lap Siding Diy Home Improvement Forum

How To Install An Outdoor Light Fixture The Right Way

How To Install An Exterior Wall Light On Lap Siding

How To Install Lighting On Old Wood Lap Siding A Step By Guide Kyinbridges Com

Proper Installation Of Outdoor Lantern Lamp On Lap Siding Diy Home Improvement Forum

Vinyl Siding Lights How To Mount Using A Mounting Block Diy

Exterior Light On Vinyl Siding

Outdoor Light Fixture Change Up

How To Install An Exterior Wall Light On Lap Siding