How to Install Kichler Outdoor Lighting
Kichler is a renowned brand recognized for its high-quality, stylish, and durable outdoor lighting fixtures. Whether you're looking to enhance security, add ambiance, or simply illuminate your outdoor spaces, Kichler's products offer a wide range of options to meet your needs. Installing Kichler outdoor lighting is a straightforward process that can be achieved with a few essential tools and basic electrical knowledge. This article will guide you through the steps involved in installing Kichler outdoor lighting, ensuring a safe and successful installation.
1. Planning and Preparation
Before commencing the installation, careful planning and preparation are crucial. This phase involves gathering the necessary materials, understanding the electrical requirements, and ensuring safety precautions are in place.
Gathering Materials
Start by considering your desired lighting scheme and choose the appropriate Kichler fixtures. Ensure you have the following materials:
- Kichler outdoor lighting fixtures
- Electrical wire (appropriate gauge and type for your application)
- Electrical junction boxes
- Mounting hardware (screws, brackets, etc.)
- Wire connectors (wire nuts)
- Electrical tape
- A voltage tester
- A level
- A drill (optional)
- Safety glasses
- Work gloves
Understanding Electrical Requirements
Familiarize yourself with the electrical requirements outlined in the Kichler fixture's installation guide. This information will include the voltage, amperage, and wiring type. It's essential to ensure that the fixture is compatible with your existing electrical system.
Safety Precautions
Safety should always be a top priority. Before working with electricity, always disconnect the power supply to the circuit you'll be working on. This is typically achieved by switching off the corresponding breaker at the electrical panel. Additionally, wear appropriate safety gear, including gloves and safety glasses, to protect yourself from electric shock or falling debris.
2. Installing the Fixture
Once the preparation phase is complete, you can proceed with the installation of the Kichler fixture. These steps outline the general process, but it's essential to consult the specific instructions provided with your fixture.
Mounting the Fixture
Begin by mounting the fixture to the desired location. This often involves attaching a mounting bracket to the wall, post, or other surface. Ensure the bracket is securely mounted using screws and anchors if necessary. Use a level to ensure the fixture is level and aesthetically pleasing.
Running the Wiring
Run the electrical wire from the junction box to the fixture. Ensure the wire is properly secured within conduit or wire mold as needed. This step might require the use of a wire cutter to strip insulation from the wire ends.
Connecting the Wires
Connect the wires from the fixture to the wires coming from the junction box. Match the colors of the wires correctly:
- Black (hot)
- White (neutral)
- Green or bare copper (ground)
Secure the connections securely using wire nuts.
Testing and Finishing
Reconnect the power supply at the breaker box and carefully test the fixture. If it illuminates correctly, you can proceed with finishing touches such as installing any decorative elements, adjusting the fixture's angle, and ensuring everything is secure and aesthetically pleasing.
3. Troubleshooting and Maintenance
While Kichler fixtures are built for durability, occasional troubleshooting and routine maintenance are essential to ensure optimal performance. Here are a few common issues and how to address them:
Fixture Doesn't Illuminate
If the fixture doesn't light up, check the following:
- Ensure the breaker is switched on at the electrical panel.
- Verify that the connections are properly made between the wires.
- Test the bulb to ensure it is functional.
Flickering or Dimming
This could be caused by a loose connection, a faulty bulb, or even a problem with the electrical wiring. Inspect the connections, replace the bulb if necessary, and consider calling an electrician if the issue persists.
Fixture Malfunctions
Over time, Kichler fixtures may experience malfunctions. If you notice any issues, such as a broken switch or a damaged lens, consult the installation guide or contact Kichler customer support to address the matter appropriately.
Regular maintenance, such as cleaning the fixture and inspecting the wiring, can help extend the life of your Kichler outdoor lighting. Consider cleaning the fixture with a mild soap and water solution, avoiding harsh chemicals that can damage the finish.
Installing Kichler outdoor lighting can enhance your home's curb appeal and provide valuable illumination. With careful planning, a basic understanding of electrical wiring, and these steps, you can successfully install and enjoy the benefits of Kichler's high-quality lighting solutions.

How To Install Outdoor Light Fixtures Be Your Own Handyman Home

Kichler Connects Quick Start Guide Lighting

Kichler Outdoor Lighting Defines Your Style

How To Install Outdoor Landscape Lighting On A Tiny Home The

How To Install Outdoor Landscape Lighting On A Tiny Home The

How To Install Low Voltage Outdoor Landscape Lighting The Garden Glove

Step Up Your Project With Lights Kichler Lighting

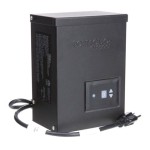
Kichler Lighting Landscape Smart Transformer

Landscape Lighting 101 Bob Vila

Installing Outdoor Lighting In Fall And Winter Limelight
Related Posts