How To Install An Outdoor Light Fixture On Siding
Installing an outdoor light fixture enhances curb appeal, improves security, and adds functionality to outdoor spaces. This guide provides a comprehensive overview of the installation process for mounting a light fixture directly onto existing siding. Adherence to local building codes and safe electrical practices is paramount throughout this process. Always consult a qualified electrician if there are any uncertainties or if local regulations require it.
Planning and Preparation
Before beginning any electrical work, disconnect the power to the circuit at the main breaker box. Confirm the power is off using a non-contact voltage tester. Choosing the right location for the fixture is crucial. Consider the intended purpose of the light, the architectural style of the house, and the proximity to other fixtures or obstructions. Gather all necessary tools and materials, including the light fixture, mounting block, electrical box, wire connectors, wire strippers, screwdriver, drill, appropriate drill bits for the siding material, and silicone caulk.
Determine if the chosen location has existing wiring. If wiring is present, identify the type and gauge of the wire to ensure compatibility with the new fixture. If no wiring exists, running a new cable from the main electrical panel to the fixture location will be necessary. This often requires professional expertise due to the complexities and potential hazards involved.
Mounting the Electrical Box
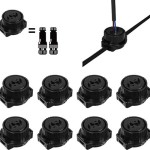
If working with vinyl siding, a mounting block specifically designed for use with this type of siding is essential. This block provides a secure and stable platform for the electrical box while maintaining the integrity of the siding's weatherproofing. Attach the mounting block directly to the siding, following the manufacturer’s instructions. Typically, this involves removing a small section of siding and securely fastening the block to the underlying wall sheathing.
For other siding materials like wood or fiber cement, a different approach may be required. It might be possible to mount the electrical box directly to the siding, using appropriate fasteners and ensuring a watertight seal. Consult the manufacturer’s instructions for the specific siding material being used.
Once the mounting block (if used) is securely attached, install the electrical box. The box should be weatherproof and appropriately rated for outdoor use. Securely fasten the box to the mounting block or directly to the siding, ensuring it is flush and level.
Wiring the Light Fixture
With the electrical box installed, carefully feed the wiring through the designated opening in the back of the box. Connect the wires from the fixture to the wires in the electrical box according to the fixture's instructions and local electrical codes. Typically, this involves connecting black wires together, white wires together, and ground wires together using approved wire connectors. Securely tighten the connectors to ensure a reliable connection.
Ensure all wire connections are neatly tucked inside the electrical box. Overcrowding the box can make it difficult to install the fixture and could create a fire hazard. Carefully mount the fixture to the electrical box, following the manufacturer's instructions. Typically, this involves aligning the fixture with the mounting holes on the electrical box and securing it with screws.
Sealing and Finishing
Once the fixture is mounted, apply a bead of silicone caulk around the perimeter where the fixture meets the siding. This creates a weathertight seal, preventing moisture from entering the electrical box and causing damage. Smooth the caulk with a damp finger for a clean, professional finish.
After the caulk has dried, restore power to the circuit at the main breaker box. Test the fixture to ensure it is functioning correctly. If the fixture does not work, double-check all connections and consult a qualified electrician if necessary. Replace any removed sections of siding, ensuring a proper fit and secure attachment. For vinyl siding, this typically involves snapping the siding back into place.
Safety Precautions
Working with electricity can be dangerous. Always disconnect the power before starting any electrical work. Use a non-contact voltage tester to confirm the power is off. If unsure about any aspect of the installation process, consult a qualified electrician. Following these precautions will help ensure a safe and successful installation.
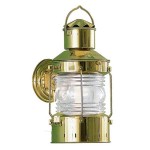
Choosing the Right Fixture
Selecting the correct outdoor light fixture involves considering factors such as the desired lighting effect, the style of the house, and the fixture's durability. Different fixtures offer varying levels of brightness, light distribution patterns, and weather resistance. Choosing a fixture that complements the home's aesthetics and withstands the elements is crucial for long-term satisfaction.

How To Install An Outdoor Light Fixture The Right Way

New House Siding How Do I Install Outdoor Lights On This Bracket Doityourself Com Community Forums

Vinyl Siding Lights How To Mount Using A Mounting Block Diy

How To Install An Exterior Electrical Box For A Light Fixture On The Wood Siding

Replacing An Outdoor Light Fixture

Top Tips Replacing An Outdoor Wall Sconce Porch Daydreamer

How To Install An Exterior Light Fixture On Vinyl Siding

Replacing An Outdoor Light Fixture

How To Install A Porch Light

How To Install An Outdoor Light Fixture The Right Way