How To Hang Outdoor String Lights On Awning
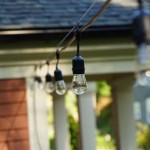
Outdoor string lights are a popular and beautiful way to add ambiance and charm to any outdoor space. Hanging them on an awning can create a cozy and inviting atmosphere for evening gatherings, especially when paired with comfortable outdoor furniture. While hanging string lights on an awning may seem straightforward, there are a few key steps to ensure they are installed correctly and securely. This guide provides a comprehensive step-by-step process, ensuring your string lights hang securely and beautifully for many seasons to come.
1. Choose the Right String Lights
The first step in hanging outdoor string lights on an awning is to choose the right type of lights. There are many different types of string lights available, each with its own unique advantages and disadvantages. Consider the following factors when making your selection:
- Light Source: LED, incandescent, or solar powered
- Bulb Type: Globe, Edison, or fairy lights
- Length: Choose a length that will adequately cover the awning and provide the desired lighting effect.
- Color: White, warm white, or colored lights
- Durability: Look for lights designed for outdoor use and made with weather-resistant materials.
For awnings, consider choosing lights with a longer cord to reach the power source, especially if your awning extends beyond an outlet. If the awning is a significant distance from a power outlet, consider using extension cords that are also designed for outdoor use.
2. Measure and Plan Your Installation
Before installing the lights, it's crucial to measure and plan their placement. This will ensure the lights are evenly spaced and aesthetically pleasing.
- Measure the awning: Determine the length and width of the awning to estimate the number of string lights needed and calculate the spacing between them.
- Consider the placement of the power source: Identify the location of the nearest electrical outlet and plan how you will run the extension cord to the awning.
- Visualize the desired lighting effect: Determine if you prefer a more evenly spaced look or a more clustered arrangement.
For a visually appealing arrangement consider:
- Horizontal or diagonal lines: Hanging lights in straight lines across the awning can create a modern and sleek look. Hanging lights at a diagonal angle can provide a more dynamic and interesting display.
- Curving patterns: For a romantic and whimsical look, you can hang the lights in a curved pattern, following the shape of the awning.
While planning, visualize the overall impact of the lights, particularly at night. The ideal positioning ensures the lights illuminate the space evenly and add to the desired ambiance.
3. Install the Lights Securely
Once you've chosen the right lights and planned their placement, it's time to install them securely. Here's a step-by-step guide:
- Attach clips or hooks: If the awning has a solid frame, you can use clips or hooks to attach the lights directly to the frame. Choose clips or hooks that are strong enough to support the weight of the string lights. If clips are not available, consider using outdoor-rated zip ties or small screws.
- Use wire ties: For a more temporary solution, use wire ties to attach the lights to the awning's frame. It is important to ensure the wire ties are properly anchored to avoid any loose ends or potential safety hazards.
- Install a line of lights: Start by attaching the lights to one end of the awning and then work your way across. Ensure the lights are evenly spaced and securely fastened.
- Conceal cords: Once the lights are installed, you can use cable ties or zip ties to neatly secure the cords. Ensure the cords are not exposed to any potential hazards, like sharp edges or moving parts.
- Plug in the lights: Once the lights are installed and the cords are secured, plug them in and admire your work. Remember to turn off the lights before connecting them to the power source, and check for any loose connections before powering them on.
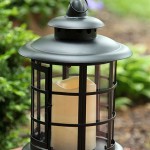
You can add a finishing touch by incorporating additional decorative elements like lanterns, plants, or even small fairy lights to enhance the overall ambiance.
Remember to test the lights after installation to ensure they work properly and are securely attached. Regularly check for any loose wires, faulty bulbs, or signs of wear. If you encounter any issues, you can easily replace them with spare bulbs or connectors.
By following these steps, you can successfully hang outdoor string lights on your awning, creating a beautiful and inviting outdoor space for your enjoyment. Choose the right lights, plan their placement, and install them securely, and you'll be able to enjoy the ambiance of your new outdoor lighting for years to come.

A Canopy Of String Lights In Our Backyard Gray House Studio

Diy Patio Arbor Using String Lights The Honeycomb Home

How To Hang Patio Lights

A Canopy Of String Lights In Our Backyard Gray House Studio

Diy Patio Arbor Using String Lights The Honeycomb Home

How To Hang String Lights On A Covered Patio Without Nails

Diy Patio Arbor Using String Lights The Honeycomb Home

20 Amazing Backyard String Light Ideas For A Dreamy Ambiance

How To Hang Festoon Lights On A Covered Patio And Along Fences

How To Add Lights A Pergola Or Pavilion Pergolakitsusa Com
Related Posts