How to Change Outdoor Porch Lights
Updating your outdoor porch lights can be a simple yet effective way to enhance your home's curb appeal and improve safety at night. Whether you're replacing burnt-out bulbs, upgrading to more energy-efficient options, or simply want a fresh look, changing porch lights is a relatively straightforward task. This guide will walk you through the process step-by-step, providing clear instructions and safety tips to help you complete the project successfully.
1. Gather Tools and Supplies
Before you begin, ensure you have all the necessary tools and supplies on hand. This will make the process smoother and prevent any delays. Here's a checklist of what you'll likely need:
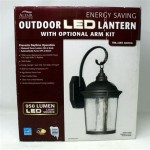
- New light bulbs (compatible with your fixture)
- A ladder (tall enough to safely reach the fixture)
- A screwdriver (matching the screws on the fixture)
- A pair of gloves (for protection)
- A flashlight (for better visibility)
- Optional: A voltage tester (to confirm power is off)
It's always a good idea to have extra supplies on hand, such as spare bulbs or screws, in case of any unexpected issues.
2. Turn Off Power
Safety is paramount when working with electricity. Before you touch any wires or the light fixture itself, it's crucial to de-energize the circuit. Locate the circuit breaker that controls the outdoor porch light in your electrical panel. Turn the breaker off to completely cut off power to the fixture.
If you're unsure about which breaker controls the light, use a voltage tester to confirm that power is off. Touch the tester's probes to the wire terminals within the light fixture. If the tester doesn't light up, power is off. Always double-check to avoid accidental shocks.
3. Remove the Old Bulb
Once the power is off, you can safely remove the old bulb. If your fixture has a glass globe or shade, carefully remove it first. Then, use a screwdriver to loosen and remove the light bulb. Be careful not to drop the bulb, as it might break.
Before discarding the old bulb, check its type and wattage. This will help you choose the appropriate replacement bulb. If you're replacing a standard incandescent bulb, you might consider upgrading to a more energy-efficient LED bulb.
4. Install the New Bulb
With the old bulb removed, carefully insert the new bulb into the socket. Twist the bulb clockwise until it's securely fastened. If you're installing an LED bulb, ensure it's properly inserted and aligned with the socket.
If your fixture has a glass globe or shade, carefully replace it after installing the bulb. Make sure it's securely fitted and doesn't obstruct the bulb's light output.
5. Turn Power Back On
Once the new bulb is installed, you can turn the power back on. Go back to the electrical panel and carefully flip the circuit breaker back to the "on" position. The light should now illuminate, indicating successful installation.
If the light doesn't come on, double-check the following:
- Ensure the new bulb is properly inserted and secured.
- Verify that the circuit breaker is turned on.
- Make sure the power is connected to the fixture (check the wires if necessary).
If you continue to have issues, it's best to consult an electrician for assistance.

Preparing To Paint Removing The Porch Lights

Replacing Outdated Porch Lights Megan Plus Five

Easy Outdoor Light Fixture Update 20 Minute Diy Upgrade

How To Change An Outdoor Porch Lantern Sconce Light Bulb Simple Diy Do It Yourself Procedure Hq

Replacing An Outdoor Light Fixture

How To Install Replace Outdoor Light Easy Simple

How To Replace An Outside Light Step By Porch Upgrade

How To Change An Outdoor Light Fixture Do It Best

How To Change Porch Light Bulb

Replacing An Outdoor Light Fixture
Related Posts