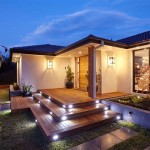
How To Build An Outdoor Kitchen With Steel Studs
The allure of outdoor entertaining has spurred a significant trend in home improvement: the outdoor kitchen. The ability to cook and socialize in the open air offers a unique appeal, extending living spaces and providing a relaxed atmosphere. Traditionally, outdoor kitchens were constructed with wood, but steel studs are gaining popularity as a durable, cost-effective, and fire-resistant alternative. This article details the process of constructing an outdoor kitchen using steel studs, providing a comprehensive guide for homeowners and contractors alike.
The choice of materials is a crucial first step. While wood offers a certain aesthetic appeal, it is susceptible to rot, insect infestation, and fire damage. Steel studs, on the other hand, offer superior resistance to these elements, making them a more durable and long-lasting option for outdoor applications. Furthermore, steel is less prone to warping and shrinking, ensuring a stable and consistent framework for the kitchen structure.
Planning is paramount before commencing any construction project. The design phase should consider several factors, including the available space, desired functionality, and budget. The location of the kitchen should be carefully selected, taking into account proximity to the house, prevailing winds, and access to utilities such as gas, water, and electricity.
A detailed plan should include the layout of the kitchen, the dimensions of the structure, and the placement of appliances such as grills, refrigerators, and sinks. It is also essential to factor in storage space for cookware, utensils, and other supplies. The design should also address the overall aesthetic, considering the materials and finishes that will complement the surrounding landscape.
Securing the necessary permits is a critical administrative step that should not be overlooked. Local building codes vary significantly, and it is essential to ensure that the project complies with all applicable regulations. This may involve submitting plans to the local building department and obtaining permits for construction, electrical work, and plumbing.
Failure to obtain the necessary permits can result in fines, delays, and even the forced removal of the structure. It is advisable to consult with the local building department early in the planning process to understand the specific requirements for the project.
Key Point 1: Foundation Preparation and Framing with Steel Studs
The foundation is the bedrock upon which the entire outdoor kitchen rests. A solid and stable foundation is crucial for ensuring the longevity and structural integrity of the structure. There are several options for foundations, including concrete slabs, pavers, and gravel beds. The choice of foundation will depend on the size and complexity of the kitchen, as well as the soil conditions.
A concrete slab is generally the most stable and durable option, providing a level surface for the kitchen structure. It involves pouring a concrete slab over a prepared base of gravel and compacted soil. The slab should be properly reinforced with rebar to prevent cracking and settling.
Pavers offer a more aesthetically pleasing option, allowing for a wider range of design possibilities. They are typically installed over a compacted gravel base and can be set in sand or mortar. While pavers are not as structurally stable as a concrete slab, they can provide an adequate foundation for smaller, less complex outdoor kitchens.
Once the foundation is in place, the next step is to frame the structure with steel studs. Steel studs are lightweight and easy to work with, making them an ideal material for DIY projects. They are also resistant to rot, insects, and fire, making them a durable and long-lasting option for outdoor applications.
The steel studs should be cut to the appropriate lengths using a metal-cutting saw or shears. They are then assembled using screws or rivets to create the framework for the kitchen. It is essential to ensure that the frame is square and level before proceeding to the next step.
The spacing of the studs will depend on the load-bearing requirements of the structure. Typically, studs are spaced 16 inches or 24 inches on center. It is also important to provide adequate support for countertops and appliances, reinforcing the frame as needed.
Key Point 2: Running Utilities and Installing Backer Boards
Before enclosing the steel stud frame, it is crucial to run all necessary utilities, including gas lines, water lines, and electrical wiring. This should be done by qualified professionals to ensure safety and compliance with local codes. The placement of utilities should be carefully planned to accommodate the location of appliances and fixtures.
Gas lines should be installed by a licensed gas fitter, ensuring that they are properly sealed and leak-tested. Water lines should be installed by a licensed plumber, ensuring that they are properly insulated to prevent freezing in cold weather. Electrical wiring should be installed by a licensed electrician, ensuring that it is properly grounded and protected from moisture.
After the utilities have been installed, the next step is to install backer boards on the steel stud frame. Backer boards provide a solid surface for attaching exterior finishes, such as stone veneer, tile, or stucco. Cement board is a popular choice for backer boards, as it is water-resistant and durable.
The backer boards should be cut to the appropriate size and attached to the steel studs using screws. It is important to ensure that the backer boards are properly aligned and secured to prevent them from sagging or shifting over time. The seams between the backer boards should be taped and sealed with a waterproof membrane to prevent moisture from penetrating the structure.
The choice of backer board will influence the type of exterior finish that can be applied. For example, cement board is suitable for tile, stone veneer, and stucco, while plywood may be more appropriate for wood siding or paneling.
Key Point 3: Exterior Finishes and Countertop Installation
The exterior finish is what gives the outdoor kitchen its aesthetic appeal. There are many options for exterior finishes, including stone veneer, tile, stucco, brick, and wood siding. The choice of finish will depend on the overall design of the kitchen and the surrounding landscape.
Stone veneer is a popular choice for outdoor kitchens, as it provides a natural and elegant look. It is available in a wide range of colors and styles, and can be installed using mortar or adhesive. Tile is another popular option, offering a durable and easy-to-clean surface. It is available in a wide range of colors, sizes, and patterns, allowing for a variety of design possibilities.
Stucco is a classic choice for outdoor kitchens, providing a smooth and seamless finish. It is durable and weather-resistant, and can be painted to match the surrounding landscape. Brick is a traditional choice for outdoor kitchens, providing a rustic and charming look. It is durable and fire-resistant, and can be used to create a variety of patterns and designs.
Once the exterior finish is complete, the next step is to install the countertops. Countertops are a crucial element of any outdoor kitchen, providing a surface for food preparation, serving, and socializing. There are many options for countertops, including granite, concrete, stainless steel, and tile.
Granite is a popular choice for outdoor countertops, as it is durable, heat-resistant, and easy to clean. It is available in a wide range of colors and patterns, and can be sealed to prevent staining. Concrete is another popular option, offering a modern and industrial look. It can be custom-colored and textured to create a unique design.
Stainless steel is a durable and sanitary option for outdoor countertops, making it ideal for food preparation. It is heat-resistant and easy to clean, but can be prone to scratches and dents. Tile is a versatile option for outdoor countertops, offering a wide range of colors, sizes, and patterns. It is durable and easy to clean, but can be prone to cracking and chipping in cold weather.
The installation of appliances should be completed after the countertops are in place. Ensure all connections are secure and compliant with local codes. Consider built-in grills, side burners, refrigerators, and sinks to complete the outdoor kitchen functionality.
Landscaping around the outdoor kitchen can enhance its appeal and integrate it into the outdoor living space. Select plants that are appropriate for the climate and require minimal maintenance. Adequate lighting is essential for evening use, plan for ambient and task lighting to create a comfortable and functional cooking and dining area.

How To Build An Outdoor Kitchen With Metal Studs Plans Island

Outdoor Kitchen Framing 11 Helpful Facts You Should Know

How To Build A Bbq Island With Steel Studs Thegrill Com

How To Build An Outdoor Kitchen With Metal Studs My Guides

How To Build A Bbq Island With Steel Studs Thegrill Com

Outdoor Kitchen Steel Stud Shapes Plans Diy Island

Why Choose Sumo Frames Outdoor

Rolling Outdoor Island Building Plans Pneumatic Addict

Do You Know How To Build An Outdoor Kitchen With Metal Studs If Not Re In The Rig Plans Countertops

How To Build An Outdoor Kitchen With Metal Studs My Guides
Related Posts


