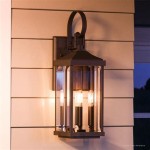
DIY Mason Jar Outdoor Solar Lights with Timer
Transform your outdoor space into a magical oasis with the warm glow of DIY Mason Jar Solar Lights with Timer. This project combines the charm of rustic mason jars with the practicality of solar-powered lighting, creating a beautiful and sustainable addition to any garden, patio, or walkway. By integrating a timer, you can enjoy the convenience of automatic illumination, ensuring your lights turn on at dusk and off at dawn.
Materials You’ll Need
Before embarking on your DIY journey, make sure you have the following materials readily available:
- Mason jars (various sizes and styles)
- Solar-powered LED lights with timer (ensure they fit comfortably within the chosen jars)
- Wire cutters
- Hot glue gun and glue sticks
- Sandpaper (optional, for a distressed or rustic look)
- Decorative elements (twine, burlap, ribbons, faux flowers, etc.)
Step-by-Step Guide
Follow these simple steps to create your own enchanting mason jar solar lights:
-
Prepare the Jars:
Clean the mason jars thoroughly to remove any residue or dust. If desired, you can use sandpaper to create a distressed or rustic effect on the glass. For a more polished look, leave the jars as is. -
Attach the Solar Lights:
- Carefully remove the solar panel from the LED light fixture, ensuring that you don’t damage any wires.
- Use hot glue to attach the solar panel to the bottom exterior of the mason jar. Ensure the panel is secure and can effectively capture sunlight.
- Gently insert the LED light fixture into the jar. If necessary, use wire cutters to trim the wires to a suitable length. Secure the LED fixture with hot glue if needed.
-
Decorate the Jars:
Let your creativity run wild! Decorate the jars to match your personal style and outdoor decor. Wrap twine or burlap around the jar, add ribbons, or use faux flowers for a touch of elegance. -
Position the Lights:
Place the finished mason jar lights in strategic locations within your outdoor space. Ensure that the solar panels are exposed to direct sunlight during the day to charge properly. -
Choose high-quality solar lights:
Invest in durable and efficient solar lights that offer ample brightness and long-lasting battery life. -
Position for optimal sunlight:
Locate the lights where the solar panels will receive maximum sunlight exposure throughout the day. -
Regularly clean the solar panels:
Dust and debris impacting the solar panels can hinder their charging efficiency. Regularly clean the panels with a damp cloth to maintain their performance. -
Use a timer:
Consider using solar lights equipped with a timer for automatic activation at dusk. This feature adds convenience and ensures your lights illuminate your outdoor space at the optimal time. -
Experiment with different jar styles:
Explore various sizes and shapes of mason jars to create a unique and visually appealing display.
Tips for Success
Here are some tips for maximizing the effectiveness and longevity of your DIY mason jar solar lights:
By following these steps and incorporating your own personal touch, you can create a stunning and functional outdoor lighting display that will enhance the beauty of your space. Remember to choose durable and reliable lighting components, ensure proper installation and maintenance, and most importantly, have fun with the creative process!

Mason Jar Solar Lights

Mason Jar Solar Lights
Hanging Solar Mason Jar Lights Dollar Tree Diy Craft Idea Joyfully Treasured

Mason Jar Solar Lights

Diy Solar Mason Jar Lights Illuminate Your Yard With Creative Ambiance Chas Crazy Creations

Mason Jar Solar Lights For Kids Tinkerlab

Mason Jar Solar Lights

5 Gorgeous Outdoor Mason Jar Lights The Garden Glove

Mason Jar Solar Lights

Diy Solar Mason Jar Lights Illuminate Your Yard With Creative Ambiance Chas Crazy Creations
Related Posts
