How to Install Outdoor LED Landscape Lighting
Outdoor LED landscape lighting significantly enhances a property's aesthetic appeal, security, and usability after dark. The installation process, while achievable for many homeowners, requires careful planning, preparation, and adherence to safety protocols. This article provides a comprehensive guide on how to install outdoor LED landscape lighting effectively.
Before commencing the installation, it’s crucial to understand the project scope. This includes determining the desired lighting effects, identifying suitable fixture locations, and assessing power requirements. LED lighting offers energy efficiency and long lifespan, making it an excellent choice for outdoor applications.
The first step involves conceptualizing the lighting design. Consider the areas you wish to illuminate, such as pathways, gardens, architectural features, and water features. Different types of fixtures create distinct visual effects. Spotlights highlight architectural details or specific plants, while path lights provide illumination for walkways. Floodlights offer broader coverage, and well lights are recessed into the ground to provide upward illumination. Understanding these options allows for a tailored lighting scheme.
Planning and Preparation
Effective planning is paramount for a successful landscape lighting installation. This phase involves several critical steps, ensuring that the project proceeds smoothly and safely.
Firstly, create a detailed lighting plan. Sketch a layout of your property and mark the intended locations for each fixture. Note the type of fixture, its wattage, and the desired beam angle. This visual representation serves as a roadmap throughout the installation process.
Next, calculate the total wattage required for the entire system. This calculation is essential for selecting the appropriate transformer. The transformer converts standard household voltage (typically 120V) to a lower voltage (usually 12V or 24V) suitable for LED landscape lighting. The transformer's wattage capacity must exceed the total wattage of all fixtures to prevent overloading. Add a safety margin of approximately 20% to the total wattage to account for future expansion or fluctuations in power consumption.
Procure the necessary materials and tools. This includes the LED fixtures, transformer, low-voltage cable, wire connectors, cable stakes, and a multimeter. Tools required are a shovel or trenching tool, wire strippers, wire crimpers, a screwdriver, a hammer, and safety glasses. Ensure that all materials are rated for outdoor use and suitable for direct burial.
Contact your local municipality to inquire about any required permits or inspections for landscape lighting installations. Some areas may have specific regulations regarding wiring, fixture placement, or light pollution. Obtaining the necessary permits ensures compliance with local codes and avoids potential fines or penalties.
Before digging, contact your local utility company to locate underground utilities. This step is crucial to prevent accidental damage to buried cables, pipes, or other infrastructure. Mark the locations of underground utilities clearly before beginning any excavation.
Installation Process
The installation process involves several distinct phases, each requiring careful attention to detail. Following these steps ensures a safe and functional landscape lighting system.
Begin by installing the transformer. Choose a location that is accessible, well-ventilated, and protected from the elements. The transformer should be mounted on a sturdy surface, such as a wall or post, at least 12 inches above ground level. Connect the transformer to a GFCI-protected outlet. GFCI outlets provide protection against electrical shock and are essential for outdoor applications.
Next, lay the low-voltage cable. Dig shallow trenches along the planned routes for the cable. The depth of the trenches should be sufficient to protect the cable from damage, typically 6-8 inches. Run the cable from the transformer to each fixture location. Avoid sharp bends or kinks in the cable, as these can damage the insulation and reduce the cable's lifespan.
Connect the fixtures to the low-voltage cable. Use waterproof wire connectors to ensure a secure and weather-resistant connection. Strip the insulation from the ends of the cable and the fixture wires, then twist the wires together and secure them with the wire connectors. Bury the connections underground to protect them from the elements. Alternatively, use direct burial connectors to avoid using junction boxes.
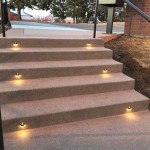
Position and secure the fixtures. Place each fixture in its designated location according to the lighting plan. Use cable stakes to secure the low-voltage cable to the ground, preventing it from being accidentally pulled or damaged. Adjust the fixture's aiming angle to achieve the desired lighting effect. For spotlights, focus the beam on the target object, such as a tree or architectural detail. For path lights, ensure that the light is directed downward to illuminate the walkway without causing glare.
Test the system. Once all fixtures are connected, turn on the transformer and verify that each fixture is functioning correctly. Use a multimeter to check the voltage at each fixture. The voltage should be within the acceptable range specified by the manufacturer. If any fixtures are not working, check the connections and wiring for any issues.
Bury the cables and backfill the trenches. Once the system is tested and verified to be working correctly, carefully bury the low-voltage cables in the trenches. Backfill the trenches with soil, ensuring that the cables are adequately covered and protected. Tamp down the soil to prevent settling and ensure a level surface.
Safety Considerations
Safety is paramount when installing outdoor landscape lighting. Adhering to safety guidelines minimizes the risk of electrical shock, injury, or property damage.
Always disconnect the power before working on any electrical components. Turn off the circuit breaker that supplies power to the GFCI outlet before connecting or disconnecting any wires. This prevents accidental electrical shock and ensures a safe working environment.
Wear appropriate safety gear. Safety glasses protect your eyes from debris while digging or working with tools. Gloves protect your hands from sharp objects or electrical hazards. Closed-toe shoes provide protection for your feet.
Use GFCI-protected outlets. GFCI outlets are designed to detect ground faults and interrupt the flow of electricity, preventing electrical shock. Ensure that the transformer is connected to a GFCI-protected outlet for added safety.
Use waterproof connectors and direct burial cable. These materials are designed to withstand outdoor conditions and prevent water from entering the electrical system. This minimizes the risk of electrical shorts and ensures the longevity of the lighting system.
Avoid burying cables near sharp rocks or objects. These can damage the cable insulation and create a safety hazard. If necessary, protect the cable with conduit or additional layers of soil.
Comply with local electrical codes. Your local municipality may have specific regulations regarding outdoor lighting installations. Ensure that the installation complies with all applicable codes and regulations to prevent potential fines or penalties.
It is crucial to select LED fixtures that are designed for outdoor use. Look for fixtures with a high IP (Ingress Protection) rating. The IP rating indicates the fixture's resistance to dust and water. A higher IP rating signifies greater protection. For example, a fixture with an IP65 rating is dust-tight and protected against water jets, making it suitable for most outdoor applications.
Proper grounding is also vital for safety. The transformer should be properly grounded according to the manufacturer's instructions and local electrical codes. Grounding protects against electrical shock and ensures that any fault current is safely dissipated.
Consider the environmental impact of your lighting choices. Use low-wattage LED fixtures to minimize energy consumption. Direct the light downwards to avoid light pollution and minimize disruption to nocturnal wildlife. Choose fixtures with adjustable brightness levels to further reduce energy consumption and customize the lighting to suit your needs.
Regular maintenance is essential to keep your landscape lighting system functioning safely and efficiently. Inspect the fixtures and wiring regularly for any signs of damage or wear. Replace any damaged components promptly. Clean the lenses of the fixtures to remove dirt and debris, ensuring optimal light output.

Install Landscape Lighting For Added Curb Appeal

The Easiest Way To Install Low Voltage Landscape Lighting Abby Organizes

The Easiest Way To Install Low Voltage Landscape Lighting Abby Organizes

Outdoor Low Voltage Lighting Diy Family Handyman

Led Landscape Lighting Installation Tips Proper Voltage

How To Install Landscape Lighting The Home Depot

Easy Outdoor Lighting With Solar Led Landscape Lights Average But Inspired

Planning Your Low Voltage Outdoor Landscape Lighting 1000bulbs Blog

Our Home From Scratch

How To Install Outdoor Low Voltage Led Step Lights Mullan Lighting
Related Posts