Wiring Diagram For Outdoor Light Switch: A Comprehensive Guide
Installing an outdoor light switch can enhance both functionality and security for your home. A well-lit exterior provides safety and visibility at night, deterring potential intruders and making it easier for guests to find your entrance. This guide will delve into the essential aspects of wiring a basic outdoor light switch installation, offering a clear understanding of the components involved and the steps required for a successful project.
Understanding the Components
Before embarking on the installation, it is crucial to familiarize yourself with the key components that make up an outdoor light switch circuit. These components work together to provide a safe and functional electrical connection for your outdoor lighting.
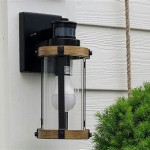
- Outdoor Light Fixture: This is the actual light source, typically a weatherproof fixture designed for outdoor use. It contains the bulb socket, the switch, and the mounting plate.
- Outdoor Light Switch: This switch controls the flow of electricity to the light fixture. It is usually located inside your home and can be a single-pole switch, a 3-way switch, or a dimmer switch.
- Electrical Wires: These wires carry electricity from the power source to the switch and the light fixture. They are typically color-coded for easy identification: black (hot), white (neutral), and green (ground).
- Junction Box: This box serves as a central point where the wires from different components are connected. It is crucial to choose a weatherproof junction box for outdoor installations.
- Circuit Breaker: The circuit breaker acts as a safety device, interrupting the flow of electricity to the circuit in case of an overload, malfunction, or short circuit.
Steps for Installing an Outdoor Light Switch
The installation of an outdoor light switch involves several steps, each requiring careful attention to detail and adherence to safety protocols.
- Planning and Preparation: Before starting the installation, carefully plan the location of the switch and the light fixture. Determine the type and wattage of bulb you will require. Ensure the switch is easily accessible and that the light fixture is mounted in an area that provides adequate illumination without posing hazards.
- Turning Off Power: Safety is paramount. Before working with any electrical wiring, always turn off power to the circuit at the breaker box. Verify that the power is off by testing the circuit with a non-contact voltage detector.
- Running Electrical Wires: Run the electrical wires from the junction box to the switch and the light fixture. If you are adding a new circuit, you may need to run wires from the breaker box to the junction box. Follow local electrical codes and use appropriate wire sizes for your application. Securely fasten the wires in place using staples, wire clips, or conduit.
- Connecting Wires at the Junction Box: Connect the wires at the junction box. Join the black (hot) wire from the light fixture to the black (hot) wire from the switch. Connect the white (neutral) wire from the light fixture to the white (neutral) wire from the switch. Connect the green (ground) wires from both the fixture and the switch to the green (ground) wire in the junction box. Use wire connectors to securely join the wires.
- Connecting Wires at the Switch: Connect the wires at the switch. Connect the black (hot) wire from the junction box to the terminal on the switch marked "Line" or "L". Connect the white (neutral) wire from the junction box to the terminal on the switch marked "Neutral" or "N". Connect the green (ground) wire from the junction box to the green (ground) terminal on the switch.
- Connecting Wires at the Light Fixture: Connect the wires at the light fixture. Connect the black (hot) wire from the switch to the terminal on the fixture marked "Hot" or "L". Connect the white (neutral) wire from the switch to the terminal on the fixture marked "Neutral" or "N". Connect the green (ground) wire from the switch to the green (ground) terminal on the fixture.
- Testing and Finishing: Turn on the power at the breaker box and test the circuit by flipping the switch on and off. Ensure that the light fixture illuminates properly. If everything works, secure the switch and light fixture in their respective locations. Install any necessary covers or plates to complete the installation.
Important Considerations for Outdoor Light Switch Installation
Here are some crucial aspects to consider when planning and installing your outdoor light switch circuit.
- Weatherproofing: As the installation is outdoors, weather resistance is crucial. Use weatherproof junction boxes, conduit, and electrical fittings to protect the wiring from moisture, rain, and other elements. Choose a suitable light fixture rated for outdoor use.
- Ground Fault Circuit Interrupter (GFCI): To prevent electrical shocks, it is generally required to install a GFCI outlet or GFCI breaker in outdoor circuits. A GFCI outlet is typically located near the light fixture, while a GFCI breaker is located at the breaker box and protects the entire circuit.
- Electrical Codes: Always refer to the National Electrical Code (NEC) and local building codes for specific requirements and regulations regarding electrical installations. Consult an electrician if you are unsure about any aspects of the wiring process.
- Professional Assistance: If you are not comfortable or experienced working with electrical wiring, it is highly recommended to consult a qualified electrician. They can ensure that the installation is done safely and in compliance with all applicable codes and standards.

How To Install A One Way Light Switch Socketsandswitches Com

2 Way Light Switch With Power Feed Via In 2024 Home Electrical Wiring Projects

Light Switch Wiring Diagram Home Electrical

How To Wire A Light Switch Downlights Co

Adding An Extra Light From A Switch

How To Wire A Light Switch And Outside Together Ehow

Elegant Wiring Diagram Ceiling Light Diagrams Digramssample Diagramimages Wiringdiagramsam Outdoor Flood Lights Sensor Lighting Wire

How To Install A Double Pole Switch Socketsandswitches Com

How To Wire A Light Switch Downlights Co

How To Wire A Smart Switch
Related Posts