Wiring a Light Sensor to Outdoor Lighting: A Comprehensive Guide
The integration of light sensors with outdoor lighting systems offers a significant advantage in energy conservation and automated operation. By responding to ambient light levels, these sensors can automatically activate outdoor lights at dusk and deactivate them at dawn, eliminating the need for manual intervention and reducing unnecessary energy consumption during daylight hours. This article provides a detailed guide on the process of wiring a light sensor to outdoor lighting, covering essential components, wiring configurations, safety precautions, and troubleshooting tips.
Before commencing the wiring process, it is crucial to understand the fundamental principles of operation. A light sensor, often referred to as a photocell or photoelectric sensor, contains a light-sensitive resistor (photoresistor). The resistance of this resistor varies inversely with the intensity of light falling upon it. In darkness, the resistance is high, allowing current to flow and activate the connected lighting circuit. Conversely, in bright light, the resistance is low, inhibiting current flow and deactivating the circuit. The specific threshold at which the sensor triggers activation and deactivation is typically pre-set or adjustable, depending on the model.
Several types of light sensors are available, each suited for different applications and environments. Common types include: *
Photocell Sensors:
These are the most basic and widely used type, employing cadmium sulfide (CdS) or similar materials. They are generally inexpensive and suitable for residential and commercial applications. *Photodiode Sensors:
These sensors respond much faster to changes in light intensity compared to photocell sensors. They are more sensitive and can be used in applications requiring rapid response times. *Phototransistor Sensors:
Similar to photodiodes, phototransistors amplify the light-induced current, providing a stronger signal. They are often used in applications requiring high sensitivity and amplification. *Digital Light Sensors:
These sensors provide a digital output proportional to the light intensity, offering greater precision and control. They are commonly used in advanced lighting control systems.The choice of light sensor depends on factors such as the desired level of sensitivity, response time, environmental conditions, and budget. Understanding the characteristics of each type is essential for selecting the appropriate sensor for a specific application.
Key Point 1: Essential Components and Tools
Successful wiring of a light sensor to outdoor lighting requires assembling the necessary components and tools. The following is a comprehensive list:
*
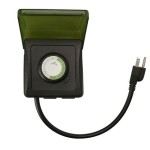
Light Sensor:
Select a sensor appropriate for the voltage and current requirements of the outdoor lighting system. Ensure the sensor is rated for outdoor use and can withstand the expected environmental conditions. Check the sensor's specification for the correct wiring diagram.*
Outdoor Lighting Fixture:
This is the light that will be controlled by the sensor. Ensure the fixture is in good working condition and properly grounded.*
Wiring:
Use appropriately sized and rated wiring for the voltage and current of the circuit. Outdoor-rated wiring (e.g., UF cable) is recommended for direct burial or exposure to weather. Follow local electrical codes for wire types and sizes.*
Junction Box:
A weatherproof junction box is essential for making safe and secure electrical connections. The junction box should be appropriately sized to accommodate the wiring and connections.*
Wire Connectors:
Use waterproof wire connectors (e.g., wire nuts or crimp connectors) to ensure secure and insulated connections. Avoid twisting wires together without proper connectors.*
Electrical Tape:
Use electrical tape to provide additional insulation and protection to the wire connections, especially in damp or wet locations.*
Conduit (Optional):
Conduit can be used to protect wiring that is exposed or buried underground. The choice of conduit depends on the application and local electrical codes.*
Tools:
The following tools are essential for the wiring process: wire strippers, wire cutters, screwdrivers (Phillips and flathead), pliers, a multimeter, and a voltage tester.*
Safety Gear:
Always wear appropriate safety gear, including safety glasses and insulated gloves, when working with electricity. Adhere to all applicable safety regulations and practices.Before starting, always double-check the voltage and current ratings of all components to ensure compatibility. Confirm that the outdoor lighting fixture is rated for the voltage provided by the electrical circuit.
Key Point 2: Wiring Configurations and Procedures
The specific wiring configuration will depend on the type of light sensor and the electrical system. However, the following is a general guide to the wiring process:
1.
Safety First:
Turn off the power to the circuit at the circuit breaker or fuse box before commencing any wiring work. Verify that the power is off using a voltage tester.2.
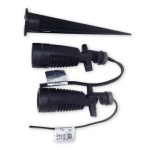
Mounting the Sensor:
Mount the light sensor in a location where it will receive unobstructed daylight but is not directly illuminated by artificial light sources. Follow the manufacturer's instructions for mounting the sensor. Ensure the sensor is mounted securely and weatherproofed.3.
Connecting the Wiring:
*Neutral Wire:
Connect the neutral (white) wire from the power source to the neutral wires of both the light sensor and the outdoor lighting fixture within the junction box. Use a wire connector to make a secure and insulated connection. *Line (Hot) Wire:
Connect the line (hot) wire (typically black) from the power source to the line-in terminal of the light sensor. This terminal is usually marked with "L" or "Line." *Load Wire:
Connect the load wire from the light sensor (typically marked with "Load" or "Output") to the line (hot) wire of the outdoor lighting fixture. This wire carries the current to the light when the sensor detects darkness. *Ground Wire:
Connect the ground (green or bare copper) wire from the power source to the ground wires of both the light sensor and the outdoor lighting fixture. Connect all ground wires to the ground terminal in the junction box. A proper ground connection is essential for safety.4.
Securing the Connections:
Ensure that all wire connections are secure and properly insulated. Use wire connectors to join the wires, and then wrap the connections with electrical tape for added protection. Properly tighten all screws and connections within the junction box.5.
Enclosing the Wiring:
Carefully arrange the wires within the junction box, ensuring that they are not pinched or strained. Close the junction box cover securely to protect the wiring from the elements.6.
Testing the Circuit:
Turn the power back on at the circuit breaker or fuse box. Test the operation of the light sensor by covering it with a dark cloth or box. The outdoor light should turn on. Remove the covering, and the light should turn off after a delay (if the sensor has a built-in delay function).Consult the specific wiring diagram provided with the light sensor for detailed instructions. If the sensor has adjustable sensitivity settings, adjust them to achieve the desired level of responsiveness to ambient light.
Key Point 3: Safety Precautions and Troubleshooting Tips
Working with electricity can be hazardous. Adhering to safety precautions is paramount:
*
Always Disconnect Power:
Before commencing any wiring work, always disconnect the power to the circuit at the circuit breaker or fuse box. Verify the power is off using a voltage tester.*
Wear Safety Gear:
Wear safety glasses and insulated gloves to protect yourself from electrical shock and other hazards.*
Do Not Work in Wet Conditions:
Avoid working with electricity in wet or damp environments. Water is an excellent conductor of electricity, and the risk of electrical shock is significantly increased.*
Follow Local Electrical Codes:
Adhere to all applicable local electrical codes and regulations. These codes are designed to ensure the safety and quality of electrical installations.*
If in Doubt, Consult a Professional:
If you are not comfortable working with electricity, or if you encounter any difficulties during the wiring process, consult a qualified electrician. Safety should always be the top priority.If the outdoor lighting system is not functioning correctly after wiring the light sensor, consider the following troubleshooting tips:
*
Check the Wiring Connections:
Ensure that all wiring connections are secure and properly insulated. Loose or corroded connections can cause malfunctions.*
Verify the Sensor's Operation:
Test the light sensor by covering it with a dark cloth or box. If the light does not turn on, the sensor may be faulty or improperly wired.*
Check the Bulb:
Ensure that the bulb in the outdoor lighting fixture is in good working condition. Replace the bulb if necessary.*
Check the Circuit Breaker:
Verify that the circuit breaker or fuse is not tripped or blown. Reset the breaker or replace the fuse if necessary.*
Inspect for Damage:
Check the wiring, light sensor, and outdoor lighting fixture for any signs of damage, such as frayed wires, cracked housings, or corroded terminals. Replace any damaged components.*
Sensitivity Adjustment:
If the sensor has adjustable sensitivity, experiment with the settings to find the optimal level of responsiveness for your environment. A sensor set too sensitively may trigger the lights prematurely in twilight, while a sensor set too insensitive may not activate the lights until it is completely dark.By carefully following these guidelines and adhering to all safety precautions, it is possible to successfully wire a light sensor to outdoor lighting, achieving automated operation and energy conservation.

How To Add Motion Sensor Outdoor Lights With Or Function Doityourself Com Community Forums

How To Wire Motion Sensor Occupancy Sensors

How To Wire Motion Sensor Occupancy Sensors

Can You Add Motion Sensors To Existing Outdoor Lights Led Lighting Info

Zenith Motion Sensor Wiring Diagram Outside Lights To Handyman Wire Home Electrical

Hardwire Post Eye Light Control With Photocell Automatic Sensor Switch Ledwholers

Unique Wiring Diagram For Outdoor Motion Detector Light Diagrams Digramssample Diagramimage Flood Lights Sensor Lighting Wire

How To Add Motion Sensor Outdoor Lights With Or Function Doityourself Com Community Forums

Motion Sensor Wiring Diagram Lights Outdoor

How To Wire Occupancy Sensor And Motion Detectors
Related Posts