Troubleshooting a Non-Functional Outdoor Sensor Light
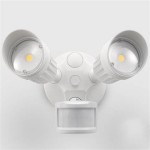
Outdoor sensor lights, also known as motion-activated lights, are a common feature in residential and commercial properties due to their security benefits and energy-saving capabilities. These lights automatically illuminate an area when motion is detected, deterring potential intruders and providing convenient illumination. However, when these lights fail to function as intended, it can compromise security and create frustration. Understanding the potential causes and troubleshooting steps is crucial for restoring proper functionality.
A malfunctioning outdoor sensor light can stem from a variety of factors, ranging from simple issues like a dead bulb to more complex problems involving the sensor or wiring. A systematic approach to diagnosis and repair is essential for efficiently identifying and resolving the underlying cause. This article will explore common reasons why an outdoor sensor light might not be working and provide practical steps for troubleshooting and rectifying the issue.
Power Supply and Bulb Issues
One of the most frequent causes of a non-functional outdoor sensor light is related to the power supply or the light bulb itself. Before delving into more intricate troubleshooting steps, it is prudent to examine these basic elements.
First, the power source should be verified. Ensure that the circuit breaker controlling the outdoor light is switched on. A tripped breaker can occur due to power surges or excessive electrical load on the circuit. If the breaker is tripped, reset it and monitor the light's behavior. If the breaker trips again immediately or shortly after being reset, it indicates a potential short circuit that requires further investigation by a qualified electrician.
Next, assess the light bulb. Even if the bulb appears intact, the filament may be broken. Replace the bulb with a new one of the correct wattage specified for the fixture. Using a bulb with a higher wattage than recommended can overload the system and potentially damage the sensor or wiring. For LED fixtures, confirm compatibility with the motion sensor, as some older sensors might not function correctly with certain LED bulb types. If replacing the bulb resolves the issue, the problem was simply a burnt-out or faulty bulb.
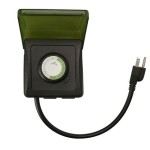
Consider the type of bulb being used. Some sensor lights are designed to work specifically with incandescent, halogen, or LED bulbs. Using an incompatible bulb can lead to flickering, intermittent operation, or a complete failure to illuminate. Consult the manufacturer's instructions for the sensor light to determine the appropriate bulb type. Furthermore, if the fixture utilizes a photocell to prevent daytime activation, a faulty photocell can interfere with the light's operation. Testing the photocell requires specialized equipment and knowledge and is best left to a professional electrician.
Inspect the wiring connections at the light fixture. Loose or corroded connections can impede the flow of electricity. Carefully examine the wires and ensure they are securely connected to the terminals. If corrosion is present, clean the terminals with a wire brush or electrical contact cleaner. Turn off the power supply at the breaker before inspecting the wiring to prevent electrical shock. If wiring appears damaged, it should be repaired or replaced by a qualified electrician.
If these initial steps do not resolve the issue, it is necessary to investigate the sensor itself and its settings.
Motion Sensor Settings and Functionality
The motion sensor is the core component responsible for detecting movement and triggering the light. Improper settings or a malfunctioning sensor can prevent the light from activating as expected. Thoroughly examining the sensor's settings and functionality is crucial for accurate troubleshooting.
Many motion sensor lights have adjustable settings for sensitivity, range, and on-time. Sensitivity determines how much motion is required to trigger the light. A low sensitivity setting might cause the light to ignore minor movements, while a high sensitivity setting could trigger the light unnecessarily due to objects swaying in the wind or small animals. Adjust the sensitivity setting to find a balance that phù hợp with the environment. The range setting controls the distance at which the sensor can detect motion. If the range is set too low, the light might not be triggered by movement within the desired area. Increase the range setting to extend the detection zone.
The on-time setting determines how long the light remains illuminated after motion is detected. A short on-time saves energy, while a longer on-time provides extended illumination. Adjust the on-time setting to suit specific needs.
Ensure that the sensor is not obstructed by any objects, such as tree branches, bushes, or other obstructions. These obstructions can interfere with the sensor's ability to detect motion. Trim any vegetation that might be blocking the sensor's field of view. Additionally, consider the placement of the sensor. If it is facing direct sunlight, the heat from the sun can trigger false activations or damage the sensor over time. Repositioning the sensor to a shaded area can help prevent these issues.
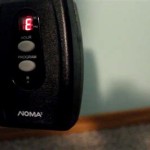
Test the sensor by walking within its detection range. If the light does not activate, try adjusting the sensitivity and range settings. If the light still does not activate, the sensor might be faulty and require replacement. Some motion sensors have a test mode that allows for quick verification of functionality. Consult the manufacturer's instructions for details on how to activate the test mode.
Certain environmental factors can also impact sensor performance. Extreme temperatures, heavy rain, or snow can sometimes interfere with motion detection. If the light is malfunctioning only during certain weather conditions, it suggests that the sensor is sensitive to these factors. In such cases, consider replacing the sensor with a model that is designed for harsh weather conditions.
Wiring and Electrical Connections Issues
Beyond the bulb and the sensor itself, problems with the wiring and electrical connections are a significant contributor to outdoor sensor light malfunctions. Safe and proper inspection of wiring requires caution and, if necessary, the expertise of a qualified electrician.
As previously mentioned, begin by ensuring the circuit breaker is off before performing any electrical work. Visually inspect the wiring for any signs of damage, such as frayed insulation, exposed wires, or corrosion. Damaged wiring poses a safety hazard and can cause short circuits and other electrical problems. If damaged wiring is identified, it must be replaced or repaired by a qualified electrician.
Check the wire connections at the light fixture, the junction box, and any other points along the circuit. Loose connections can prevent electricity from flowing properly. Tighten any loose connections and ensure that the wires are securely attached to the terminals. Use wire connectors that are appropriate for outdoor use to prevent corrosion and moisture from interfering with the connections.
Proper grounding is crucial for electrical safety. Ensure that the light fixture is properly grounded to prevent electrical shock. Check the ground wire connection at the fixture and at the grounding point in the electrical panel. A loose or missing ground wire can create a dangerous situation. Consult an electrician if you are unsure about the grounding of the light fixture.
Moisture can often infiltrate outdoor electrical connections, leading to corrosion and short circuits. Use weatherproof connectors and sealant to protect the wiring from moisture. Inspect outdoor electrical boxes for any signs of water intrusion. If water is present, identify and address the source of the leak. Damaged or improperly sealed electrical boxes should be replaced to prevent further water damage.
If the wiring and electrical connections appear to be in good condition, but the light is still not working, the problem might be located elsewhere in the electrical circuit. Testing the voltage at the light fixture with a multimeter can help determine if power is reaching the fixture. However, this task should only be performed by someone with experience in electrical work. If the voltage is not within the expected range, it indicates a problem with the wiring or electrical components upstream from the light fixture. Contact a qualified electrician to diagnose and repair the issue.
In conclusion, the failure of an outdoor sensor light can stem from a multitude of reasons, ranging from simple power supply and bulb issues to more complex problems involving sensor settings, wiring, and electrical connections. A methodical approach to troubleshooting, starting with the most basic elements and progressing to more intricate components, is essential for identifying the underlying cause and implementing the appropriate solution. While some issues can be resolved with simple adjustments or replacements, others might require the expertise of a qualified electrician to ensure safety and proper repair.

Motion Sensor Lights Tips To Reset Detector

Light Sensor Test Trouble Shooting

How To Troubleshoot Motion Detector Lights Solutions For Every Problem

How To Reset A Motion Sensor Light Local Electrical Group

Here S Why Your Motion Sensor Lights Aren T Turning On Us Electric

How To Reset Outdoor Motion Sensor Lights Electronicshub

How To Fix Motion Sensor Security Floodlight Not Working

How To Troubleshoot Motion Detector Lights Solutions For Every Problem

Defiant 180 Degree Motion Sensor White Outdoor Security Light Df 5416 Wh A The Home Depot

How To Make A Motion Sensor Light Stay On Rayzeek
Related Posts