Replacing a Bulb in an Outdoor Light Fixture: A Comprehensive Guide
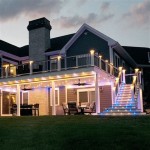
Outdoor lighting is an essential component of home security and aesthetics. Properly illuminated exterior spaces enhance safety by deterring potential intruders, provide visibility for navigating pathways and steps during nighttime hours, and contribute to the overall curb appeal of a property. A malfunctioning outdoor light fixture, most commonly due to a burnt-out bulb, can compromise these benefits. Consequently, knowing how to safely and effectively replace a bulb in an outdoor light fixture is a valuable skill for any homeowner or property manager. There are certain precautions and procedures that must be followed to ensure a successful and safe bulb replacement without causing damage to the fixture or injury to the individual performing the task.
This article provides a detailed guide on replacing a bulb in an outdoor light fixture. It covers aspects from preparing for the task and identifying the correct type of replacement bulb to the actual steps involved in the replacement process and troubleshooting potential issues. Safety is paramount; therefore, significant emphasis is placed on safety measures to prevent electrical shock or other accidents.
Preparing for the Bulb Replacement
Before initiating any electrical work, preparation is vital. This phase includes gathering the necessary tools and materials, understanding the fixture type, and, most importantly, ensuring the power supply to the fixture is completely disconnected. Disregarding these preliminary steps can lead to safety hazards or incorrect bulb selection, ultimately prolonging the task and potentially causing damage.
The first step is compiling the required tools and materials. These typically include: a replacement light bulb of the correct type and wattage (more on this later), a ladder or step stool of appropriate height to safely reach the fixture, screwdrivers (both flathead and Phillips head) to potentially open the fixture housing, work gloves to protect hands, safety glasses to protect eyes from debris or shattering glass, and a voltage tester to confirm the power is off. Having all these essentials readily available streamlines the process and minimizes interruptions.
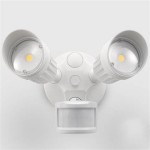
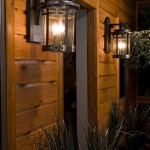
Next, it is essential to identify the type of outdoor light fixture. Common types include wall-mounted lanterns, post lights, floodlights, and recessed lights. Each fixture type may have a different method for accessing the bulb. Some fixtures have a simple screw-on cover, while others require unscrewing several fasteners or removing a protective cage. Understanding the fixture's design beforehand prevents unnecessary force or damage during disassembly. Examining the fixture in daylight before attempting the replacement at night is highly recommended to familiarize yourself with its construction.
The most crucial aspect of preparation is disconnecting the power supply. Locate the circuit breaker that controls the outdoor lighting circuit within the electrical panel. Switch the breaker to the "OFF" position. This action cuts off the electrical current to the fixture. However, relying solely on the breaker is insufficient. After switching the breaker off, use a voltage tester to definitively confirm that no electricity is flowing to the fixture before touching any wires or components. Place the tester's probes on the fixture's terminals or wires to ensure a reading of zero volts. Never assume the circuit is dead based only on the breaker position. If you are unsure how to use a voltage tester or are uncomfortable working with electricity, it is always best to consult a qualified electrician.
Selecting the Correct Replacement Bulb
Choosing the right replacement bulb goes beyond merely fitting it into the socket. It involves understanding the bulb type, wattage, voltage, and compatibility with the existing fixture and its intended function. Using an incorrect bulb can lead to premature failure, damage to the fixture, or even create a fire hazard. The fixture manufacturer often provides specific recommendations that should be followed. Ignoring these recommendations could void any warranty on the fixture.
The first step is to determine the bulb type. Common bulb types for outdoor lighting include incandescent, halogen, compact fluorescent (CFL), and light-emitting diode (LED). Incandescent bulbs are the traditional type but are less energy-efficient and have a shorter lifespan compared to other options. Halogen bulbs provide brighter light than incandescent bulbs but also consume more energy. CFLs are more energy-efficient than incandescent and halogen bulbs but contain mercury and require careful disposal. LEDs are the most energy-efficient and longest-lasting option, making them a popular choice for outdoor lighting. LEDs also come in a variety of color temperatures, allowing for customization of the light output. The type of bulb previously used in the fixture can usually be determined by examining marking on the bulb itself if it is still intact.
The wattage of the bulb is another critical consideration. The wattage indicates the amount of power the bulb consumes. Exceeding the maximum wattage rating specified on the fixture can overload the circuit and potentially cause a fire. The wattage rating is typically printed on a label inside the fixture or nearby the bulb socket. Choose a replacement bulb with the same or lower wattage rating than the original bulb. For example, if the fixture specifies a maximum wattage of 60 watts, do not use a bulb that exceeds that rating. If you are switching from an incandescent to an LED bulb, remember that LEDs produce the same amount of light with much lower wattage. For instance, a 10-watt LED bulb may produce the same light output as a 60-watt incandescent bulb.
Consider the bulb's voltage. In most residential applications, the voltage will be 120 volts. However, some landscape lighting systems operate at lower voltages, such as 12 volts. Make sure the replacement bulb has the correct voltage for the fixture. Using a bulb with the wrong voltage can cause it to fail immediately or damage the fixture's wiring. Check the fixture's specifications or the original bulb to determine the correct voltage.
Beyond the electrical specifications, consider the physical size and shape of the bulb. The replacement bulb must fit properly within the fixture housing. Some fixtures have limited space, requiring a specific bulb shape or size. Check the fixture's specifications or examine the old bulb to determine the appropriate size and shape. Also, consider the bulb's base type (e.g., screw-in or bayonet). Ensure the replacement bulb has the same base type as the original bulb so it will fit correctly into the socket. Many LED bulbs are designed to be direct replacements for incandescent or halogen bulbs, making the selection process easier.
The Bulb Replacement Process
With the preparations complete and the correct replacement bulb selected, the actual bulb replacement process can begin. This involves accessing the bulb, removing the old bulb, installing the new bulb, and reassembling the fixture. Adhering to a systematic approach and exercising caution throughout each step are essential for a safe and successful outcome.
The initial step is accessing the bulb within the fixture. The method for accessing the bulb varies depending on the fixture type. For wall-mounted lanterns, this often involves unscrewing a cover or releasing a latch. For post lights, the globe may need to be unscrewed or removed by loosening screws. Floodlights often have a hinged cover that can be opened. Recessed lights may require a special tool or a twisting motion to release the bulb from its socket. Refer to the fixture's instructions or examine the fixture carefully to determine the correct method for accessing the bulb without causing damage. If screws are involved, use the appropriate screwdriver size to avoid stripping the screw heads.
Once the bulb is accessible, the old bulb needs to be removed. If the bulb is still intact, it may be hot, so allow it to cool down completely before touching it. If the bulb is broken, wear safety glasses and work gloves to protect yourself from shards of glass. For screw-in bulbs, turn the bulb counterclockwise to unscrew it from the socket. Apply gentle pressure to avoid breaking the bulb. For bayonet bulbs, push the bulb inward and twist it to release it from the socket. Dispose of the old bulb properly. Incandescent and halogen bulbs can be discarded in regular trash. CFL bulbs, however, contain mercury and should be recycled according to local regulations. LEDs generally do not contain hazardous materials but can often be recycled as well.
The next step is installing the new bulb. Carefully align the base of the new bulb with the socket and gently screw it in or push and twist it into place, depending on the bulb type. Do not overtighten the bulb, as this can damage the socket. Ensure the bulb is securely seated in the socket. If the bulb does not fit properly, recheck the bulb type and base to ensure they are compatible with the fixture. Check that the bulb is making good contact with the electrical terminals inside the socket.
The final step is reassembling the fixture. Replace any covers, globes, or cages that were removed to access the bulb. Ensure all screws are tightened securely, but do not overtighten them. Check that all components are properly aligned and that the fixture is securely mounted. Restore power to the circuit by switching the circuit breaker back to the "ON" position. Test the new bulb by turning on the light switch. If the bulb does not light up, double-check the bulb installation and ensure the circuit breaker is not tripped. If the problem persists, there may be an issue with the fixture or wiring, and it is best to consult a qualified electrician.
By adhering to these steps, homeowners can safely and effectively replace bulbs in outdoor light fixtures, ensuring continued security and illumination around their properties for safety and aesthetics.

How To Replace An Outside Light

How To Change Porch Light Bulb

How To Replace An Outdoor Light Fixture

How To Change An Outside Light Bulb Quick And Easy

Home Improvement How To Remove Replace Outdoor Light Fixtures Porch Driveway Etc

Replacing An Outdoor Light Fixture

Replace Bulb Of Outdoor Light In 2 Minutes

How To Replace An Outside Light

How To Remove A Porch Light Cover Change The Bulb Hunker

Can Anyone Help Me Open This Outdoor Wall Fixture To Change The Bulbs
Related Posts