Outdoor Light Timer Instructions: A Comprehensive Guide
Outdoor light timers offer a convenient and energy-efficient way to manage landscape lighting, holiday decorations, and other outdoor electrical devices. These devices automate the process of turning lights on and off, saving time and reducing energy consumption. Understanding the different types of timers, their installation, and programming is crucial for effective and reliable operation. This article provides a comprehensive guide to outdoor light timers, covering various aspects from choosing the right timer to troubleshooting common issues.
Outdoor light timers come in several forms, each designed for specific applications and user preferences. The primary distinctions lie in their functionality, power source, and programming interface. Understanding these differences is the first step toward selecting the appropriate timer for individual needs.
### Key Point 1: Types of Outdoor Light TimersThere are three main types of outdoor light timers currently available: mechanical timers, digital timers, and smart timers. Each type has advantages and disadvantages regarding ease of use, accuracy, and features.
Mechanical Timers: These timers are the simplest and most affordable option. They feature a rotating dial with pins or segments that can be pushed in or pulled out to set the on and off times. Mechanical timers operate using a clockwork mechanism and do not require batteries. Their straightforward design makes them easy to use, but they offer limited programming flexibility. The minimum on/off interval is typically 30 minutes or 1 hour, making them less suitable for precise timing requirements. They are also prone to slight inaccuracies over time due to the mechanical nature of their operation. These inaccuracies can be compounded by temperature fluctuations.
Digital Timers: Digital timers offer more precise control and greater programming flexibility compared to mechanical timers. They feature a digital display and buttons for setting the on and off times. Digital timers often allow for multiple on/off settings per day and can be programmed for specific days of the week. Some models include features such as sunrise/sunset settings, which automatically adjust the on/off times based on the local sunrise and sunset times. Digital timers require a power source, typically batteries or a direct connection to an electrical outlet. Battery-powered digital timers retain their programming during power outages. While more complex than mechanical timers, digital timers offer a user-friendly interface and improved accuracy.
Smart Timers: Smart timers represent the most advanced option, offering remote control and integration with smart home systems. These timers connect to a Wi-Fi network and can be controlled using a smartphone app or voice commands. Smart timers typically offer all the features of digital timers, plus additional capabilities such as energy monitoring, custom schedules, and integration with other smart home devices. Some smart timers can also learn user habits and automatically adjust the on/off times based on usage patterns. Smart timers require a Wi-Fi connection and a power source. Their enhanced features and remote control capabilities make them a popular choice for users seeking maximum convenience and control over their outdoor lighting.
When selecting an outdoor light timer, consider the specific needs and budget. Mechanical timers are suitable for basic timing requirements, while digital timers offer greater precision and flexibility. Smart timers provide the most advanced features and integration with smart home systems.
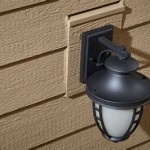
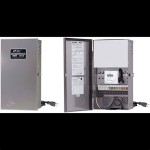
### Key Point 2: Installation and Safety ConsiderationsProper installation is crucial for the safe and reliable operation of an outdoor light timer. Before beginning the installation process, it's essential to understand the electrical requirements of the timer and the outdoor lighting system.
Safety Precautions: Before working with any electrical device, disconnect the power supply at the circuit breaker. Wear appropriate safety gear, such as insulated gloves and eye protection. Ensure that the timer is rated for outdoor use and is adequately protected from the elements. Never attempt to install a timer if unfamiliar with electrical wiring or if uncertain about any aspect of the installation process. Consulting a qualified electrician is recommended in cases of doubt or complexity.
Installation Steps: The installation process varies depending on the type of timer and the existing wiring configuration. For timers that plug directly into an outdoor outlet, simply plug the timer into the outlet and then plug the outdoor lighting system into the timer. For timers that require wiring, follow the manufacturer's instructions carefully. Typically, this involves connecting the timer's wires to the power source and the outdoor lighting system using wire connectors. Ensure that all connections are secure and properly insulated. Mount the timer in a suitable location, away from direct sunlight and excessive moisture. If the timer is not weatherproof, it may be necessary to install it in a weather-resistant enclosure.
Wiring Considerations: Pay close attention to the wiring requirements of the timer and the outdoor lighting system. Ensure that the wire gauge is appropriate for the current load. Use outdoor-rated wire connectors to prevent corrosion and ensure a reliable connection. If the outdoor lighting system includes a ground wire, connect it to the timer's ground terminal. Incorrect wiring can lead to electrical hazards, such as short circuits and fires. Double-check all wiring connections before restoring power to the circuit.
GFCI Protection: Ground Fault Circuit Interrupter (GFCI) outlets provide an added layer of safety by detecting ground faults and interrupting the current flow. Outdoor outlets are typically required to be GFCI-protected. If the outdoor outlet is not GFCI-protected, consider replacing it with a GFCI outlet or installing a GFCI circuit breaker. This will help prevent electrical shocks and protect the outdoor lighting system from damage.
Following these installation and safety considerations will ensure the safe and reliable operation of the outdoor light timer. Remember to consult the manufacturer's instructions for specific guidance and recommendations.
### Key Point 3: Programming and TroubleshootingProgramming an outdoor light timer involves setting the desired on and off times. The programming process varies depending on the type of timer. Troubleshooting common issues can help maintain the timer's performance and extend its lifespan.
Programming Mechanical Timers: To program a mechanical timer, push in or pull out the pins or segments corresponding to the desired on and off times. The dial typically rotates once every 24 hours. Align the current time with the indicator mark on the dial. Mechanical timers are relatively simple to program, but their programming flexibility is limited. The minimum on/off interval is typically 30 minutes or 1 hour.
Programming Digital Timers: To program a digital timer, use the buttons on the timer to set the on and off times. Digital timers typically allow for multiple on/off settings per day and can be programmed for specific days of the week. Some models include features such as sunrise/sunset settings, which automatically adjust the on/off times based on the local sunrise and sunset times. Refer to the manufacturer's instructions for specific programming details.
Programming Smart Timers: To program a smart timer, use the smartphone app or voice commands to set the on and off times. Smart timers typically offer all the features of digital timers, plus additional capabilities such as energy monitoring, custom schedules, and integration with other smart home devices. The app typically provides a user-friendly interface for creating and managing schedules. Refer to the app's documentation for specific programming instructions.
Troubleshooting Common Issues: Several common issues can affect the performance of outdoor light timers. These include the timer not turning on or off at the programmed times, the timer malfunctioning during power outages, and the timer displaying error codes. To troubleshoot these issues, check the following:
* Power Supply: Ensure that the timer is receiving power. Check the circuit breaker and the outlet. Replace batteries if necessary. * Programming: Verify that the timer is programmed correctly. Double-check the on and off times and the days of the week. * Wiring Connections: Ensure that all wiring connections are secure and properly insulated. * Environmental Factors: Protect the timer from direct sunlight, excessive moisture, and extreme temperatures. * Timer Reset: Try resetting the timer to its factory settings. Refer to the manufacturer's instructions for the reset procedure.If the troubleshooting steps do not resolve the issue, consulting a qualified electrician or contacting the manufacturer's customer support is recommended.
Proper programming and troubleshooting can help ensure the reliable operation of the outdoor light timer. Regularly check the timer's performance and address any issues promptly to maximize its lifespan and energy-saving benefits.
By understanding the different types of outdoor light timers, their installation requirements, and programming procedures, individuals can effectively manage their outdoor lighting systems and reduce energy consumption. These devices offer a convenient and cost-effective way to automate outdoor lighting, enhancing security, aesthetics, and energy efficiency.

3 Easy Ways To Use A Light Timer Wikihow

How To Set A Plug Timer Mechanical Digital Switches

How To Set A Plug Timer Mechanical Digital Switches

How To Use A Timer Switch For Lights

3 Easy Ways To Use A Light Timer Wikihow

3 Easy Ways To Use A Light Timer Wikihow

Noma Light Timer Instructions Model Et525c Lights

Dewenwils Outdoor Digital Timer 7 Day Programmable Plug In With 3 Grounded S For Landscape String Light

3 Easy Ways To Use A Light Timer Wikihow

Power Gear Outdoor Yard Stake Mechanical Timer With 6 Grounded S In Green 64759 The Home Depot
Related Posts