Outdoor Light Installation on Vinyl Siding: A Comprehensive Guide
Vinyl siding offers a durable and aesthetically pleasing exterior finish for many homes. However, installing outdoor lighting on vinyl siding requires careful planning and execution to ensure both safety and the integrity of the siding itself. Improper installation can lead to water damage, electrical hazards, and unsightly cosmetic damage. This guide provides a detailed overview of the best practices for installing outdoor lighting fixtures on homes with vinyl siding.
The initial consideration involves selecting the appropriate lighting fixtures. Fixtures designed for outdoor use are essential, as they are built to withstand weather conditions such as rain, snow, and extreme temperatures. Furthermore, the size and weight of the fixture should be appropriate for the siding; excessively heavy fixtures can strain the vinyl and potentially cause it to detach or crack. Consider the style of the fixture and how it complements the overall aesthetic of the home. LED fixtures are increasingly popular due to their energy efficiency and long lifespan.
Before commencing any installation work, it is crucial to disconnect the power supply to the circuit that will be used for the new lighting. This is a fundamental safety precaution to prevent electrical shock. Use a circuit tester to verify that the power is indeed off before proceeding with any wiring. If unsure about electrical work, it is strongly recommended to consult a qualified electrician.
Proper Planning and Preparation
The cornerstone of a successful outdoor lighting installation lies in meticulous planning. This phase involves determining the precise location for each fixture, taking into account factors such as the desired illumination level, the architectural features of the house, and any potential obstructions. Consider the purpose of the lighting: is it for security, ambiance, or providing illumination for pathways and entrances? The answer to these questions will influence the placement and type of fixture selected.
Accurate measurements are paramount. Measure the distance between the mounting points of the fixture and transfer these measurements to the vinyl siding. Use a level to ensure that the fixture will be installed straight. Marking the locations with a pencil or marker will serve as a guide during the actual installation process. It is also advisable to inspect the wall behind the siding to identify any potential obstacles, such as studs or wiring, which may require adjustments to the fixture placement.
Another important aspect of preparation is gathering the necessary tools and materials. These include a drill with appropriate drill bits, a screwdriver, a level, a wire stripper, wire connectors, silicone sealant, and potentially a vinyl siding mounting block. Having all the necessary tools readily available will streamline the installation process and minimize the risk of errors or delays. It's also crucial to have safety glasses and gloves to protect oneself during the work.
When dealing with vinyl siding, it is imperative to understand its properties. Vinyl siding is designed to expand and contract with temperature fluctuations. This means that fixtures cannot be rigidly attached directly to the siding. Doing so will create stress points that can lead to cracking or warping of the siding. The solution to this problem is to use a vinyl siding mounting block.
A vinyl siding mounting block is a specially designed component that provides a stable and level surface for attaching the lighting fixture. It essentially creates a buffer between the fixture and the siding, allowing the siding to expand and contract freely without affecting the fixture. These mounting blocks are available in various sizes and shapes to accommodate different types of fixtures and siding profiles. They are typically made of durable plastic or composite materials that are resistant to weathering and UV degradation.
Installing the Mounting Block and Wiring
The first step in installing the mounting block is to locate a suitable position on the siding. The ideal location will typically be where two pieces of siding overlap, providing a more secure anchor point. Use a siding removal tool to carefully detach the siding section at the chosen location. This tool is designed to slip behind the siding and release it from the interlocking lip of the adjacent panel.
Once the siding section is removed, the underlying wall sheathing will be exposed. Position the mounting block against the sheathing and mark the screw holes. Pre-drill pilot holes through the sheathing before attaching the mounting block with exterior-grade screws. Ensure that the mounting block is securely fastened and level before proceeding.
Before reattaching the siding section, it is necessary to run the electrical wiring to the location of the mounting block. This may involve drilling a hole through the wall to route the wiring from the inside of the house. Use a generous amount of silicone sealant around the hole to prevent water from seeping into the wall cavity. Thread the wires through the mounting block, leaving enough slack for making the electrical connections.
Carefully reattach the siding section, ensuring that it interlocks properly with the adjacent panels. The mounting block should fit snugly within the space created by the removed siding section. If necessary, use a rubber mallet to gently tap the siding into place. Avoid using excessive force, as this can damage the siding.
With the mounting block installed and the wiring in place, the next step is to connect the electrical wires. Using wire strippers, carefully remove a small amount of insulation from the ends of the wires. Connect the wires from the lighting fixture to the wires from the house wiring, using appropriate wire connectors. Ensure that the connections are secure and that no bare wire is exposed. Wrap the connections with electrical tape for added protection. It is crucial to follow local electrical codes and regulations when making these connections.
Attaching the Fixture and Final Steps
Once the wiring connections are complete, the lighting fixture can be attached to the mounting block. Position the fixture over the mounting block and align the screw holes. Use screws that are appropriate for the type of mounting block and fixture being used. Tighten the screws securely, but avoid over-tightening, as this can damage the fixture or the mounting block.
After attaching the fixture, inspect the installation carefully to ensure that everything is properly aligned and secure. Check that all wiring connections are protected and that no bare wires are exposed. Apply a bead of silicone sealant around the perimeter of the mounting block where it meets the siding. This will help to prevent water from seeping behind the siding and causing damage.
Finally, restore the power to the circuit and test the lighting fixture. If the fixture does not illuminate, double-check all wiring connections and ensure that the bulb is properly installed. If problems persist, consult a qualified electrician. Once the fixture is functioning correctly, it is recommended to periodically inspect the installation to ensure that it remains secure and that there are no signs of damage or water intrusion.
Regular maintenance, such as cleaning the fixture and replacing bulbs as needed, will help to prolong the lifespan of the lighting system and keep it functioning optimally. By following these guidelines, it is possible to successfully install outdoor lighting on vinyl siding while maintaining the integrity and appearance of the home's exterior.
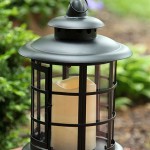
Choosing the right type of outdoor lighting fixture is crucial. Options include wall-mounted lights, floodlights, spotlights, and pathway lights. Wall-mounted lights are commonly used to illuminate entryways and garages. Floodlights provide broad illumination and are often used for security purposes. Spotlights are used to highlight specific architectural features or landscaping elements. Pathway lights illuminate walkways and gardens, enhancing safety and aesthetics.
The style of the fixture should complement the architectural style of the house. For example, a contemporary home might benefit from sleek, minimalist fixtures, while a traditional home might be better suited to more ornate or classic designs. The finish of the fixture should also be considered. Common finishes include black, bronze, silver, and white. The finish should be durable and resistant to corrosion to withstand the elements.
The light output of the fixture is another important consideration. The appropriate light output will depend on the intended use of the lighting. For security lighting, a brighter light output is generally preferred. For ambient lighting, a softer, more diffused light output may be more appropriate. LED fixtures offer a wide range of light output options, allowing for precise control over the illumination level.

How To Add A Light Fixture Vinyl Siding Electrical Box Aka J Block

Vinyl Siding Lights How To Mount Using A Mounting Block Diy

How To Install An Exterior Light Fixture On Vinyl Siding

Exterior Light Installation On Vinyl Siding Block

Vinyl Siding Light Fixture Mount Porch Lighting Fixtures

New House Siding How Do I Install Outdoor Lights On This Bracket Doityourself Com Community Forums

Mounting Blocks Vinyl Siding Mounts Ply Gem

How To Install A Mounting Block On Existing Vinyl Siding Step By Tutorial

How To Install An Exterior Light Your Home

How To Correct Bad Porch Light Installation Doityourself Com Community Forums