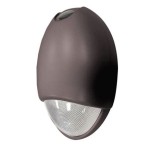
Mayfair IP44 Outdoor Lantern with PIR Sensor Installation Instructions
This guide provides comprehensive instructions for installing your Mayfair IP44 Outdoor Lantern with PIR sensor. It covers the necessary tools, safety precautions, and step-by-step installation instructions. Following these steps will ensure proper installation and optimal performance of your outdoor lantern.
Step 1: Gather Tools and Materials
Before commencing the installation, gather the following tools and materials. Make sure you have all the necessary items to streamline the installation process:
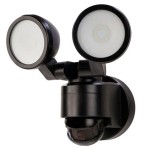
- Mayfair IP44 Outdoor Lantern with PIR sensor
- Screwdriver (Phillips head)
- Wire strippers
- Cable ties
- Voltage tester
- Ladder (if needed)
- Safety glasses
- Gloves
It is crucial to use the correct tools for the job. Using inappropriate tools can damage parts or lead to unsafe conditions.
Step 2: Safety Precautions
Prioritize your safety by adhering to the following precautions:
- Always disconnect the power supply to the circuit before working on the wiring.
- Wear safety glasses and gloves to protect your eyes and hands from potential hazards.
- Use a voltage tester to ensure the power supply is completely disconnected.
- Never work on electrical wiring while standing on a wet surface or ladder.
- If you are uncertain about any aspect of the installation, consult a qualified electrician.
By observing these safety measures, you minimize the risk of accidents and ensure a safe installation process.
Step 3: Determine Mounting Location
Choose a suitable mounting location for your outdoor lantern. Consider factors such as visibility, accessibility, and proximity to power supply. Ensure the location is free from obstructions such as trees or branches. The PIR sensor should be mounted in a position that provides optimal coverage of the desired area.
The ideal location should also consider aesthetics. The lantern should complement the existing architecture and design of the property. Ensure that the mounting location is level and secure.
Step 4: Install Mounting Bracket
If the mounting bracket is not pre-installed on the lantern, attach it to the back of the lantern following the manufacturer's instructions. Once the bracket is securely attached, locate the mounting screws provided with the lantern and mark the wall or surface where you will be installing the bracket.
Use a drill to create pilot holes at the marked locations. This step ensures that the screws are securely fastened into the wall material and prevents damage to the bracket.
Step 5: Connect Wiring
Before connecting any wiring, ensure the power supply to the circuit is disconnected. Use a voltage tester to confirm that there is no live current. Locate the terminal block on the lantern. The terminal block will have clearly marked terminals for connecting the live, neutral, and earth wires.
Strip the insulation off the ends of the wires for a clean connection. Connect the live wire (usually red or brown) to the terminal marked "L" or "Live." Connect the neutral wire (usually blue or black) to the terminal marked "N" or "Neutral." Connect the earth wire (usually green or yellow) to the terminal marked "E" or "Earth." If you are unsure about the wire colors, consult the wiring diagram provided with the lantern.
Tighten all wire terminals securely to ensure a stable connection. Double-check the connections to avoid potential short circuits or faulty wiring. Once the wiring is complete, re-connect the power supply and test the lantern.
Step 6: Mounting the Lantern
With the wiring completed, carefully align the lantern on the mounting bracket. Ensure it is level and secure. Use the provided screws to fasten the lantern to the bracket. Tighten the screws securely to ensure a stable and secure installation. Double-check that the screws are properly seated to prevent the lantern from becoming loose.
After mounting the lantern, test the PIR sensor functionality. Stand within the sensor's detection range and ensure the lantern illuminates when motion is detected. Adjust the sensor's sensitivity and detection range as necessary to achieve the desired performance.
Step 7: Final Checks
After completing the installation, perform a final check of the lantern. Ensure that it is securely mounted, the wiring is properly connected, and the PIR sensor is working correctly. Test the illumination and the sensor's response time. If any issues are encountered, refer to the manufacturer's instructions or contact a qualified electrician for assistance.
Regularly inspect the lantern and PIR sensor for any signs of damage or deterioration. Periodically check the wiring for loose connections and make sure the sensor is clean and unobstructed.
Following these instructions will ensure the safe and efficient installation of your Mayfair IP44 Outdoor Lantern with PIR sensor. Enjoy the added security and convenience provided by this innovative lighting solution. Remember to always prioritize safety and consult a qualified electrician if you have any doubts or concerns.

White Mayfair Pir Ip44 Outdoor Lantern Value Lights

White Mayfair Pir Ip44 Outdoor Lantern Value Lights

Mayfair Ip44 Up Down Wall Lantern With Pir Sensor Black Electrical Whole Consumer Units Supplies

White Mayfair Pir Ip44 Outdoor Lantern Value Lights

Mayfair Ip44 Up Down Wall Lantern With Pir Sensor Black Electrical Whole Consumer Units Supplies

Mayfair 19048 Ip44 White Outdoor Wall Lantern With Pir Sensor

Mayfair Ip44 Up Down Wall Lantern With Pir Sensor Black Electrical Whole Consumer Units Supplies

17250 Minisun Mayfair Dusk To Dawn Outdoor Wall Lantern Black Ip44 Farnell De

Mayfair Ip44 Up Down Wall Lantern With Pir Sensor Black Electrical Whole Consumer Units Supplies

Valuelights Mayfair Black Outdoor Wall Lantern Style
Related Posts