Installing Outdoor Lighting on a Brick Wall: A Comprehensive Guide
Outdoor lighting plays a crucial role in enhancing the aesthetic appeal and safety of any property. Brick walls, with their timeless charm and durability, often serve as a prominent feature in outdoor spaces. Integrating lighting into these walls can illuminate walkways, highlight architectural details, and create a welcoming ambiance. This guide provides a comprehensive overview of installing outdoor lighting on a brick wall, covering essential considerations, techniques, and best practices.
1. Planning and Preparation
Before embarking on the installation process, careful planning and preparation are essential. This involves determining the desired lighting effects, selecting appropriate fixtures, and ensuring necessary tools and materials are readily available.
a. Defining Lighting Objectives
The first step is to define the specific lighting objectives for the brick wall. Consider whether the primary purpose is to illuminate walkways, accentuate architectural features, create a cozy atmosphere, or enhance security.
b. Choosing the Right Fixtures
Selecting the right fixtures is paramount to achieving the desired lighting effects. Factors to consider include:
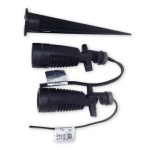
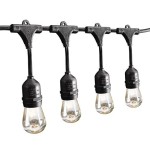
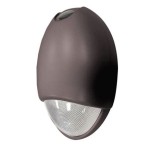
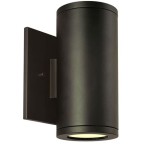
- Style: Choose fixtures that complement the architectural style of the house and the brick wall. Consider options like lanterns, sconces, spotlights, or string lights.
- Light Output: The amount of light emitted by the fixture should be appropriate for the intended purpose. For walkways, brighter fixtures are recommended, while accent lighting might require softer, more focused beams.
- Material: Select fixtures made of durable materials that can withstand the elements, such as weather-resistant metals, glass, or composite materials.
- Color Temperature: The color temperature of the light bulbs will influence the overall ambiance. Warm white (2700-3000K) creates a cozy and inviting atmosphere, while cool white (4000-4500K) offers a brighter and more contemporary feel.
c. Gathering Tools and Materials
Before beginning the installation, ensure you have the following tools and materials:
- Drill/driver with appropriate drill bits
- Level
- Tape measure
- Pencil
- Wire strippers
- Wire connectors
- Electrical tape
- Safety glasses
- Work gloves
- Brick anchors
- Screws
- Outdoor electrical wire
- Outdoor lighting fixtures
- Light bulbs
2. Installation Process
The installation process involves several steps, each requiring careful attention to detail and safety precautions.
a. Determining the Location and Mounting Points
Choose the optimal location for the fixtures, considering factors like visibility, aesthetics, and accessibility for maintenance. Mark the desired mounting points on the brick wall using a pencil and level.
b. Drilling Pilot Holes and Installing Anchors
Drill pilot holes at the marked locations using a drill bit slightly smaller than the diameter of the brick anchors. Tap the anchors firmly into the holes. These anchors provide a secure and stable mounting point for the fixtures.
c. Wiring the Fixtures
Following the instructions provided with the fixtures, connect the electrical wires to the appropriate terminals, ensuring proper polarity (positive to positive, negative to negative). Use wire connectors to secure the connections and wrap them with electrical tape for insulation.
d. Mounting the Fixtures
Align the fixtures over the anchors and attach them using screws or other mounting mechanisms provided. Ensure the fixtures are securely mounted and level.
e. Connecting to Power Source
Connect the electrical wire running from the fixtures to a nearby power source, such as an outdoor outlet or a dedicated circuit breaker. Consult a qualified electrician if you are unsure about the wiring process.
f. Testing and Final Touches
Once the connections are complete, test the fixtures by switching on the power. Ensure all lights are functioning correctly and adjust the fixture positions for optimal illumination.
3. Safety Considerations
Installing outdoor lighting on a brick wall involves working with electricity, which requires adhering to strict safety guidelines. Here are some essential precautions:
- Disconnect Power: Always disconnect the power supply to the circuit before working on any wiring or fixtures.
- Use Insulated Tools: Use insulated tools and wear rubber-soled shoes to minimize the risk of electric shock.
- Be Aware of Surroundings: Be mindful of your surroundings to avoid tripping hazards and potential falls.
- Work with a Partner: Whenever possible, work with a partner to assist with lifting, holding, and connecting wires.
By following these guidelines, you can ensure a safe and successful installation process.

Mounting Exterior Light Through Brick Wall

How To Install Outdoor Lights On Brick

Installing Outdoor Light Into Brick Diy Home Improvement Forum

How To Install Outdoor Light Fixture Replacing Exterior Diy By The Pond

7 Steps To Install Solar Lights On A Brick Wall Sresky

American Energy By James Dulley

Backyard Lighting Ideas

Adding A Sconce On Brick Wall Including How To Cut The

Everything You Need To Know About Security Light Installation

Hardscaping 101 Outdoor Wall Lights Gardenista
Related Posts