How to Wire Outdoor Lights
Illuminating your outdoor spaces can enhance your home's curb appeal, create a welcoming atmosphere, and extend your enjoyment of your property after sunset. Whether you're installing landscape lighting, patio lights, or security lights, understanding the basics of outdoor wiring is essential for a safe and successful installation.
This guide provides a comprehensive overview of how to wire outdoor lights, covering essential considerations, safety precautions, and step-by-step instructions. Note that this guide provides general information, and specific wiring requirements may vary depending on your location and the type of lighting fixtures you choose. Always consult local building codes and electrical regulations before starting any electrical work.
1. Planning and Preparation
Before you begin wiring, careful planning is crucial. Consider the following factors:
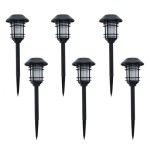
- Type of lighting: Determine the purpose of your outdoor lighting. Are you looking for general illumination, accent lighting, security lighting, or a combination of these?
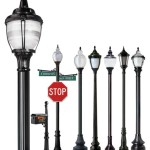
- Location and layout: Plan the placement of your lights to achieve your desired effect. Consider factors like visibility, aesthetics, and the placement of existing structures.
- Power source: Identify the nearest electrical outlet or circuit breaker box that can provide power to your outdoor lights. You may need to run new wiring to reach the desired location.
- Materials and tools: Gather the necessary materials, including weatherproof wiring, connectors, junction boxes, and appropriate light fixtures. Tools include wire strippers, pliers, a voltage tester, screwdrivers, and a drill with appropriate bits.
2. Safety Precautions
Electrical work requires caution and adherence to safety regulations. Follow these safety measures:
- Disconnect power: Before working with any electrical wires, always disconnect power to the circuit you will be working on. Use a circuit breaker or fuse to ensure the power is completely off.
- Use appropriate tools: Use insulated tools and wear gloves to protect yourself from electrical shocks.
- Inspect wiring: Carefully inspect all wires for damage, fraying, or loose connections before connecting them.
- Avoid contact with water: Do not work on electrical wiring when it is raining or when surfaces are wet.
- Consult a professional: If you are unsure about any aspect of the wiring process, consult a qualified electrician.
3. Running the Wiring
Running the wiring for your outdoor lights involves several steps:
- Choose a path: Decide on the path the wiring will take, keeping it as straight and unobtrusive as possible. Consider running the wire underground, along the exterior of your home, or through existing conduits.
- Install conduit: For underground wiring, use a conduit pipe to protect the wires from damage and moisture. Secure the conduit in place using appropriate clamps or straps.
- Run the wiring: Pull the weatherproof wire through the conduit or along the chosen path. Ensure the wire is securely fastened with clips or staples at regular intervals to prevent sagging.
- Connect to the power source: Connect the wiring to the power source (outlet or junction box) using appropriate connectors or wire nuts. Ensure all connections are secure and properly insulated.
4. Installing the Light Fixtures
Once the wiring is in place, you can install the light fixtures:
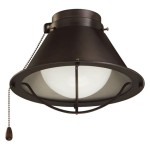
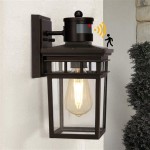
- Choose the right fixtures: Select fixtures designed for outdoor use, with weatherproof construction and proper electrical ratings.
- Mount the fixtures: Mount the fixtures to the desired location using appropriate brackets or screws. Ensure the fixtures are firmly secured and level.
- Connect the wiring: Connect the wiring to the fixture terminals using wire nuts or connectors. Make sure the connections are secure and the wire insulation is properly stripped.
- Install bulbs: Install the appropriate bulbs in the fixtures, following wattage and voltage requirements. Use LED bulbs for energy efficiency and long lifespan.
- Test the lights: Once all connections are made, restore power to the circuit and test the lights to ensure they are working correctly.
This guide provides a comprehensive overview of how to wire outdoor lights. By following these instructions and adhering to safety precautions, you can successfully illuminate your outdoor spaces and enhance the beauty and functionality of your home. Remember, electrical work can be hazardous, so consult a qualified electrician if you have any doubts or concerns.

Installation Help For Outdoor Lighting

How To Install A Yard Light Post Electrical Projects Home Wiring Lights

How To Install Low Voltage Outdoor Landscape Lighting The Garden Glove

How To Wire Landscape Lights In Series On A Switch Doityourself Com Community Forums

How To Install Low Voltage Outdoor Landscape Lighting The Garden Glove

Diagrams Digramssample Diagramimages Wiringdiagramsample Wiringdiagram Check More At H Led Outdoor Lighting Security Lights Light Fixtures

Wire 4 Outdoor Lights With One Switch Diy Home Improvement Forum

Using A Cable To Hang String Lights Concord Carpenter

How To Wire Outdoor Low Voltage Lighting Part 2

How To Add Motion Sensor Outdoor Lights With Or Function Doityourself Com Community Forums
Related Posts