How to Troubleshoot Outdoor Lighting
Outdoor lighting plays a crucial role in enhancing the aesthetics and security of any property. From illuminating pathways to highlighting landscaping features, well-functioning outdoor lights can transform a space. However, like any electrical system, outdoor lighting can occasionally experience malfunctions. Understanding how to troubleshoot these issues effectively can save you time, effort, and potential expenses. This guide provides a comprehensive overview of common outdoor lighting problems and detailed steps for resolving them.
1. Identifying the Source of the Problem
The first step in troubleshooting outdoor lighting is pinpointing the source of the malfunction. This involves carefully examining the affected lights and the surrounding electrical components. Here's a checklist of potential issues:
*
Power Supply:
The most common culprit is a problem with the power supply. Examine the main circuit breaker for any tripped breakers related to your outdoor lighting. Also, check the fuse box for blown fuses.*
Wiring Connections:
Loose or corroded wire connections can disrupt the flow of electricity. Inspect the wiring at the light fixture, the junction box, and along the electrical cable.*
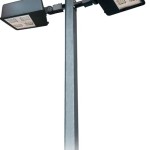
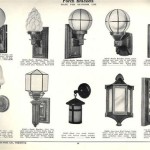
Light Fixture:
The light fixture itself could be faulty. Examine the bulbs, sockets, and any internal components for damage or wear.*
Switch:
A malfunctioning switch can prevent the lights from turning on. Check for loose connections, broken wires, or a damaged switch mechanism.*
Motion Sensor:
For motion-activated lights, the sensor might be faulty or misaligned. Test the sensor's response and make sure it's properly aimed to detect motion.*
Timer:
If you have an outdoor timer controlling the lights, it could be malfunctioning. Check for any signs of damage or incorrect settings.2. Basic Troubleshooting Steps
Once you've identified the potential source of the problem, you can begin addressing it with a series of basic troubleshooting steps.
*
Check the Bulbs:
Replace the bulbs with new ones of the same wattage and type. This eliminates the possibility of a burned-out bulb causing the issue.*
Reset the Breakers:
If a circuit breaker has tripped, reset it by flipping it to the "off" position and then back to the "on" position.*
Tighten Connections:
Carefully examine all electrical connections at the light fixture, junction box, and switch. Tighten any loose wires or connections.*
Clean Contacts:
Use a wire brush or contact cleaner to remove any corrosion or debris from the electrical contacts. This improves the flow of electricity.*
Test the Switch:
Make sure the switch is functioning properly. Try flipping it on and off several times to test its responsiveness.*
Adjust the Sensor:
If the motion sensor is the issue, try adjusting its sensitivity or aiming it differently. Experiment with various settings to optimize its effectiveness.*
Inspect the Timer:
Check the timer's settings and make sure it's programmed correctly. If it's malfunctioning, consider replacing it with a new one.3. Advanced Troubleshooting and Repairs
If the basic troubleshooting steps fail to resolve the issue, more advanced troubleshooting and repairs may be necessary.
*
Electrical Testing:
Use a voltage tester to check for electricity at the light fixture, junction box, and switch. This confirms that the circuit is live and identifies potential problems with the wiring.*
Replace Components:
If the problem persists, you may need to replace faulty components. This could include replacing the light fixture, switch, timer, or even sections of the wiring if necessary.*
Professional Assistance:
If you are uncomfortable with electrical work, it's best to consult a qualified electrician. They can diagnose the problem accurately and perform any necessary repairs safely and efficiently.*
Safety Precautions:
Always disconnect power to the affected circuit before working on any electrical components. Wear appropriate safety gear, such as gloves and safety glasses, to protect yourself from electrical hazards. Never attempt to repair electrical equipment if you are unsure of what you're doing.*
Regular Maintenance:
To prevent future issues, it's essential to perform regular maintenance checks on your outdoor lighting system. This includes inspecting the bulbs, connections, and fixtures for signs of wear and tear. Cleaning them periodically to remove dust and debris can also improve performance. By following these troubleshooting steps, you can effectively diagnose and repair common outdoor lighting problems. Remember to prioritize safety and seek professional help when necessary. With proper care and maintenance, your outdoor lights can continue to illuminate your property for years to come.
Landscape Lights Not Working Solutions To 7 Common Problems

Outdoor Landscape Light Troubleshooting Guide Abulous Lighting

How To Troubleshoot Outdoor Lighting Systems

Troubleshooting Low Voltage Landscape Lighting Problems Solutions

Tips And Trick For Solar Outdoor Lighting Troubleshooting

Outdoor Lighting Basic Troubleshooting Tips Lanai Lights

Landscape Lights Not Working Solutions To 7 Common Problems

Troubleshooting Landscape Lighting That S Not Working

Landscape Lighting Repair And How To Troubleshoot Custom Of America

5 Steps To Troubleshoot Your Outdoor Lighting