How To Set a Westinghouse Outdoor Timer
Westinghouse outdoor timers provide a convenient way to automate outdoor lighting, holiday decorations, or other electrical devices. They help conserve energy and offer an added layer of security by making it appear as if someone is home, even when they are not. Proper setup and programming of the timer are crucial to ensure its functionality and longevity. This article provides a detailed guide to setting up and programming a Westinghouse outdoor timer.
Before beginning the setup process, it is essential to identify the specific model of Westinghouse outdoor timer. There are various types, including mechanical timers with push pins, digital timers with buttons and displays, and smart timers that can be controlled via a mobile application. Each type has its unique programming method. Consulting the product manual is the first and most critical step. The manual contains specific instructions, diagrams, and safety precautions related to the specific timer model. Failure to consult the manual can lead to incorrect programming or damage to the timer.
Safety is paramount when working with electrical devices. Before handling the outdoor timer, ensure that the power supply to the outlet where the timer will be connected is turned off. This can usually be done by switching off the corresponding circuit breaker in the electrical panel. Using a non-contact voltage tester to verify that the outlet is indeed de-energized is highly recommended. Never work with electrical components in wet or damp conditions, as this increases the risk of electric shock.
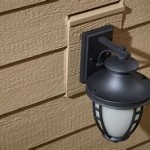
Once safety precautions have been addressed, the next step involves physically installing the timer. Westinghouse outdoor timers are typically designed for direct plug-in to an outdoor outlet. Ensure that the outlet is grounded and weather-resistant. If the outlet is not covered, consider installing a weatherproof outlet cover to protect the timer from rain, snow, and other environmental elements. For timers that require wiring, such as those intended for permanent installation, professional installation by a qualified electrician is strongly advised. Incorrect wiring can result in electrical hazards and damage to the timer or the devices connected to it.
Understanding Timer Types and Features
Westinghouse outdoor timers come in various types, each with its own set of features and programming methods. Mechanical timers are among the simplest to use, typically featuring a rotating dial with push pins or segments that can be pushed in or pulled out to set the on and off times. Digital timers offer more precise control and often include features such as multiple on/off schedules, dusk-to-dawn operation, and countdown timers. Smart timers, the most advanced type, can be controlled remotely via a smartphone application and often integrate with other smart home devices. Understanding the specific features and capabilities of the timer is crucial for effective programming.
Mechanical timers generally operate by rotating a dial that completes an electrical circuit at preset intervals. The pins or segments around the dial represent 15-minute or 30-minute intervals. Pushing a pin in corresponds to an "off" state, while pulling it out corresponds to an "on" state. Setting the desired on and off times involves manipulating these pins around the dial. To synchronize the timer with the current time, rotate the dial until the arrow or marker aligns with the current time on the dial. This ensures that the timer operates according to the programmed schedule.
Digital timers use buttons and a display to program on and off times. Typically, these timers have buttons labeled "Program," "Set," "On/Off," and directional arrows. The programming process usually involves pressing the "Program" button to enter the programming mode and then using the directional arrows to navigate through the available options, such as setting the current time and date, and creating on/off schedules. Each on/off schedule requires specifying the start time, end time, and the days of the week on which the schedule should be active. Some digital timers also offer options for random on/off times or for automatically adjusting the on/off times based on sunrise and sunset.
Smart timers connect to a home's Wi-Fi network and can be controlled remotely via a smartphone application. These timers often offer advanced features such as voice control, integration with other smart home devices, and energy monitoring. The setup process typically involves downloading the manufacturer's application, creating an account, and connecting the timer to the Wi-Fi network. Once connected, the timer can be programmed and controlled from anywhere with an internet connection. The application usually provides a user-friendly interface for creating schedules, setting timers, and monitoring energy usage.
Setting Up a Mechanical Timer
Setting up a mechanical timer involves several steps. First, locate the dial on the timer. This dial represents a 24-hour period and is marked with hour increments. Around the dial are the push pins or segments that determine the on and off times. To set the desired on time, pull out the pins or segments corresponding to the period when the connected device should be turned on. To set the off time, push in the pins or segments corresponding to the period when the device should be turned off. It's crucial to accurately identify the "on" and "off" periods to ensure proper operation of the timer.
After setting the on and off times, synchronize the timer with the current time. Locate the arrow or marker on the timer that indicates the current time. Rotate the dial until the arrow points to the current time on the dial. This ensures that the timer starts operating according to the programmed schedule. Some mechanical timers have a manual override switch that allows the user to temporarily turn the connected device on or off, regardless of the programmed schedule. This can be useful for testing the timer or for manually controlling the device when needed.
Once the timer is programmed and synchronized, plug it into the outdoor outlet. Ensure that the outlet is weather-resistant and grounded. Connect the device that needs to be controlled, such as outdoor lights or holiday decorations, to the timer. Verify that the device is functioning correctly by observing whether it turns on and off according to the programmed schedule. If the device does not turn on or off as expected, double-check the pin settings and the synchronization of the timer with the current time. Also, ensure that the power switch on the connected device is in the "on" position.
Programming a Digital Timer
Programming a digital timer requires navigating through its menu options using the buttons on the timer. The first step is usually to set the current time and date. Press the "Set" or "Clock" button to enter the time and date setting mode. Use the directional arrows to adjust the hours, minutes, and date. Once the correct time and date are set, press the "Set" button again to confirm the settings.
Next, create an on/off schedule. Press the "Program" button to enter the programming mode. The display will usually show a series of program numbers, such as "Program 1," "Program 2," etc. Select the desired program number using the directional arrows. Then, set the on time for the selected program by specifying the hour and minute. Next, set the off time for the same program. Finally, select the days of the week on which the program should be active. Some digital timers offer options for setting different schedules for different days of the week. Once the schedule is set, press the "Program" button again to save the settings. Repeat these steps to create additional schedules as needed.
Many digital timers offer additional features such as a countdown timer, dusk-to-dawn operation, and random on/off times. The countdown timer allows setting a specific duration for which the connected device should remain on before automatically turning off. Dusk-to-dawn operation automatically turns the device on at dusk and off at dawn, based on the timer's built-in light sensor or geographical location settings. Random on/off times introduce variability into the schedule, which can be useful for security purposes by making it appear as if someone is home. Refer to the product manual for specific instructions on how to use these additional features.
After programming the digital timer, test the programmed schedules to ensure they are functioning correctly. Observe whether the connected device turns on and off according to the programmed times. If any adjustments are needed, repeat the programming steps to modify the schedules. Digital timers often have a manual override button that allows temporarily turning the connected device on or off, regardless of the programmed schedule. Pressing this button toggles the device between the "on" and "off" states.
Regularly checking the timer's settings and battery backup (if applicable) is important. Over time, power outages or battery depletion can cause the timer to lose its programmed settings. Replacing the battery backup regularly can prevent this. Also, periodically reviewing the programmed schedules ensures that they still meet the user's needs and adjusting them as necessary. Proper maintenance and attention to detail will ensure that the Westinghouse outdoor timer operates reliably for an extended period.

How To Program And Set Time On The Westinghouse Automatic Electric Timer

Westinghouse Timers And Manuals

Westinghouse Timers And Manuals

How To Program And Set Time On The Westinghouse Automatic Electric Timer

Westinghouse Outdoor Timer User Manual Manualzz

Westinghouse 3 Outdoor Heavy Duty Digital Photocell Timer Instructions Hunker

Westinghouse 2 Darkness Sensing Timer

Westinghouse 2 Outdoor Timer Target Inventory Checker Brickseek

Programming Your Mechanical Timer

How To Set A Plug Timer Mechanical Digital Switches
Related Posts