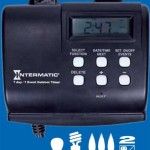
How to Set Outdoor Motion Sensor Lights
Outdoor motion sensor lights offer a practical and effective way to illuminate your property while enhancing security. These lights automatically activate when they detect movement, providing a deterrent to would-be intruders and making it easier to navigate your yard at night. Setting up these lights correctly is crucial to ensure they function optimally and serve their intended purpose. This article will provide a step-by-step guide on how to set outdoor motion sensor lights, covering essential aspects such as installation, adjustment, and troubleshooting.
1. Installation
The first step in setting up outdoor motion sensor lights is to choose the appropriate location and mount them securely. Consider the following factors:
- Coverage area: Determine the area you want to illuminate and ensure the lights are positioned to cover it effectively. Keep in mind that motion sensors have a specific detection range, typically 10-30 feet.
- Placement: Install the lights at a height that provides optimal visibility and minimizes potential obstruction. A height of 8-10 feet is generally recommended. Avoid placing them near trees or foliage that could trigger false activations.
- Power supply: Ensure you have access to a power source, such as a nearby electrical outlet or junction box. If you're working with a hardwired system, consult an electrician if necessary.
- Mounting method: Use appropriate mounting hardware to securely attach the lights to the wall, pole, or eaves. Follow the manufacturer's instructions for mounting and wiring.
Once the lights are mounted, run the wiring to the power source and connect it according to the manufacturer's instructions. Testing the connection before proceeding is advisable to ensure the lights are receiving power.
2. Adjusting the Sensor Settings
Outdoor motion sensor lights typically offer adjustable settings to customize their performance based on your specific needs. These settings include:
- Sensitivity: This setting determines how easily the sensor is triggered by movement. Lowering the sensitivity reduces the likelihood of false activations, while increasing it makes it more sensitive to subtle movement. Experiment with different sensitivity levels to find the optimal setting for your environment.
- Detection range: This setting controls the distance at which the sensor can detect movement. Adjust it based on the size of the area you want to monitor and the desired coverage. A wider range might be necessary for larger properties, while a narrower range is sufficient for smaller areas.
- Time delay: This setting determines how long the lights will stay on after detecting movement. Adjust the delay time based on your needs. A shorter delay might suffice for a quick glance, while a longer delay is useful for areas requiring extended illumination.
- Light intensity: This setting controls the brightness of the lights. Choose a suitable intensity based on your desired level of illumination. Consider factors such as the size of the area and the surrounding ambient light levels.
- Light mode: Some motion sensor lights allow you to choose the specific light mode. Options may include continuous illumination, flashing, or a combination of both.
Adjusting these settings is usually done via a small dial or buttons located on the sensor unit. Refer to the manufacturer's instructions for specific guidance on operating your particular model.
3. Troubleshooting
Even after proper installation and configuration, outdoor motion sensor lights may sometimes experience issues. Here are some common problems and solutions:
- False activations: If the lights are frequently turning on when no movement is present, it might be due to excessive sensitivity, obstructions in the sensor's field of view, or interference from nearby sources. Adjust the sensitivity setting, remove any obstructions, or consider relocating the lights.
- Lights not turning on: Check the power supply to ensure the lights are receiving electricity. Also, verify the wiring connections and the sensor's fuse. If the fuse is blown, replace it with a new one of the same rating.
- Dim or flickering lights: This could indicate a loose connection, a faulty bulb, or a power issue. Inspect the wiring and connections, replace the bulb if necessary, and check the power supply for any voltage fluctuations.
If you can't diagnose or resolve the problem yourself, consult a qualified electrician for assistance. They can help identify any underlying issues and provide professional solutions.

Understanding Motion Lighting

How To Adjust Your Sensor Light Metro Electrical 24 Hour Electricians

How To Reset Outdoor Motion Sensor Lights Electronicshub

Motion Sensor Lights Tips To Reset Detector

How To Install Security Lights Diy Family Handyman

Installing A Remote Motion Detector For Lighting Diy

Light Sensor Test Trouble Shooting

How To Program Your Exterior Flood Lights

Where To Place Security Lights The Best Places And More

Defiant 180 Degree Motion Sensor White Outdoor Security Light Df 5416 Wh A The Home Depot
Related Posts


