How to Replace Outdoor Motion Sensor Lights
Outdoor motion sensor lights provide security and convenience by automatically illuminating areas when motion is detected. Over time, these lights may malfunction or become outdated, necessitating replacement. Replacing outdoor motion sensor lights is a straightforward process that can be accomplished with basic tools and some electrical knowledge. This article will guide you step-by-step through the process, ensuring a safe and successful replacement.
1. Gather the Necessary Tools and Materials
Before embarking on the replacement process, gather the following tools and materials:
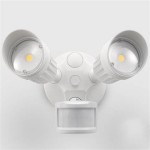
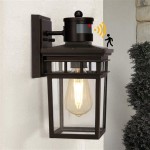
- New motion sensor light fixture
- Screwdriver (Philips and flathead)
- Wire strippers
- Wire connectors (wire nuts)
- Electrical tape
- Voltage tester
- Ladder (if necessary)
- Safety glasses
- Work gloves
Ensure the new light fixture is compatible with your existing wiring and meets your desired lighting requirements. It is also advisable to purchase a fixture with a similar wattage as the previous one to avoid overloading the circuit.
2. Disconnect Power to the Light Fixture
Safety is paramount when working with electricity. Before proceeding, disconnect power to the light fixture. Locate the circuit breaker controlling the outdoor light and switch it off. Turn off the light switch at the wall as an additional safety precaution. Use a voltage tester to ensure the power is completely disconnected.
Once the power is off, carefully remove the old light fixture. This may involve detaching screws, clips, or brackets. Note the wiring connections and orientations, as you will need to replicate them when installing the new fixture.
3. Install the New Light Fixture
With the old fixture removed, proceed to install the new one. Start by attaching the mounting bracket to the wall, ensuring it is level and secure. Follow the instructions provided with the new fixture for mounting details and any specific requirements.
Next, connect the electrical wires. The new fixture will have three wires: a black wire (hot), a white wire (neutral), and a green wire (ground). Match these wires to the corresponding wires on the existing wiring. Use wire strippers to expose a small amount of wire on each end before connecting them. Wrap the connected wires securely with wire nuts.
After connecting the wires, secure the new fixture to the mounting bracket. Use the provided screws or clips to ensure the fixture is firmly attached and stable.
4. Test and Restore Power
Once the new fixture is securely installed, it's time to test its functionality. Turn the circuit breaker back on and switch the light on. Observe the light fixture for proper operation. Check the motion sensor by moving in front of the light to ensure it activates correctly.
If the light fixture works as intended, you have successfully replaced the outdoor motion sensor light. If any issues arise, double-check the wiring connections and consult the manufacturer's instructions for troubleshooting tips.
After verifying proper operation, restore power to the circuit and dispose of the old light fixture responsibly.

How To Install An Outdoor Motion Sensor Light With Pictures

How To Install An Outdoor Motion Sensor Light With Pictures

Motion Light Sensor Replacement

How To Replace An Exterior Flood Light With Motion Sensor

How To Replace An Exterior Flood Light With Motion Sensor

How To Install Outdoor Motion Activated Lights Tomcomknowshow

Installing A Motion Sensor Light Fine Homebuilding

Motion Sensor Lights Tips To Reset Detector

Installing A Remote Motion Detector For Lighting Diy

A Short Guide To Fixing And Replacing Faulty Motion Sensor Lights
Related Posts

