How to Replace a Bulb in an Outdoor Light
Outdoor lighting provides security, ambiance, and functionality to any home or business. However, like any light bulb, the bulbs in outdoor fixtures eventually burn out and need replacing. Thankfully, replacing an outdoor light bulb is a relatively simple task that can be done by most homeowners with basic tools and a bit of caution.
This article will guide you through the process of replacing a bulb in an outdoor light fixture. It will provide step-by-step instructions, safety tips, and considerations for choosing the right bulb for your needs.
1. Safety First: Powering Down the Fixture
Before attempting any electrical work, it is crucial to prioritize safety. The first step is to turn off the power to the outdoor light fixture. Locate the circuit breaker in your electrical panel that controls the light and switch it to the "off" position.
To confirm the power is off, test the fixture with a non-contact voltage tester. This tool will detect any electrical current present, ensuring you’re not working on a live circuit. Never rely solely on the switch being in the "off" position as a safety measure.
If you are unsure about the location of the circuit breaker or the correct wiring, consult a qualified electrician. Working on a live electrical circuit can be extremely dangerous and could lead to electric shock or fire.
2. Removing the Old Bulb
Once the power is off and you have confirmed the fixture is safe to work on, you can proceed to remove the old bulb. Depending on the fixture type, this may involve several steps:
a) Unscrewing the bulb: For standard screw-in bulbs, simply twist the bulb counterclockwise until it comes loose. If the bulb is stuck or difficult to remove, use a rubber-gloved hand to grip the bulb firmly and rotate it carefully.
b) Removing a glass globe: Some outdoor lights have a glass globe or shade that protects the bulb. This globe may need to be unscrewed or removed with clips before accessing the bulb.
c) Disconnecting a bulb socket: Certain outdoor lights have a bulb socket that detaches from the fixture. To access the bulb, gently pull the socket down or out, disconnecting it from the fixture. Be careful not to pull on the wires.
After removing the old bulb, inspect the socket and the fixture for any signs of damage or corrosion. If you find any issues, it is best to consult an electrician to ensure the fixture is functioning properly.
3. Installing the New Bulb
Now that the old bulb is removed, you can install the new one. Remember to choose a bulb that is compatible with the fixture and your desired lighting effect. Factors to consider include:
a) Wattage: Do not exceed the maximum wattage rating specified on the fixture. This ensures that the fixture will not overheat and cause a safety hazard.
b) Bulb type: LED bulbs are energy-efficient and long-lasting, making them a popular choice for outdoor lighting. Other options include halogen, incandescent, and CFL bulbs. Consider the specific features and benefits of each type before making your choice.
c) Light color temperature: The color temperature of a bulb is measured in Kelvin (K). Cool white bulbs have a high Kelvin rating (4000K or higher) and are ideal for security lighting. Warm white bulbs have a lower Kelvin rating (2700K or lower) and create a more welcoming ambiance.
To install the new bulb, follow these steps:
a) Align the bulb: Carefully align the new bulb with the socket, ensuring the prongs on the bulb match the contacts in the socket.
b) Tighten the bulb: Turn the bulb clockwise until it is firmly secured in the socket. Do not overtighten the bulb as this can damage the socket.
c) Reassemble the fixture: If you removed a glass globe or shade, reassemble the fixture by securing the globe or shade back in place.
d) Test the fixture: Once the new bulb is installed, turn the power back on at the circuit breaker and test the light fixture. If the bulb illuminates correctly, you have successfully replaced the bulb.
If the bulb does not light up, check the following:
a) Power: Ensure the circuit breaker is switched on. b) Connections: Inspect the bulb socket and connections for any loose or broken wires. c) Bulb: Try a different bulb to rule out a faulty bulb. d) Fixture: If all else fails, consult an electrician to troubleshoot the fixture.

How To Change An Outdoor Porch Lantern Sconce Light Bulb Simple Diy Do It Yourself Procedure Hq

How To Change An Outside Light Bulb Quick And Easy

How To Change Your Outside Light Bulb

How To Change Your Outside Light Bulb

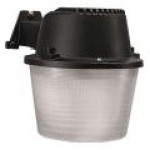
How To Replace Most Lamp Post Light Bulbs Quick Easy

Changing A Halogen Lamp

How To Change Porch Light Bulb

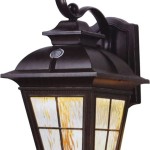
Can Anyone Help Me Open This Outdoor Wall Fixture To Change The Bulbs

How To Change An Outdoor Porch Lantern Sconce Light Bulb Simple Diy Do It Yourself Procedure Hq

How To Change Light Bulb In Outdoor Lamp Post 04 Steps Guide 99fab Com
Related Posts