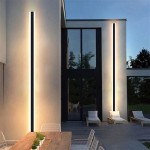
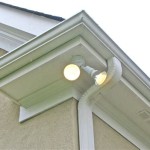
How To Put Outdoor Lights On A Timer
Outdoor lighting enhances the aesthetic appeal of any property, providing security and illumination after dark. However, manually switching them on and off can be inconvenient and energy-intensive. A timer is an effective solution to automate the process, ensuring your outdoor lights operate efficiently and contribute to your home's ambiance. This guide will provide a comprehensive overview of how to put outdoor lights on a timer, covering essential considerations and straightforward instructions.
Types of Outdoor Light Timers
Several timer options are available, each with its advantages and specific applications:
- Analog Timers: These simple and affordable mechanical timers feature a dial or knob to set on and off times. They are ideal for basic scheduling but lack flexibility and advanced features.
- Digital Timers: Digital timers offer greater precision and flexibility. They typically have a digital display for setting multiple on and off times, allowing for customized scheduling.
- Smart Timers: These connected timers enable remote control and scheduling through mobile apps. They often offer additional features like sun-sensing capabilities and integration with smart home systems.
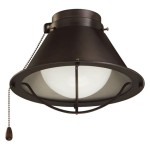
- Photocell Timers: Photocell timers automatically turn on lights at dusk and off at dawn, using a light sensor to detect changes in ambient light. This option is energy-efficient and ideal for outdoor lighting that only needs to illuminate during darkness.
Installing Outdoor Light Timers
The installation process for outdoor light timers depends on the type of timer and your existing wiring. Here's a general guide:
- Choose a Timer: Select a timer that matches your needs and compatibility with your electrical system. Consider factors like the number of circuits, power rating, and features.
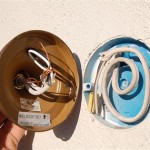
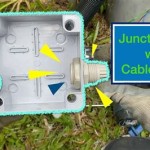
- Location and Mounting: Choose an accessible and weatherproof location for the timer. Use a junction box or weatherproof enclosure to protect the timer from the elements.
- Disconnect Power: Before working with electrical wiring, always turn off power to the circuit at the breaker box.
- Connect Wiring: Depending on the type of timer, you may need to connect wires to the appropriate terminals. The timer typically has terminals for the "hot" (live) wire, "neutral" wire, and "load" wire (connected to the lights).
- Secure the Timer: Use screws or clamps to secure the timer to the mounting location, ensuring a snug and stable fit.
- Restore Power: Once the wiring is complete, turn the power back on at the breaker box and test the timer to ensure it functions correctly.
Setting Up and Using Outdoor Light Timers
After installation, configure the timer to meet your specific requirements:
- Set On and Off Times: Use the timer's controls to set the desired on and off times for your outdoor lights. Consider your preferred lighting schedule for security, ambiance, and energy efficiency.
- Test the Timer: After setting the on and off times, test the timer to ensure it operates as intended. Observe the lights to confirm they turn on and off at the programmed times.
- Monitor and Adjust: Regularly monitor the timer's operation and adjust the on and off times as necessary. This ensures the outdoor lights provide optimal illumination throughout the season.
Remember to consult with an electrician if you're unsure about any aspect of the installation process. They can provide expert guidance and ensure the timer is correctly installed for safe and reliable operation.

How To Put Outdoor Lights On A Timer Electronicshub

Can You Put Outdoor Lights On A Timer Sorta Techy

How To Use A Timer Switch For Lights

Turn Your Outdoor Lights On Off Automatically

How To Set Your Outdoor Lighting Timers

Easy To Install Programmable Timer The Lady Diy

3 Remarkably Easy Solutions For An Automatic Porch Light Timer

How To Install Timer For Outdoor Lights That Has No Wall Switch

How To Use A Timer Switch For Lights

How To Set A Plug Timer Mechanical Digital Switches