How to Install Solar Lights Outdoor
Solar lights offer a sustainable and environmentally-friendly way to illuminate outdoor spaces. They harness the power of the sun to provide light at night, eliminating the need for electrical wiring and reducing energy consumption. Installing solar lights can be a straightforward process, even for those with limited DIY experience. This guide provides a comprehensive breakdown of the steps involved, from selecting the right lights to securing them in place.
1. Choosing the Right Solar Lights
The first step in installing solar lights is selecting the appropriate type for your needs. Consider the following factors when making your choice:
- Purpose: Are you looking for lights for security, ambiance, or both?
- Brightness: How much light do you require? Lumen output is a measure of light intensity.
- Style: Solar lights come in various designs to complement different outdoor settings.
- Battery capacity: This determines how long the lights will stay lit at night.
- Features: Some solar lights offer additional features such as motion sensors or dimming options.
Once you have determined your requirements, browse online retailers or local hardware stores to find solar lights that meet your criteria. Reading reviews and comparing prices can help you make an informed decision.
2. Selecting the Installation Location
The location where you install your solar lights is crucial for optimal performance. Ensure the chosen spot receives ample sunlight throughout the day. This will maximize the solar panel's energy absorption, allowing the lights to charge efficiently and provide adequate illumination at night.
Consider the following factors when choosing a location:
- Direct sunlight: Aim for a location that receives six to eight hours of direct sunlight daily.
- Shadows: Avoid areas where trees or buildings cast shadows over the solar panels.
- Desired illumination: Position the lights to illuminate the areas you want to highlight.
- Accessibility: Choose a location that allows easy access for cleaning and maintenance.
3. Preparing for Installation
Before installing the solar lights, gather the necessary tools and materials. These may include:
- Screwdriver or drill: For securing the lights to surfaces.
- Level: To ensure the lights are installed straight.
- Measuring tape: To determine the placement of the lights.
- Pencil or marker: To mark the installation points.
- Safety glasses: To protect your eyes from debris.
- Gloves: To protect your hands during the installation process.
- Anchor bolts or screws: For attaching to concrete or brick surfaces.
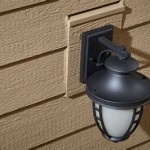
4. Installing the Solar Lights
Once you have selected the installation location and gathered the necessary tools, follow these steps to install your solar lights:
- Read the manufacturer's instructions: Each model may have specific installation procedures. Familiarize yourself with the guidelines before proceeding.
- Mark the installation points: Use a pencil or marker to indicate where you will mount the lights.
- Secure the lights: Use screws or anchor bolts to attach the lights firmly to the chosen surface. Ensure the solar panels are facing directly towards the sun.
- Position the lights: Adjust the angle of the lights to direct the illumination towards the desired areas.
- Turn the lights on: Most solar lights have a built-in switch to activate them. Turn them on and allow them to charge in the sun.
After installation, clean the solar panels regularly to ensure optimal performance. Dust and debris can obstruct sunlight and reduce the lights' charging efficiency.
5. Maintenance and Troubleshooting
Solar lights typically require minimal maintenance. However, it's important to monitor their performance and address any issues that arise. Here are some common troubleshooting tips:
- Check the solar panel: Make sure the panel is clean and unobstructed by shadows or debris.
- Verify the battery: Ensure the battery is charged and functioning correctly.
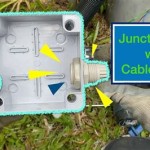
- Inspect the wiring: Look for any loose connections or damage to the wires.
- Replace bulbs: If the bulbs are burnt out, replace them with compatible ones.
- Contact the manufacturer: If you encounter persistent issues, consult the manufacturer's instructions or contact their customer support for assistance.
By following these simple steps, you can successfully install and maintain solar lights to enhance your outdoor spaces with sustainable and energy-efficient lighting solutions.

Tips For Installing Outdoor Solar Lights Home Matters Ahs

The Best Places To Install Solar Lights In Your Outdoor Space Bob Vila

How To Install Outdoor Solar Lighting

How To Install Outdoor Solar Lights Homeserve Usa

The Best Places To Install Solar Lights In Your Outdoor Space Bob Vila

Tips For Installing Solar Lights Outdoors Pretty Diy Home

Tips For Installing Maintaining Outdoor Solar Lights

Tips For Installing Solar Light Home Outdoor 2024 Lightcheckup

The Best Places To Install Solar Lights In Your Outdoor Space Bob Vila

How To Install Solar Motion Flood Lights On House Shed