How To Install Outdoor Yard Lighting
Outdoor yard lighting enhances safety, security, and aesthetics. A well-lit yard deters intruders, makes navigating pathways easier at night, and highlights landscape features. Installing outdoor lighting requires careful planning, proper electrical connections, and adherence to safety guidelines. This guide provides a comprehensive overview of the process, covering planning, preparation, installation, and testing.
Planning and Preparation: Mapping the Landscape
Before commencing any physical work, a detailed plan incorporating the yard's layout and intended use is essential. This involves identifying areas requiring illumination and determining the type of lighting fixture best suited for each location. Considerations include the purpose of the lighting (security, ambiance, pathway illumination), the desired level of brightness, and the style of fixtures that complement the existing architecture and landscaping.
The initial step involves creating a site map. This map should accurately represent the yard's dimensions, including existing structures, pathways, trees, and other landscape features. Use the map to mark the proposed locations for each lighting fixture. Consider the following factors when selecting locations:
Pathway Lighting: Fixtures positioned along walkways should provide adequate illumination to prevent tripping hazards. Low-voltage path lights are a popular choice due to their ease of installation and soft, diffused light.
Security Lighting: Motion-activated floodlights are effective for deterring intruders and illuminating large areas. These lights are typically installed near entrances, garages, and other vulnerable points.
Accent Lighting: Uplighting, spotlights, and landscape lighting fixtures can highlight architectural features, trees, shrubs, and other landscape elements. This type of lighting adds depth and visual interest to the yard.
Patio and Deck Lighting: String lights, lanterns, and recessed lighting can create a welcoming and functional outdoor living space. Consider the desired ambiance and activity level when selecting lighting for these areas.
Once the lighting locations have been determined, calculate the total wattage required for each circuit. This is crucial for selecting the appropriate transformer or power supply. Consult the manufacturer's specifications for each fixture to determine its wattage. If using multiple fixtures on a single circuit, the total wattage should not exceed the circuit's capacity.
After mapping and wattage calculations, compile a list of necessary materials and tools:
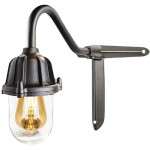
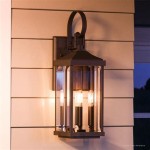
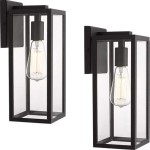
Lighting Fixtures: Select fixtures that are designed for outdoor use and rated for the appropriate weather conditions. Consider the style, size, and light output of each fixture.
Low-Voltage Transformer or Power Supply: Choose a transformer or power supply that is appropriately sized for the total wattage of the lighting system. Ensure that it is weatherproof and suitable for outdoor installation.
Low-Voltage Wire: Use direct burial wire specifically designed for outdoor lighting applications. The wire gauge should be appropriate for the distance and wattage of the fixtures.
Wire Connectors: Use weatherproof wire connectors to ensure secure and reliable electrical connections.
Ground Stakes: Ground stakes may be required to secure path lights and spotlights.
Conduit: Conduit is used to protect wires that are run above ground or through vulnerable areas.
Shovel or Trenching Tool: A shovel or trenching tool is needed to bury the low-voltage wire.
Wire Strippers/Crimpers: These tools are essential for preparing and connecting wires.
Screwdriver: A screwdriver is needed to install the lighting fixtures.
Voltage Tester: A voltage tester is used to verify that the power is off before working on electrical connections.
Multimeter: A multimeter can be used to measure voltage and current in the system.
Gloves and Safety Glasses: These protective gear items are essential for safety during installation.
Local building codes and electrical regulations should be reviewed before starting the installation. Permits may be required for certain types of outdoor lighting installations, particularly those involving direct connections to the main electrical panel. Consult with a qualified electrician to ensure compliance with all applicable codes and regulations.
Installation Procedures: Connecting Wiring and Fixtures
The installation process begins with establishing a power source. For low-voltage lighting systems, this typically involves connecting a transformer to a GFCI-protected outlet. The outlet should be located in a weatherproof enclosure to prevent water damage. For line-voltage systems, a direct connection to the main electrical panel may be required, which must be performed by a licensed electrician.
The location of the transformer is critical. It must be accessible for maintenance and protected from the elements. Ideally, the transformer should be mounted on a wall or post near the outlet. Ensure that the transformer is securely mounted and that all connections are weatherproofed.
Once the transformer is in place, the low-voltage wire can be run to the lighting fixtures. The wire should be buried at a depth of at least 6 inches to protect it from damage. Use a shovel or trenching tool to create a narrow trench along the planned route. Avoid running the wire under driveways or other areas where it may be subject to heavy traffic. If the wire must cross a driveway, protect it by running it through conduit.
At each lighting fixture location, allow for sufficient slack in the wire to make connections. Strip the ends of the wire and connect them to the fixture's terminals using weatherproof wire connectors. Ensure that the connections are tight and secure to prevent corrosion and electrical shorts.
Install the lighting fixtures according to the manufacturer's instructions. For path lights, this typically involves inserting the ground stake into the ground and attaching the fixture to the stake. For spotlights and uplights, the fixtures may be mounted on a wall, post, or tree using screws or brackets. Ensure that the fixtures are securely mounted and that they are aimed in the desired direction.
After all the fixtures have been installed and wired, connect the low-voltage wire to the transformer. Follow the manufacturer's instructions for making these connections. Typically, the wire is connected to terminals on the transformer. Ensure that the connections are tight and secure. Once the connections are made, plug the transformer into the GFCI-protected outlet. The lighting system should now be operational.
For line-voltage systems, the wiring process is more complex and requires a higher level of electrical knowledge. Line-voltage wiring must be run through conduit and connected to junction boxes. The connections must be made in accordance with the National Electrical Code (NEC) and all applicable local codes. Due to the potential safety hazards involved, line-voltage wiring should only be performed by a licensed electrician.
Testing and Troubleshooting: Ensuring Proper Functionality
After the installation is complete, the lighting system should be thoroughly tested to ensure that it is functioning properly. Begin by inspecting all the wires, connections, and fixtures. Look for any signs of damage or loose connections. Use a voltage tester to verify that the correct voltage is present at each fixture.
If some of the lights are not working, check the following:
Blown Fuses or Tripped Circuit Breakers: If the transformer has a fuse, check to see if it has blown. If a circuit breaker has tripped, reset it. If the fuse or circuit breaker continues to blow or trip, there may be a short circuit in the wiring.
Loose Connections: Check all the wire connections to ensure that they are tight and secure. Loose connections can cause intermittent lighting or complete failure.
Corroded Connections: Corrosion can build up on wire connections, preventing them from conducting electricity. Clean any corroded connections with a wire brush and apply a corrosion inhibitor.
Faulty Bulbs or LED Lamps: If a bulb or LED lamp is not working, replace it with a new one. Ensure that the new bulb or lamp is the correct type and wattage for the fixture.
Damaged Wiring: Inspect the wiring for any signs of damage, such as cuts, abrasions, or kinks. If the wiring is damaged, it must be repaired or replaced.
Transformer Issues: Use a multimeter to measure the voltage output of the transformer. If the voltage is not within the specified range, the transformer may be faulty and need to be replaced.
If the lights are flickering, it may be due to voltage fluctuations or loose connections. Check the voltage at the transformer and at the fixtures. Tighten all the wire connections to ensure that they are secure.
Motion-activated lights should be tested to ensure that they are responding to motion. Adjust the sensitivity and range settings as needed. If the lights are not responding to motion, check the sensor and wiring.
Once the lighting system is functioning properly, bury the low-voltage wire and tidy up the yard. Backfill the trenches with soil and smooth out any uneven areas. Remove any debris or waste materials from the work area. Ensure that the lighting system is properly aimed to achieve the desired effect.
Regular maintenance is essential to keep the outdoor lighting system functioning properly. Clean the fixtures regularly to remove dirt, dust, and debris. Inspect the wiring and connections for any signs of damage or corrosion. Replace any burned-out bulbs or LED lamps promptly. Trim any vegetation that may be obstructing the light from the fixtures.
During the winter months, protect the lighting system from snow and ice. Clear any snow that may be blocking the lights. Consider removing the fixtures and storing them indoors if they are not needed during the winter.

How To Install Your Own Outdoor Backyard Lighting My 100 Year Old Home

How To Install Your Own Outdoor Backyard Lighting My 100 Year Old Home

Installing Outdoor Landscape Lighting Easy By Home Repair Tutor

28 Backyard Lighting Ideas How To Hang Outdoor String Lights

How To Install Low Voltage Outdoor Landscape Lighting The Garden Glove

How To Install Low Voltage Outdoor Landscape Lighting 1000bulbs Blog

How To Hang Patio Lights

How To Install Your Own Outdoor Backyard Lighting My 100 Year Old Home

How To Hang Patio Lights

How To Install Outdoor Low Voltage Led Step Lights Mullan Lighting
Related Posts