How to Connect Outdoor Light Wires
Connecting outdoor light wires is a common DIY project that can enhance the aesthetics and functionality of your outdoor space. Whether you're installing string lights, pathway lights, or security lighting, understanding the process is crucial for ensuring a safe and successful installation. This article will guide you through the essential steps of connecting outdoor light wires, providing clear instructions and safety precautions.
1. Gather the Necessary Materials
Before embarking on your wiring project, ensure you have all the essential materials at hand. These include:
- Outdoor-rated electrical wire (typically 14/2 or 12/2 gauge)
- Wire connectors (wire nuts)
- Electrical tape
- Voltage tester
- Wire strippers
- Pliers
- Screwdriver
- Optional: Conduit or wire mold for protection and aesthetics
The type of wire you choose should be appropriate for the amperage and voltage requirements of your lights. Always use outdoor-rated wire and connectors designed for wet locations to prevent electrical hazards.
2. Plan the Wiring Layout
Before running any wires, it's essential to plan your wiring layout carefully. Consider the placement of your lights, the distance between them, and the power source. You'll need to determine the shortest and safest route for the wires, taking into account any obstacles like trees, fences, or walkways. Sketching a simple diagram can help you visualize the wiring path.
For aesthetic reasons, consider using conduit or wire mold to conceal the wires and create a more polished look. Conduit provides added protection for the wires, especially in areas exposed to weather elements.
3. Safely Connect the Wires
Once you've planned your wiring layout, it's time to connect the wires to your lights and power source. Follow these steps:
- Turn off the power: Before working with any electrical components, always turn off the power supply to the circuit you're working on. This is essential for safety and prevents electrical shocks.
- Strip the wire ends: Use wire strippers to remove the insulation from the ends of the wires. Expose approximately ½ inch of bare wire for each connection.
- Connect the wires: Connect the wires according to the color code. Typically, black wire is hot, white wire is neutral, and green or bare wire is ground. Join the wires together using wire connectors (wire nuts). Ensure the wires are securely connected and make good contact.
- Secure the connections: Wrap electrical tape around the wire connectors for added protection and insulation.
- Test the connection: After making all connections, use a voltage tester to ensure the wires are properly connected and that there is no voltage present. If you detect any voltage, double-check your connections and ensure the power is off.
It's essential to follow electrical codes and safety guidelines when connecting outdoor light wires. If you're unsure about any aspect of the wiring process, consult a qualified electrician.
4. Install the Lights
Once you've wired your lights, you can proceed with their installation. Follow the manufacturer's instructions for each specific light fixture. Most outdoor lights have mounting brackets or screws for securing them to walls, fences, or posts.
Ensure that the lights are installed securely and level. Use a level to ensure that the lights are straight and symmetrical. If you're using post lights, make sure the post is anchored firmly to the ground.
5. Turn on the Power and Test
After installing the lights, carefully turn the power back on at the circuit breaker. Once the power is restored, inspect the lights to ensure they're working properly. Check for any flickering or dimness, and make sure each light is illuminated as intended.
If you encounter any issues, turn off the power again and re-check your wiring connections. Ensure that all wires are securely connected and that the power source is functioning correctly. If you're unable to troubleshoot the problem independently, contact a qualified electrician to help you.
By carefully following these steps, you can successfully connect outdoor light wires and illuminate your outdoor space. Remember to prioritize safety, consult electrical codes, and seek professional help if you have any doubts or concerns.

Outdoor Low Voltage Lighting Diy Family Handyman

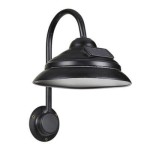
How To Replace An Outdoor Light

Replacing An Outdoor Light Fixture

How To Wire Outdoor Lighting Warisan

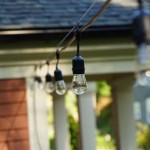
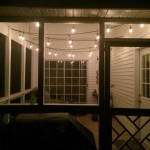
How To Hang Outdoor String Lights Resource Article By Partylights Com

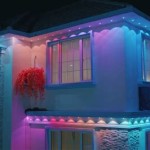
Wiring And Installing Exterior Lighting

How To Replace An Outdoor Light

Electrical Wiring From A Photocell To An Outdoor Led Floodlight Or Reflector 110v Devices

Wiring Installation Coastal Source

How To Wire A Light Switch And Outside Together Ehow
Related Posts