How to Change an Outdoor Light Socket
Outdoor light sockets, often exposed to the elements, can deteriorate over time, leading to malfunction or safety hazards. Changing a faulty outdoor light socket requires a few simple steps and basic electrical knowledge. This article provides a comprehensive guide on how to safely and effectively replace an outdoor light socket.
1. Safety Precautions
Safety is paramount when working with electricity. Before starting any work, it is crucial to disconnect power to the circuit. Locate the circuit breaker controlling the outdoor light fixture and switch it to the "off" position. Confirm that the power is off by testing the light fixture with a non-contact voltage tester. It is also advisable to wear safety glasses and insulated gloves for protection.
2. Removing the Old Socket
Once the power is disconnected, the old socket can be safely removed. If the socket is attached to a junction box, unscrew the mounting screws holding the socket in place. If the socket is directly wired to the fixture, disconnect the wires from the socket terminals. Take careful note of the wire colors (usually black for hot, white for neutral, and green or bare copper for ground) to ensure proper reconnection.
Using a screwdriver or wire cutters, carefully loosen and remove the wire connectors from the socket terminals. If the socket is a push-in type, gently push the wires out of their connectors. Once the wires are disconnected, remove the old socket from the fixture or junction box.
3. Installing the New Socket
With the old socket removed, it's time to install the new one. If the new socket is similar to the old one, the installation process will be straightforward. If the new socket has different wiring connections or requires different mounting hardware, carefully refer to the manufacturer's instructions for installation details.
Begin by attaching the new socket to the fixture or junction box. If using mounting screws, ensure they are properly tightened. If using a push-in type socket, ensure the wires are securely connected to the terminals.
Connect the wires to the new socket, matching the colors of the wires to the corresponding terminals on the socket. Black wire to the black terminal (hot), white wire to the white terminal (neutral), and green or bare copper wire to the green terminal (ground). Secure the wire connections using wire connectors or by tightening the screws on the terminals.
4. Testing and Re-energizing the Circuit
With the new socket installed and the wires connected, it's time to test the fixture. Before re-energizing the circuit, visually inspect the connections and ensure all wires are securely connected. If the connections look good, carefully turn the circuit breaker back on and check if the light fixture turns on.
If the light does not turn on, check for loose connections, ensure the circuit breaker is turned on, or contact a licensed electrician for assistance. If the light turns on, test the socket with a light bulb of the appropriate wattage. If the light bulb is functioning properly, the new socket has been installed successfully.
Remember, electrical work can be dangerous. If you are uncomfortable working with electricity, it is always best to contact a qualified electrician to handle the task.

Broken Exterior Light Socket Secret Replace Repair Fix

Light Socket Removal Releases From Housing Of Fixture

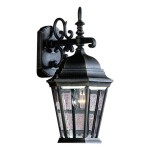
How To Replace An Outside Light

How To Replace An Outside Light

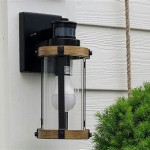
How To Replace An Outdoor Light Fixture

How To Replace An Outdoor Light Fixture

How To Replace An Outside Light

How To Install Replace Outdoor Light Easy Simple

How To Fit Outdoor Lights Lighting Electrical Security B Q

How To Change Porch Light Bulb