How To Change A Lightbulb In An Outdoor Light Fixture
Changing a lightbulb in an outdoor light fixture is a common maintenance task required for property upkeep. Safety is paramount when dealing with electrical components. This guide provides a comprehensive breakdown of the process, emphasizing safety precautions and detailed instructions for common outdoor light fixture types.
Safety First: Preparation and Precautions
Before commencing any work on an outdoor light fixture, safety must be considered. Electricity poses a significant risk, and taking preventative measures is crucial to avoid injury or damage. The initial step is to disconnect the power supply to the fixture at the circuit breaker. Locate the breaker that controls the outdoor lighting circuit in the electrical panel. Switch the corresponding breaker to the "Off" position. This disconnects the flow of electricity to the light fixture, minimizing the risk of electrical shock. Always double-check that the light is indeed off before proceeding.
Verification of power disconnection is a critical step. After switching the breaker off, test the fixture to ensure no residual current is present. A non-contact voltage tester is an essential tool for this purpose. Hold the tester near the fixture's wiring or bulb socket; if the tester indicates the presence of voltage, the breaker may not be the correct one or there might be a fault in the wiring. In such cases, it is recommended to consult with a qualified electrician before proceeding. If the tester confirms the absence of voltage, then the work area can be considered safe.
Personal protective equipment (PPE) is also advisable. Wearing rubber gloves provides an additional layer of insulation against accidental electrical contact. Safety glasses protect the eyes from debris that may fall during the bulb replacement process, such as fragments of glass if the old bulb is broken. A sturdy ladder or step stool is frequently required to reach the outdoor light fixture. Ensure the ladder is placed on a level and stable surface before climbing. Adherence to these safety protocols significantly reduces the potential for accidents and ensures a safe working environment.
Daylight is the ideal time to undertake this task, as natural light provides clear visibility. If working in low-light conditions, use a portable work light. Ensure the work light is battery-powered or plugged into a circuit separate from the one being worked on. Avoid dangling cords that can create trip hazards. A clear and well-lit workspace contributes to accuracy and reduces the likelihood of errors.
Identifying the Fixture Type and Accessing the Bulb
Outdoor light fixtures come in various designs, each requiring a slightly different approach to bulb replacement. Common types include enclosed fixtures (with globes or lenses), open fixtures, and recessed lighting. Understanding the specific type of fixture is essential before attempting to remove the old bulb.
Enclosed fixtures frequently have a globe or lens that needs to be removed to access the bulb. The method of removal varies. Some globes are held in place by screws around the base. Use the appropriate screwdriver (Phillips head or flathead) to loosen the screws. Do not completely remove the screws, as the globe could fall. Support the globe with one hand while loosening the screws with the other. Once the screws are loose enough, carefully remove the globe or lens and set it aside on a soft surface to prevent damage. Other globes may be spring-loaded or have a twist-and-lock mechanism. For these, gently push inward and twist the globe to release it.
Open fixtures typically have the bulb directly exposed or shielded by a cage. If a cage is present, it will likely be attached with screws or clips. Loosen the screws or release the clips to remove the cage. Once the cage is removed, the bulb is accessible. Recessed lighting fixtures require a different approach. These often have a trim ring that is held in place by spring clips. Gently pull the trim ring away from the housing; the spring clips should disengage, allowing the trim ring and bulb to be removed. Be careful not to pull too hard, as the wiring connections may be fragile.
It may be necessary to consult the fixture's manual for specific instructions on how to remove the globe, lens, or trim ring. If the manual is unavailable, a close inspection of the fixture will usually reveal the mechanism for accessing the bulb. Before attempting to remove anything, ensure that the fixture is clean and free of debris. Accumulated dirt and grime can make components difficult to remove. Clean the fixture with a dry cloth to improve visibility and grip. Once the bulb is accessible, proceed to the next step with caution.
Removing the Old Bulb and Installing the New One
With the fixture open and the bulb accessible, carefully remove the old bulb. If the bulb has recently been in use, it may be hot. Allow it to cool down completely before attempting to remove it. Use gloves or a cloth to handle the bulb, protecting the hands from heat and potential breakage.
There are two primary types of lightbulbs: screw-in and bayonet. Screw-in bulbs, also known as Edison bulbs, are the most common type. To remove a screw-in bulb, grasp it firmly and turn it counterclockwise until it comes loose from the socket. If the bulb is stuck, apply gentle pressure and try again. Avoid using excessive force, as this could cause the bulb to break in the socket. If the bulb does break, extreme caution is necessary to remove the remaining pieces. Disconnect the power at the circuit breaker again to avoid any accidental electrocution. Use pliers to carefully remove the broken glass and the base of the bulb from the socket. Ensure all fragments are removed to avoid damaging the new bulb or the socket.
Bayonet bulbs have a different removal process. These bulbs have pins on the side that lock into the socket. To remove a bayonet bulb, push it gently into the socket and twist it counterclockwise. The pins will disengage, allowing the bulb to be pulled out. If the bulb is difficult to remove, check for any corrosion or debris that may be obstructing the pins. Clean the socket if necessary before attempting to remove the bulb again. Select a replacement bulb that matches the specifications of the old bulb. Check the wattage and voltage requirements printed on the old bulb or in the fixture's manual. Using a bulb with the incorrect wattage can damage the fixture or create a fire hazard.
Install the new bulb by reversing the removal process. For screw-in bulbs, align the base of the bulb with the socket and turn it clockwise until it is snug. Do not overtighten, as this could damage the socket. For bayonet bulbs, align the pins on the side of the bulb with the slots in the socket, push the bulb in, and twist it clockwise to lock it in place. Once the new bulb is installed, carefully reassemble the fixture. Replace the globe, lens, or trim ring, ensuring it is securely fastened. Tighten the screws or engage the clips according to the fixture's design. After reassembling the fixture, switch the circuit breaker back to the "On" position. Test the light to ensure it is working properly. If the light does not turn on, double-check that the bulb is properly installed and that the circuit breaker is not tripped. If the light still does not work, consult with a qualified electrician.

How To Change An Outdoor Porch Lantern Sconce Light Bulb Simple Diy Do It Yourself Procedure Hq

How To Remove A Porch Light Cover Change The Bulb Hunker

How To Change An Outdoor Porch Lantern Sconce Light Bulb Simple Diy Do It Yourself Procedure Hq

Replace Bulb Of Outdoor Light In 2 Minutes

Can Anyone Help Me Open This Outdoor Wall Fixture To Change The Bulbs

How To Change An Outdoor Porch Lantern Sconce Light Bulb Simple Diy Do It Yourself Procedure Hq

3 Tips For Changing A Flood Light Bulb Doityourself Com

How To Change An Outside Light Bulb Quick And Easy

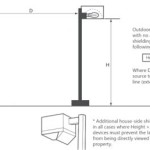
How To Change Light Bulb In Outdoor Lamp Post

How To Change A Lightbulb Express Electrical
Related Posts