How Do You Install Outdoor Security Lights?
Outdoor security lights serve a vital purpose in enhancing the safety and security of homes and businesses. They provide crucial illumination, deterring potential intruders and improving visibility at night. Installing these lights effectively requires a combination of planning, proper tools, and electrical knowledge. This guide will outline the essential steps involved in installing outdoor security lights, ensuring a secure and well-lit environment.
Step 1: Planning the Installation
Before embarking on the installation process, careful planning is crucial. This involves determining the optimal location, type, and number of lights needed. Consider the following factors:
- Area Coverage: Identify the specific areas to be illuminated, such as the front door, garage, driveway, or backyard. Determine the required coverage range for each location.
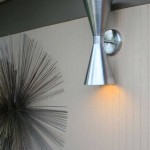
- Light Type: Choose the appropriate light type based on the purpose and environment. Motion-activated lights offer enhanced security, while floodlights provide ample illumination for larger areas. Consider decorative options for aesthetic purposes.
- Power Source: Determine the available power source, whether it is a dedicated circuit or an existing outlet. Ensure the circuit capacity is sufficient for the lights being installed.
- Placement: Position lights strategically to maximize visibility and deter intruders. Consider placing lights at high vantage points to illuminate entryways and vulnerable areas.
Once the planning is complete, gather all necessary tools and materials, including:
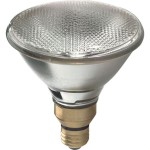
- Outdoor security lights
- Wire and electrical connectors
- Junction box
- Screwdrivers (Phillips and flathead)
- Wire strippers
- Voltage tester
- Ladder
- Drill and drill bits
- Safety gear (gloves, eye protection)
Step 2: Electrical Connections
Connecting outdoor security lights to the power source is a crucial step requiring electrical knowledge and safety precautions. Ensure power is disconnected before working on the electrical system. Follow these steps:
- Locate the Power Source: Identify the nearest electrical outlet or switch. Ensure the circuit capacity is sufficient for the lights being installed.
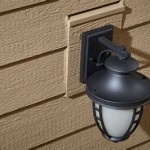
- Install Junction Box: Position the junction box strategically for easy access to the power source and light fixture. Secure the box with screws to the wall or beam.
- Run Wires: Connect electrical wires from the power source to the junction box, using appropriate wire gauge and connectors. Ensure the wires are secured and properly insulated. Run additional wires from the junction box to the light fixture.
- Connect Wires to Light Fixture: Connect the wires to the light fixture terminals, matching the colors (black to black, white to white, ground to ground). Secure the connections with wire nuts and ensure they are tight.
- Test Connections: Before restoring power, use a voltage tester to verify that all connections are correct and properly insulated.
Step 3: Mounting the Light Fixture
Once the electrical connections are complete, mount the light fixture securely to the chosen location. Follow these steps:
- Position the Fixture: Hold the light fixture in its desired position and mark the mounting points on the wall or beam.
- Drill holes for mounting screws: Use a drill to create pilot holes at the marked spots.
- Secure Fixture: Attach the light fixture to the wall or beam using the provided mounting screws. Ensure the fixture is securely fixed and level.
- Adjust Position: Adjust the fixture's direction to maximize illumination and coverage of the desired area.
After completing the installation, restore power to the circuit and test the lights. Check that they turn on and function properly. Ensure the lights are properly aimed and provide adequate illumination in all desired areas. Adjust the light direction as needed to optimize coverage and security.
While installing outdoor security lights, prioritize safety. Disconnect the power before working on any electrical components. Use proper tools and safety gear, and be mindful of potential hazards, such as ladders and electrical wires. Consult with a qualified electrician if you are unsure about any aspect of the installation process.

Led Security Lights The Ultimate Guide To Home Safety

4 Tips For Outdoor Security Lighting Haas Sons

Everything You Need To Know About Security Light Installation

Condo Blues How To Install A Solar Security Light

How To Make Your Home More Secure With Outdoor Security Lights Checkatrade

Installing Outside Security Lights Costs

Outdoor Security Lights Installed Home Garden Lighting

Should You Install Outdoor Security Lighting Dna

How To Install A Security Light The Easy Way

Outdoor Security Lighting Installation Sydney Nsw
Related Posts