How to Install an Outdoor Wall Light Box
Outdoor wall light boxes, often referred to as wall sconces, add a touch of elegance and functionality to any outdoor space. They provide illumination for pathways, entrances, and landscaping, enhancing safety and aesthetics. Installing an outdoor wall light box is a relatively straightforward DIY project, requiring basic tools and some electrical knowledge. This guide will walk you through the installation process, emphasizing safety and clarity.
1. Gather Necessary Materials and Tools
Before starting the installation, gather all required materials and tools. This includes:
- Outdoor wall light box (ensure it's rated for outdoor use)
- Electrical junction box (if not included with the light fixture)
- Weatherproof electrical wire (matching the gauge required by the fixture)
- Wire connectors (appropriate for the wire gauge and type)
- Electrical tape
- Voltage tester
- Level
- Screwdriver
- Drill with appropriate bits (for drilling pilot holes)
- Safety glasses
- Work gloves
Ensure you have the correct type and size of materials for your specific installation. Double-check the electrical requirements of the light fixture, as this dictates the necessary wire gauge and connector type.
2. Prepare the Installation Area
Proper preparation is crucial for a successful installation. Follow these steps:
- Turn off the power: Locate the circuit breaker controlling the outdoor lighting and switch it off. Confirm the power is off using a voltage tester.
- Choose the location: Decide on the optimal placement for your light box, taking into account factors like visibility, proximity to an electrical outlet, and aesthetic considerations.
- Mark the position: Use a level and pencil to mark the exact location where the light box will be mounted. Ensure the marking is level and centered.
- Drill pilot holes: If mounting on a brick or concrete wall, drill pilot holes using an appropriate drill bit. This will prevent the screws from cracking the wall.
It's recommended to install the light box near an existing electrical outlet to minimize the wiring required. If the installation is close to a water source, ensure you use weatherproof materials and techniques to prevent water ingress.
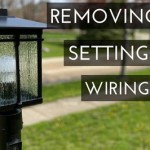
3. Install the Light Box and Connect Wiring
The installation process involves securing the light box and connecting the wiring. Follow these instructions carefully:
- Mount the light box: Align the light box with the marked location and secure it to the wall using the provided screws or anchors. Ensure the box is firmly attached and level.
- Run the electrical wire: If an existing outlet is unavailable, run a weatherproof wire from the electrical panel to the junction box (if needed) and then to the light box.
- Connect the wires: Strip the insulation off the ends of the wire using wire strippers. Connect the wires to the corresponding terminals on the light box and junction box (if used) using wire connectors. Ensure the connections are secure and properly isolated using electrical tape.
- Test the connection: Turn on the power at the circuit breaker and test the light box. Ensure the light works properly and that all connections are secure.
When connecting wires, carefully match the colors: black to black, white to white, and ground to ground. This ensures proper polarity and prevents electrical hazards. If in doubt, consult a qualified electrician.
4. Complete the Installation
The final steps involve finishing the installation and ensuring proper functionality:
- Install the light fixture: Once the wiring is complete, attach the light fixture to the light box according to the manufacturer's instructions. Secure it firmly and ensure it sits flush with the wall.
- Test again: Turn on the power and test the fixture thoroughly, making sure the light is working correctly and that all connections are secure.
- Clean up: Discard any leftover materials and clean up the installation area, removing any debris or tools.
After completing the installation, ensure the light box is properly grounded to provide a safe and reliable environment. If you encounter any issues or have concerns about your electrical system, contact a qualified electrician for assistance.
By following these steps and taking the necessary precautions, you can successfully install an outdoor wall light box and enhance the safety, aesthetics, and functionality of your exterior space.

How To Install An Exterior Electrical Box For A Light Fixture On The Wood Siding

Replacing An Outdoor Light Fixture Concord Carpenter

Replacing An Outdoor Light Fixture Concord Carpenter

Installing Light On Round Junction Service Box Diy Home Improvement Forum

How To Install A Porch Light Exterior Fixtures Lighting

Replacing An Outdoor Light Fixture Concord Carpenter

Replacing An Outdoor Light Fixture Concord Carpenter

Steel Wall For Mounting Light Fixtures Hansen Buildings

Reviews For Home Luminaire Spence 1 Light White Outdoor Wall Lantern Sconce With Seeded Glass And Built In Gfci S Pg 5 The Depot

Help With Rough In For Outside Lights And Receptacles Electrician Talk