How Do I Adjust the Sensitivity on My Outdoor Light Sensor?
Outdoor light sensors, also known as photocells or dusk-to-dawn sensors, are essential components of many outdoor lighting systems, automatically switching lights on at night and off during the day. While these sensors are designed to operate reliably, there are situations where adjusting their sensitivity can be necessary to optimize their performance. Factors like changing seasons, landscaping changes, or even the addition of new light sources can affect the sensor's ability to detect the appropriate light levels. This article provides a comprehensive guide on how to adjust the sensitivity of your outdoor light sensor, ensuring your lights turn on and off precisely when needed.
Understanding Light Sensitivity
The sensitivity of a light sensor determines how much ambient light it needs to detect before triggering the light fixture. Higher sensitivity settings require less ambient light to activate the sensor, while lower sensitivity settings require more light. Most light sensors have a sensitivity adjustment knob or dial that allows you to fine-tune their response. The adjustment mechanism can vary depending on the specific sensor model, but common methods include a potentiometer or a series of switches.
Before adjusting the sensitivity, it's helpful to understand the different factors that can influence the sensor's performance. For example, the presence of nearby streetlights, porch lights, or other artificial light sources can interfere with the sensor's ability to accurately detect the onset of darkness. Similarly, changes in the surrounding landscape, such as the growth of trees or the addition of new structures, can also affect the sensor's light detection.
Locating and Accessing the Sensitivity Adjustment
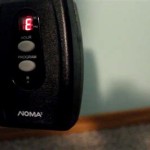
The first step in adjusting the sensitivity of your outdoor light sensor is to locate the adjustment mechanism. Typically, the sensitivity knob is located on the sensor itself, often on the side or bottom. It may be a small, circular knob or a series of switches.
To access the adjustment knob, you may need to remove the sensor from its housing or carefully pry open a cover. If you are unsure about how to access the adjustment mechanism, consult the manufacturer’s instructions or contact a qualified electrician. It's crucial to disconnect the power to the fixture before attempting any adjustments to the sensor.
Adjusting the Sensitivity
Once you have located and accessed the sensitivity adjustment knob, you can begin to fine-tune the sensor's response. Typically, turning the knob clockwise increases the sensitivity of the sensor, requiring less ambient light for activation. Conversely, turning the knob counter-clockwise decreases the sensitivity, requiring more light for activation.
To find the optimal sensitivity setting for your specific situation, experiment with different positions of the adjustment knob. Start by adjusting the knob in small increments, observing how the sensor responds to changing light conditions. It's best to test the sensitivity during both daytime and nighttime hours to fully understand the impact of the adjustment.
If your lights are turning on too early in the evening, you might need to decrease the sensitivity. Conversely, if your lights are turning on too late or not at all, you might need to increase the sensitivity. Once you have found the optimal setting, secure the adjustment knob and reconnect the power to the fixture.
Additional Tips for Optimizing Sensor Performance
In addition to adjusting the sensitivity, there are other steps you can take to improve the performance of your outdoor light sensor:
1. Clean the Sensor: Over time, the sensor lens can become dirty or covered with debris, affecting its ability to detect light accurately. Clean the lens with a soft cloth and mild soap solution to ensure optimal performance. 2. Position the Sensor Correctly: Make sure the sensor is positioned in a location where it is not obstructed by trees, shrubs, or other objects. The sensor should have an unobstructed view of the sky for optimal light detection. 3. Consider Obstructions: If your sensor is located near streetlights, porch lights, or other artificial light sources, they can interfere with the sensor's operation. If possible, try to position the sensor away from these light sources to minimize interference.
By understanding the principles of light sensitivity, properly adjusting the sensor, and following these additional tips, you can ensure your outdoor light sensors function correctly, providing reliable, automatic illumination when needed.

How To Adjust Your Sensor Light Metro Electrical 24 Hour Electricians

Motion Sensor Lights Tips To Reset Detector

How To Reset Outdoor Motion Sensor Lights Electronicshub

Trouble Shooting A Motion Sensor Light That Stays On Sparkybase

Is Your Motion Sensor Light Irritatingly Sensitive Let S Get It Fixed Sparkybase

How To Reset A Motion Sensor Light Local Electrical Group

Understanding Motion Lighting

Sensitivity Control Detection Zone Setup

Security Outdoor Solar Motion Sensor Light 10w 20w Cob Led

How To Adjust Security Lights Lighting And Ceiling Fans The Home Depot