Hard-Wired Outdoor Post Light Replacement: A Step-by-Step Guide
Outdoor post lights provide both safety and aesthetic appeal to your property. Over time, these lights may require replacement due to aging, damage, or simply a desire for a new look. Replacing a hard-wired outdoor post light can seem daunting, but with the right steps and safety precautions, this task is manageable for the average homeowner.
Safety First: Power Disconnection and Precautions
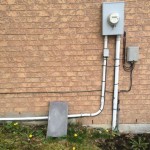
Before embarking on any electrical work, the most crucial step is to ensure your safety by disconnecting the power supply. This involves locating the circuit breaker controlling the outdoor post light and switching it off. To confirm the power is off, test the light fixture with a voltage tester. Additionally, wear appropriate safety gear like rubber-soled shoes, gloves, and eye protection to prevent electric shock and potential injuries.
Preparing for the Replacement: Removing the Old Fixture
Once the power is off, you can begin removing the old fixture. Start by carefully removing the lamp shades and bulbs. Then, identify the mounting screws securing the light fixture to the post. Use a suitable screwdriver to loosen and remove these screws. Once the screws are removed, you can gently pull the fixture away from the post, being cautious not to damage any wiring.
Disconnect the electrical wires connecting the old fixture to the post. Pay attention to the wire colors – usually, black is for live wire, white for neutral, and green or bare copper for ground. Take note of which wire connects to which terminal on the fixture, as you'll need this information when installing the new light. To avoid confusion, it's helpful to label the wires or take a photograph before disconnecting them.
Installing the New Fixture: Wiring and Securing
With the old fixture removed, you can now install the new one. The installation process is essentially the reverse of the removal process. Start by feeding the electrical wires through the new fixture's mounting plate. Connect the wires to the corresponding terminals on the new fixture, ensuring correct polarity. Black goes to black, white to white, and ground to ground.
Once the wiring is complete, carefully position the new fixture onto the post and secure it with the provided screws. Check that the fixture is level and stable before tightening the screws fully.
Final Steps: Testing and Restoring Power
After installing the new fixture, it's essential to test its functionality. Before restoring power, double-check all connections and ensure the wires are secure. Turn the power back on at the circuit breaker. If the light works as expected, you've successfully replaced your outdoor post light.
If the light doesn't turn on, immediately switch off the power at the circuit breaker and check your wiring again. Ensure all connections are secure and that the wires are correctly connected. If you still experience problems, it's advisable to consult a qualified electrician for further troubleshooting and repairs.

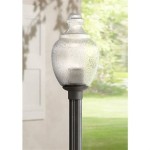
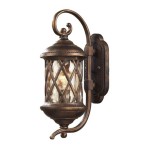
Unbranded Portland 1 Light Black 18 In Aluminum Hardwired Outdoor Weather Resistant Post Round Fitter With No Bulb Included 531phbr Bk

Cal 17 2 In 1 Light Matte Black Metal Hardwired Outdoor Weather Resistant Post With Clear Glass Pack

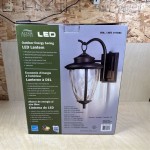
Lutec Vintage 3 Head Led Outdoor Hard Wired Street Light

Unbranded Portland 1 Light Black 97 In Aluminum Hardwired Outdoor Weather Resistant Post Set With No Bulb Included 531phbxlr 567p Bk

Kpuy Black Outdoor Post Lights Waterproof Aluminum Housing With Tempered Glass Lamp Lighting Hard Wired For Yard Driveway Path Patio

How To Update Or Replace A Lamp Post And Light

Dusk To Dawn Outdoor Post Light Hardwired 120v Waterproof Aluminum Pole Ligh

Post Lighting At Com

6 Packs Lutec Vintage 3head Led Outdoor Hardwired Post Light

Horo Martin 16 5 In 1 Light Mattle Black Metal Hardwired Outdoor Weather Resistant Post
Related Posts