Adding a Photocell to an Outdoor Light
Adding a photocell to an existing outdoor light fixture offers a convenient and energy-efficient way to automate outdoor lighting. Photocells, also known as photoresistors or light-dependent resistors (LDRs), control the flow of electricity based on the ambient light level. They activate the light at dusk and deactivate it at dawn, eliminating the need for manual switching and reducing energy waste.
Key Advantages of Using a Photocell:
- Automated Operation
- Energy Savings
- Enhanced Security
- Convenience
This article provides a step-by-step guide on how to install a photocell on an existing outdoor light fixture. Before beginning any electrical work, always ensure the power is turned off at the breaker box. Employing appropriate safety precautions is paramount to prevent electrical shock.
Essential Tools and Materials:
- Photocell Control (Twist-Lock or Screw-Terminal)
- Wire Strippers/Cutters
- Screwdrivers (Flathead and Phillips)
- Electrical Tape
- Wire Connectors (Wire Nuts)
- Ladder (if necessary)
- Voltage Tester
The first step involves choosing the correct photocell control. Two common types are available: twist-lock and screw-terminal. Twist-lock photocells are designed for easy installation by twisting them onto the light socket. Screw-terminal photocells require wiring connections. Select the type that best suits the existing light fixture and personal preference.
Understanding Photocell Types:
- Twist-Lock Photocells: Easy Installation
- Screw-Terminal Photocells: More Wiring Involved
Once the photocell is selected, the next step is to access the wiring within the light fixture. Turn off the power to the light fixture at the breaker box. Use a voltage tester to confirm the power is off. Remove the existing light bulb and any covering protecting the wiring compartment. Carefully examine the existing wiring.
Basic Wiring Considerations:
- Identify Live, Neutral, and Ground Wires
- Ensure Proper Wire Connections
- Use Correct Wire Connectors
For twist-lock photocells, simply twist the photocell onto the light socket, ensuring a secure connection. Then, screw the light bulb into the photocell. For screw-terminal photocells, the process involves connecting the wires from the photocell to the existing wiring within the fixture. Typically, black wires represent the "hot" or live wire, white wires represent the neutral wire, and green or bare copper wires represent the ground wire.
Wiring a Screw-Terminal Photocell:
- Connect Black Wires Together
- Connect White Wires Together
- Connect Ground Wires Together
- Secure Connections with Wire Nuts
Connect the black wire from the photocell to the black (live) wire from the fixture using a wire connector. Similarly, connect the white wire from the photocell to the white (neutral) wire from the fixture. Finally, connect the ground wire from the photocell to the ground wire of the fixture. Ensure all wire connections are secure and properly capped with wire connectors. Carefully tuck the wires back into the fixture's wiring compartment.
Safety Precautions During Installation:
- Always Turn Off Power at the Breaker Box
- Use a Voltage Tester to Confirm Power is Off
- Employ Proper Wiring Techniques
Once the wiring is complete, reattach the covering to the wiring compartment and install a suitable light bulb into the photocell (if using a screw-terminal type). Restore power to the light fixture at the breaker box. The light should now function automatically, turning on at dusk and off at dawn, thanks to the installed photocell.
Testing the Photocell:
- Observe Light Activation at Dusk
- Observe Light Deactivation at Dawn
Regular maintenance is recommended to ensure optimal photocell performance. Keep the photocell clean and free from debris, which can interfere with its light-sensing capabilities. Periodically inspect the wiring connections to ensure they remain secure.
Maintaining the Photocell:
- Keep the Photocell Clean
- Inspect Wiring Connections Periodically
Adding a photocell to an outdoor light is a relatively simple project that offers substantial benefits in terms of convenience, energy savings, and enhanced security. By following the steps outlined in this article and adhering to safety precautions, homeowners can easily automate their outdoor lighting and enjoy the advantages of a photocell-controlled system.

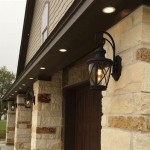
How To Add A Light Sensor Outdoor Lanterns The Navage Patch

Electrical Wiring From A Photocell To An Outdoor Led Floodlight Or Reflector 110v Devices

How To Install And Troubleshoot Photo Eye

Hardwire Post Eye Light Control With Photocell Automatic Sensor Switch Ledwholers

How To Add A Light Sensor Outdoor Lanterns The Navage Patch

Steps To Follow Add Photocell In Outdoor Lights Ledmyplace

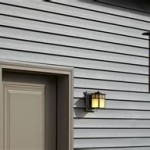
Dusk To Dawn Photocell Switch Installation

How To Wire A Photocell Multiple Lights

Sitka Add In Outdoor Photocell Sensor For Garden Light Kits Black Litecraft

Install The Photocell Sensor