How to Set Outdoor Motion Sensor Lights
Outdoor motion sensor lights offer enhanced security and convenience by automatically illuminating an area when movement is detected. Proper installation and meticulous configuration are crucial to ensure these lights function effectively and avoid triggering false alarms. This article provides a detailed guide on how to set up outdoor motion sensor lights, covering key aspects from initial planning to final adjustments.
Planning and Preparation
Before physically installing any components, careful planning is essential. This includes selecting the appropriate type of motion sensor light, determining the optimal location, and ensuring all necessary tools and materials are readily available.
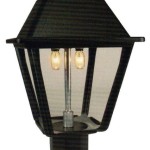
The first step involves choosing the right type of motion sensor light. Several options exist, each with its own advantages and disadvantages. Floodlights are common due to their wide coverage area and high intensity, making them suitable for large yards or driveways. Spotlights offer more focused illumination, ideal for highlighting specific areas or features. Decorative lights with integrated motion sensors provide a more aesthetically pleasing option while still offering security benefits. Furthermore, the light source itself needs consideration: LED lights are energy-efficient and long-lasting, halogen lights provide brighter illumination but consume more power, and incandescent lights are generally less efficient and have a shorter lifespan.
Selecting the optimal location is equally important. Consider factors such as the area requiring illumination, potential obstructions that might block the sensor's view, and the proximity to a power source. Ideally, the light should be positioned to cover entry points like doors and windows, as well as walkways and driveways. Avoid placing the sensor in direct sunlight or near heat sources, as these can trigger false alarms. Also, be mindful of nearby trees or bushes that might move in the wind, potentially activating the sensor unnecessarily. The mounting height should be within the manufacturer's recommended range to ensure accurate detection.
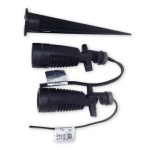
Finally, gather all necessary tools and materials before beginning the installation process. This typically includes a screwdriver (various types depending on the light fixture and mounting surface), wire strippers, electrical tape, a drill (if mounting to brick or concrete), a level, and safety glasses. Ensure the power is turned off at the circuit breaker before working with any electrical wiring. A voltage tester can confirm that the power is indeed off. Having all materials prepared in advance streamlines the installation process and minimizes potential delays.
Installation Procedures
After completing the planning phase, the next step is to physically install the motion sensor light. This involves mounting the fixture, connecting the electrical wiring, and ensuring everything is securely in place.
Begin by mounting the fixture to the chosen location. If replacing an existing light fixture, carefully remove the old fixture, noting the wiring connections. If installing a new fixture, use the mounting bracket provided with the light to mark the screw holes on the mounting surface. Drill pilot holes if necessary, especially when mounting to brick or concrete. Secure the mounting bracket using appropriate screws, ensuring it is level. Attach the light fixture to the mounting bracket, following the manufacturer's instructions. Ensure all screws are tightened to prevent movement.
Next, connect the electrical wiring. The wiring configuration typically involves three wires: a hot (black) wire, a neutral (white) wire, and a ground (green or bare copper) wire. Using wire strippers, carefully strip a small amount of insulation from the ends of each wire. Connect the corresponding wires from the light fixture to the wires from the junction box, using wire connectors or wire nuts. Ensure the connections are secure and that no bare wire is exposed. Wrap each connection with electrical tape for added insulation and protection. If unsure about the wiring configuration, consult a qualified electrician.
Once the wiring is complete, carefully tuck the wires back into the junction box and secure the light fixture to the mounting bracket. Use a level to ensure the fixture is properly aligned. Turn the power back on at the circuit breaker and test the light. If the light does not illuminate, double-check the wiring connections and the circuit breaker. If the light illuminates but the motion sensor does not function, refer to the troubleshooting section of the manufacturer's instructions.
Configuration and Adjustment
With the light installed and functioning, the final step is to configure the motion sensor settings to optimize performance and minimize false alarms. This involves adjusting sensitivity, range, and duration settings.
The sensitivity setting determines how sensitive the motion sensor is to movement. A higher sensitivity setting will detect smaller movements from farther away, while a lower sensitivity setting will require larger movements closer to the sensor. Adjusting the sensitivity setting is crucial to prevent false alarms triggered by small animals or moving branches. Start with the lowest sensitivity setting and gradually increase it until the desired detection range is achieved. Test the sensor by walking through the detection area and observing when the light activates. If the light triggers too easily, reduce the sensitivity setting; if it doesn't trigger reliably, increase it.
The range setting controls the distance at which the motion sensor can detect movement. Many motion sensor lights have an adjustable range setting, allowing you to customize the detection area. A longer range setting is suitable for large yards or driveways, while a shorter range setting is better for smaller areas or to avoid triggering the sensor from distant objects. Adjust the range setting to match the desired coverage area and to minimize the likelihood of false alarms from objects outside the target zone. Walk through the detection area at various distances to verify the range setting and make adjustments as needed.
The duration setting determines how long the light stays on after motion is detected. A longer duration setting is convenient for providing ample illumination when someone is in the area, while a shorter duration setting conserves energy and reduces light pollution. Choose a duration setting that balances convenience and energy efficiency. Experiment with different duration settings to find the optimal balance. Consider the typical amount of time someone might spend in the area covered by the light. For example, a longer duration setting might be appropriate for a driveway where someone is likely to park for several minutes, while a shorter duration setting might be sufficient for a walkway.
In addition to sensitivity, range, and duration, some motion sensor lights offer other advanced settings. These might include adjustable light levels, dawn-to-dusk operation, or manual override modes. Familiarize yourself with all available settings and configure them according to your specific needs and preferences. Regularly check the settings and make adjustments as needed to maintain optimal performance and minimize false alarms.
Periodic maintenance is essential to ensure the continued proper functioning of outdoor motion sensor lights. This includes cleaning the sensor lens, checking the wiring connections, and replacing the light bulb as needed. Dust, dirt, and debris can accumulate on the sensor lens, reducing its sensitivity and accuracy. Clean the lens regularly with a soft, damp cloth. Inspect the wiring connections periodically to ensure they are secure and free from corrosion. Replace the light bulb when it burns out to maintain optimal illumination. By performing regular maintenance, you can prolong the life of your motion sensor lights and ensure they continue to provide reliable security and convenience.

How To Install Automatic Day And Night Light Sensor Easy Electrical Diy For Your Outdoor Lights

How To Install And Wire A Motion Sensor Security Light

How To Install Motion Lights

Security Light Installation Part 8 Setting Timer And Sensitivity Controls On Pir

A Simple Guide To Adjusting Pir Sensor Light

Step By How To Install A Motion Sensor Light

How To Install An Outdoor Motion Sensor Light With Pictures

How To Reset A Motion Sensor Light The Home Depot

Tips For Setting Up Your Motion Sensor Floodlight

Onforu 50w Motion Sensor And Dusk To Dawn Led Security Light Bd66
Related Posts