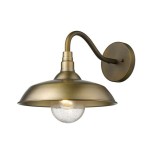
How to Relocate an Outdoor Light Fixture
Relocating an outdoor light fixture can be a straightforward project for the DIY homeowner, enhancing the functionality and aesthetics of your outdoor space. Whether you want to shift a light to a new location for better illumination or simply enhance the visual appeal of your garden or patio, this guide provides a comprehensive step-by-step process to safely and effectively relocate your outdoor light fixture.
1. Safety First: Disconnecting Power and Assessing the Wiring
Before embarking on any electrical work, it's paramount to prioritize safety. Ensure the power supply is disconnected at the circuit breaker. Locate the breaker controlling the outdoor light fixture and switch it to the "off" position. Confirm the power is off by testing the fixture with a non-contact voltage tester.
Next, carefully inspect the existing wiring. Note the type of wire (e.g., NM-B, UF) and the gauge (e.g., 14 AWG, 12 AWG). Determine if the existing wiring is sufficient to handle the new fixture's wattage. If you're unsure, consult an electrician.
2. Planning the New Location and Marking the Wiring Path
Choose the new location for your outdoor light fixture, considering factors such as visibility, accessibility, and the desired illumination pattern. Ensure the new placement aligns with your desired aesthetics and functionality.
Once you've determined the new location, mark the path for the wiring on the exterior wall or surface. The path should be as concealed and aesthetically pleasing as possible. Use a pencil or chalk to mark the route for the new wiring, taking into account any obstacles like windows, doors, or trim.
3. Installing a Junction Box and Running the New Wires
At the new location, install a junction box to house the connections for the fixture. Select a weatherproof junction box suitable for outdoor use. Secure the junction box to the wall or surface, ensuring it is level and positioned for optimal accessibility.
Next, run the new wires from the existing fixture's junction box to the new junction box. If necessary, use an electrical fish tape to guide the wires through walls or ceilings. Ensure the wiring is securely fastened to the wall or surface using staples or cable clips. If you need to run the wires outdoors, use weatherproof direct burial wire (UF-B).
4. Connecting the Wiring and Testing the Fixture
With the wiring in place, carefully connect the wires to the new fixture. Consult the fixture's instructions for proper wiring connections. Typically, there will be a black wire for hot, a white wire for neutral, and a green or bare wire for ground.
After making the connections, turn the power back on at the circuit breaker. Test the fixture to ensure it is working correctly. Verify that all lights function and that the light fixture is securely mounted.
5. Final Touches and Safety Considerations
Once the fixture is installed and functioning, make any necessary final preparations, such as attaching the light bulb and ensuring the fixture is securely mounted. Clean any excess dirt or debris from the area.
Remember, if you are unsure about any aspect of the relocation process, it's best to consult a licensed electrician for guidance. Safety should always be paramount when working with electricity.

Replacing An Outdoor Light Fixture

Replacing An Outdoor Light Fixture

Replacing An Outdoor Light Fixture

Replacing An Outdoor Light Fixture

How To Install Outdoor Lighting Fixtures

How To Install Outdoor Lighting And Diy Family Handyman

How To Spray Paint Outdoor Light Fixtures True Value

Exterior Victorian Porch Lighting Oldhouseguy Blog

How To Replace An Outside Light

Replace Recessed Light With A Pendant Fixture
Related Posts