Installing Outdoor Lighting On Your Garage Floor
A well-lit garage floor enhances safety, improves visibility, and adds a touch of convenience to any homeowner's space. Whether you're working on a project, searching for tools, or simply entering and exiting your garage after dark, proper lighting is crucial. This article will guide you through the process of installing outdoor lighting on your garage floor, providing a comprehensive and practical approach to achieving a well-lit and functional space.
1. Planning and Preparation
Before embarking on the installation process, careful planning is essential. First, determine the desired layout and placement of the lights. Consider the size of your garage, the types of activities you'll be performing, and the desired ambiance. If you have a large garage, multiple light fixtures may be necessary to ensure adequate coverage. Ideally, position the lights strategically to illuminate the entire floor area without creating glare or shadows.
Next, assess the existing electrical wiring and ensure it's up to code. If necessary, consult with an electrician to ensure that the wiring can handle the increased electrical load.
Finally, gather the necessary tools and materials. Common items include: * Outdoor-rated light fixtures * Electrical wire * Junction boxes * Conduit (optional) * Wire strippers * Wire cutters * Screwdrivers * Level * Drill * Safety glasses * Work gloves
2. Installation Process
Installation begins with marking the locations for the light fixtures. Use a level to ensure they are aligned and positioned correctly along the garage floor.
Next, run the electrical wiring from the power source to the light fixture locations. For safety and aesthetics, consider using conduit to protect the wiring. Secure the conduit to the wall or ceiling using appropriate mounting brackets and clips.
Once the wiring is in place, install the junction boxes at the fixture locations. These boxes will house the electrical connections and provide a secure point for mounting the fixtures.
Next, connect the electrical wires from the junction boxes to the light fixtures. Ensure the wires are properly stripped and connected to the appropriate terminals within the fixture.
Before mounting the fixtures, test the wiring using a non-contact voltage tester to ensure everything is working correctly.
Finally, mount the light fixtures to the designated locations using appropriate mounting screws or brackets. Ensure the fixtures are securely fastened and aligned.
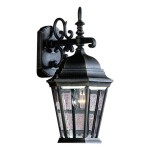
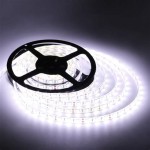
3. Selecting the Right Lights
Selecting the right lights for your garage floor is a crucial step in achieving optimal functionality and aesthetics. Several factors should be considered when making your choice:
Type of Light:
*LED:
Energy-efficient, long-lasting, and offer bright illumination. *Fluorescent:
Affordable and provide good lighting, but may not be as energy-efficient as LED. *Incandescent:
Traditional bulbs, but generate a lot of heat and are not very energy-efficient.Brightness:
*Lumens:
A measure of light output. Higher lumens mean a brighter light. *Color Temperature:
Measured in Kelvin (K). Warm white (2700K) is often preferred for residential spaces, while cool white (4000K) provides a brighter, more task-oriented light.Style:
*Recessed:
Flush-mounted into the ceiling or wall, providing a clean and modern look. *Pendant:
Hanging fixtures that offer a range of styles and can be customized with different shades. *Surface-mounted:
Mounted directly to the surface, ideal for quick installation and diverse aesthetics.Consider your specific needs and preferences when choosing the type, brightness, and style of lights that best suit your garage.

Concrete Driveway Lighting Using Led Strips And Channels Ecolocity

How To Install Led Recessed Lights For Outdoor Concrete Spaces In Lite Lighting

Outdoor Lighting Guide Delmarfans Com

How To Install Outdoor Lighting And Diy Family Handyman

Outdoor Lighting Guide Delmarfans Com

Outdoor Lighting Guide Exterior Tips And Tricks

Garage Lighting Guide Lowe S

Outdoor Lighting Guide Delmarfans Com

Outdoor Lighting Placement Kichler

How To Install Outdoor Floodlights True Value